Mounting Setup
What you will need
Required tools & components
- Ruler + Permanent Marker
- Drilling machine
- Metal Drill Bit 4 mm
- Allen wrench 3 mm
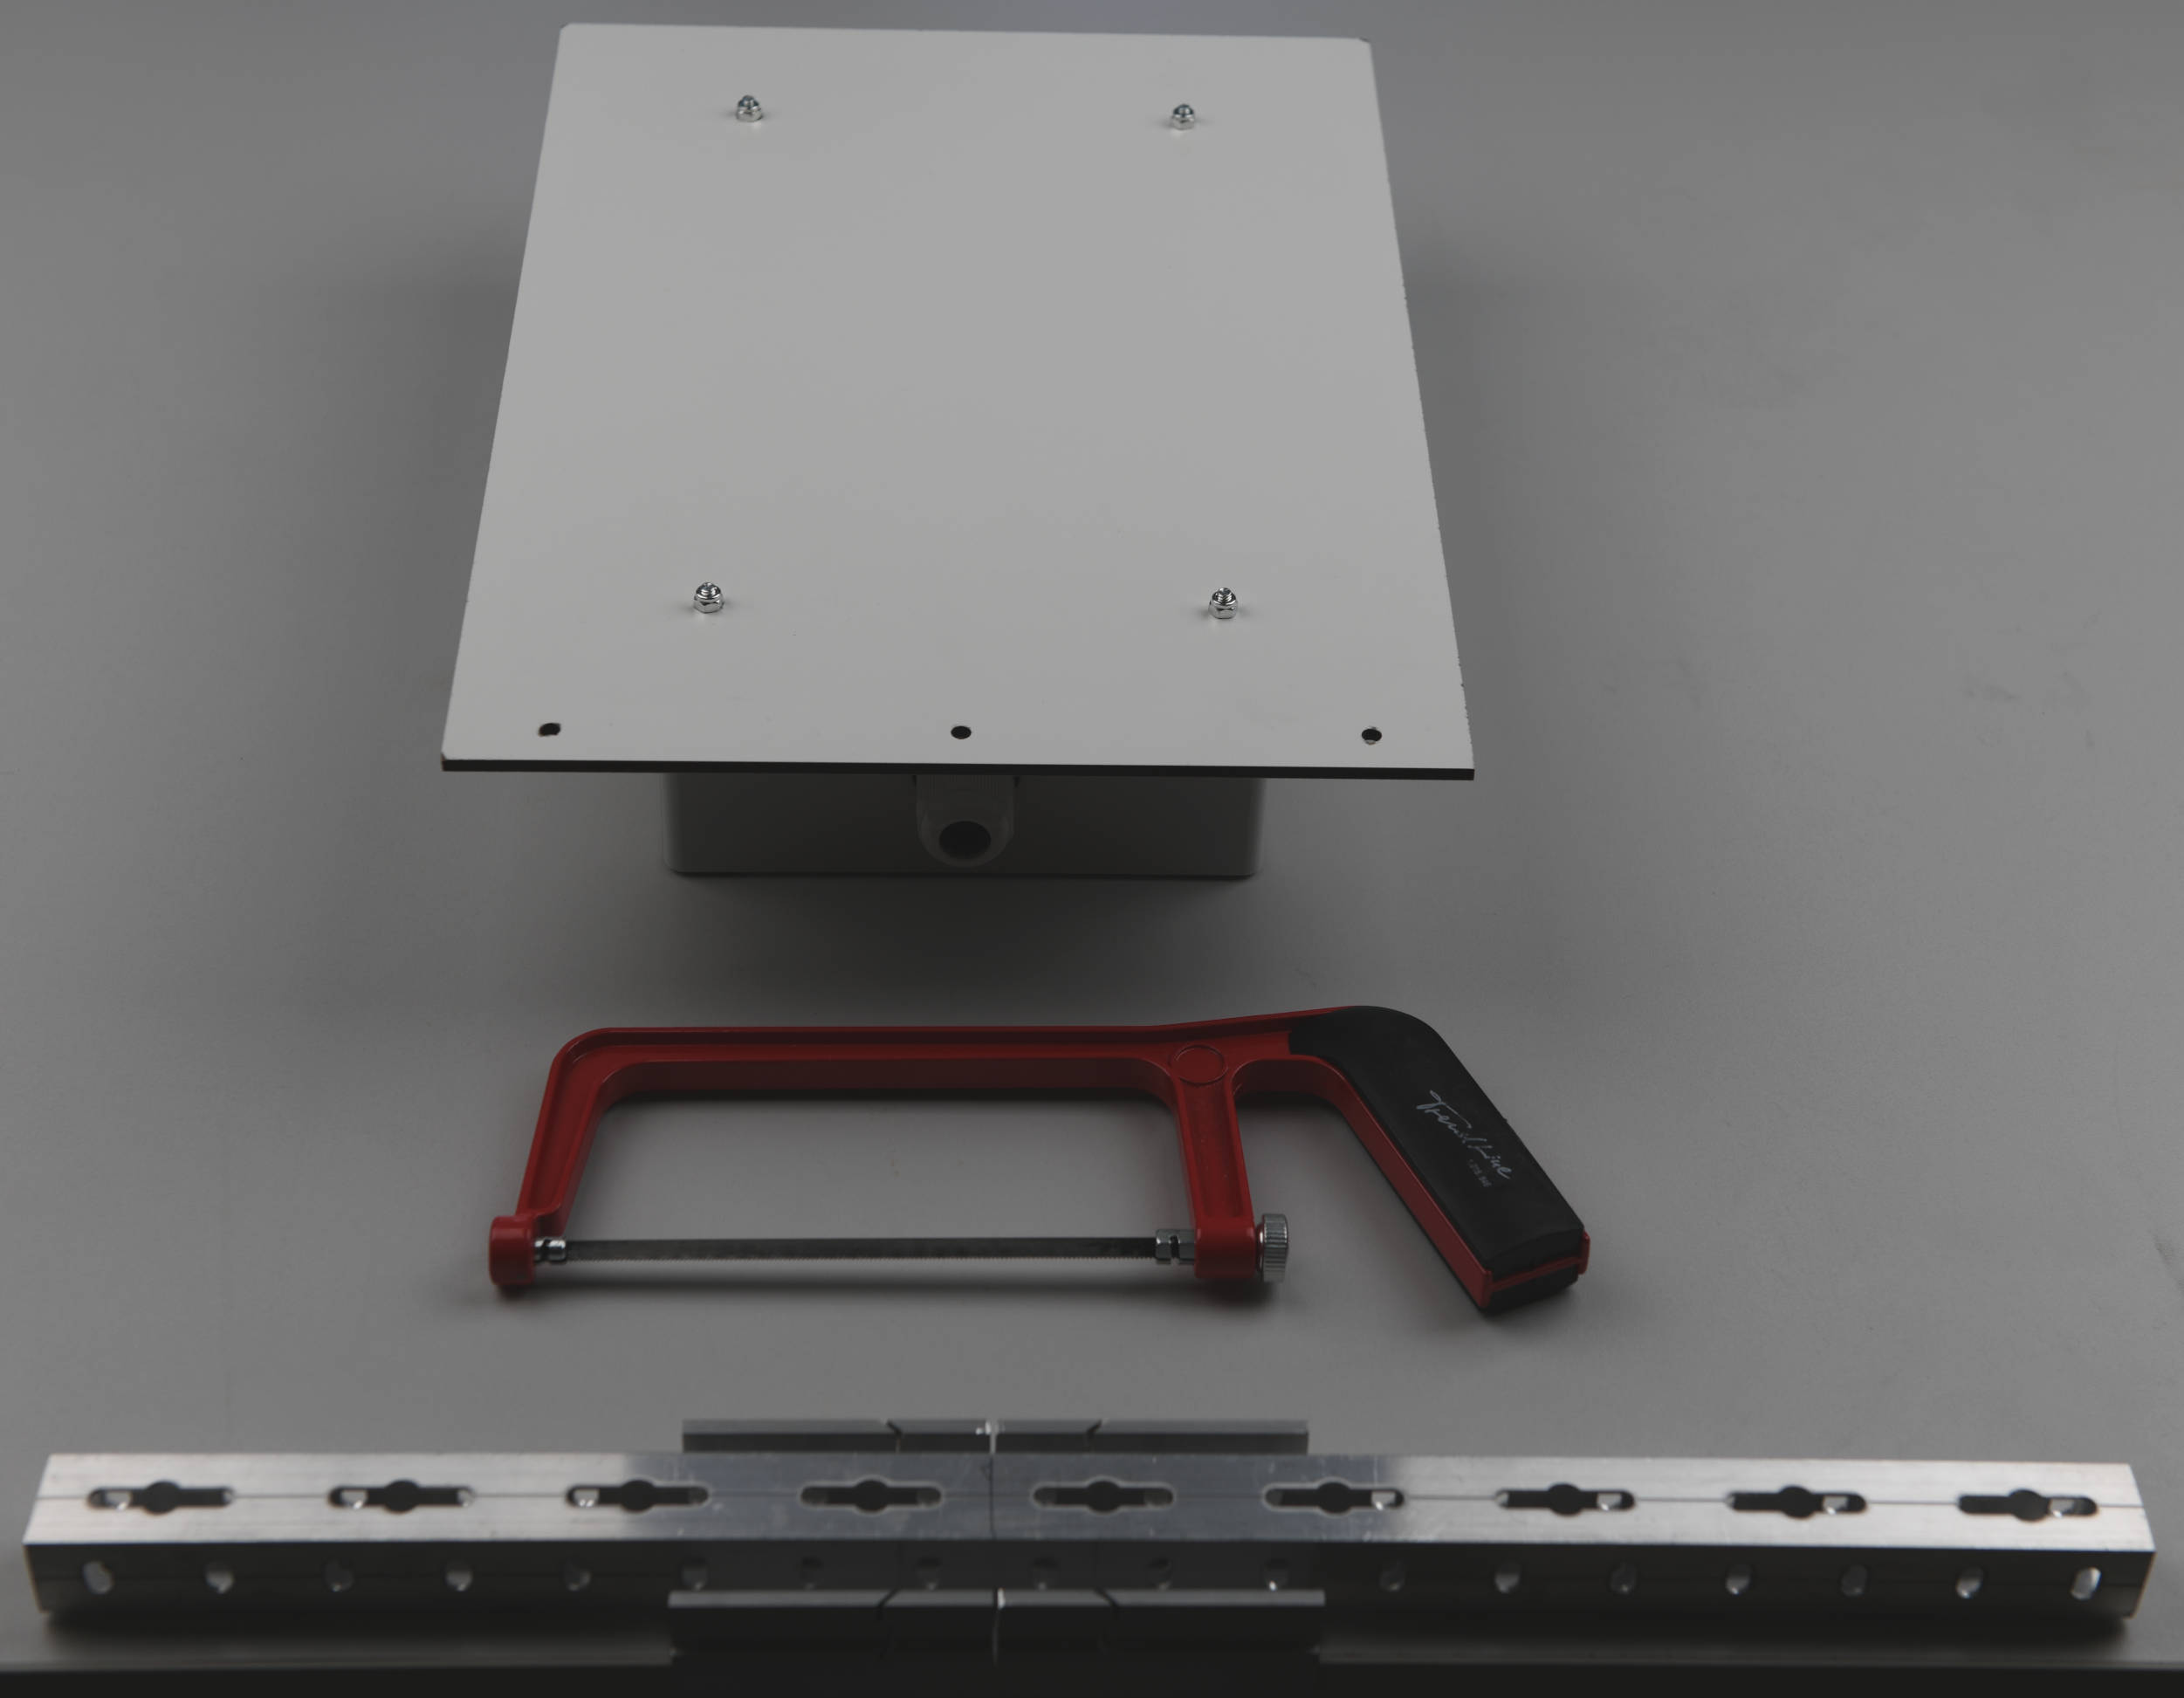
- Metal saw
- HPL Sheet (4 mm) 350x250 mm
- 4x M4 20 mm Screws (internal hexagon)
- 21x M4 Hex Nuts
- Aluminium Square Tube (23.5x23.5 mm), 1.5 m
- 7x M4 40 mm Screws
- 2x M4 60 mm Screws
- 18x Flat Washer (e.g. M4 15 mm)
- Pipe Clamp (60.3mm) 70 mm + screws & nuts
- Pipe Clamp (60.3 mm) 350 mm + screws & nuts
- Flower Platform (e.g. 500x280 mm)
- Solar Panel Bracket, Medium (optional)
Drilling the HPL sheet
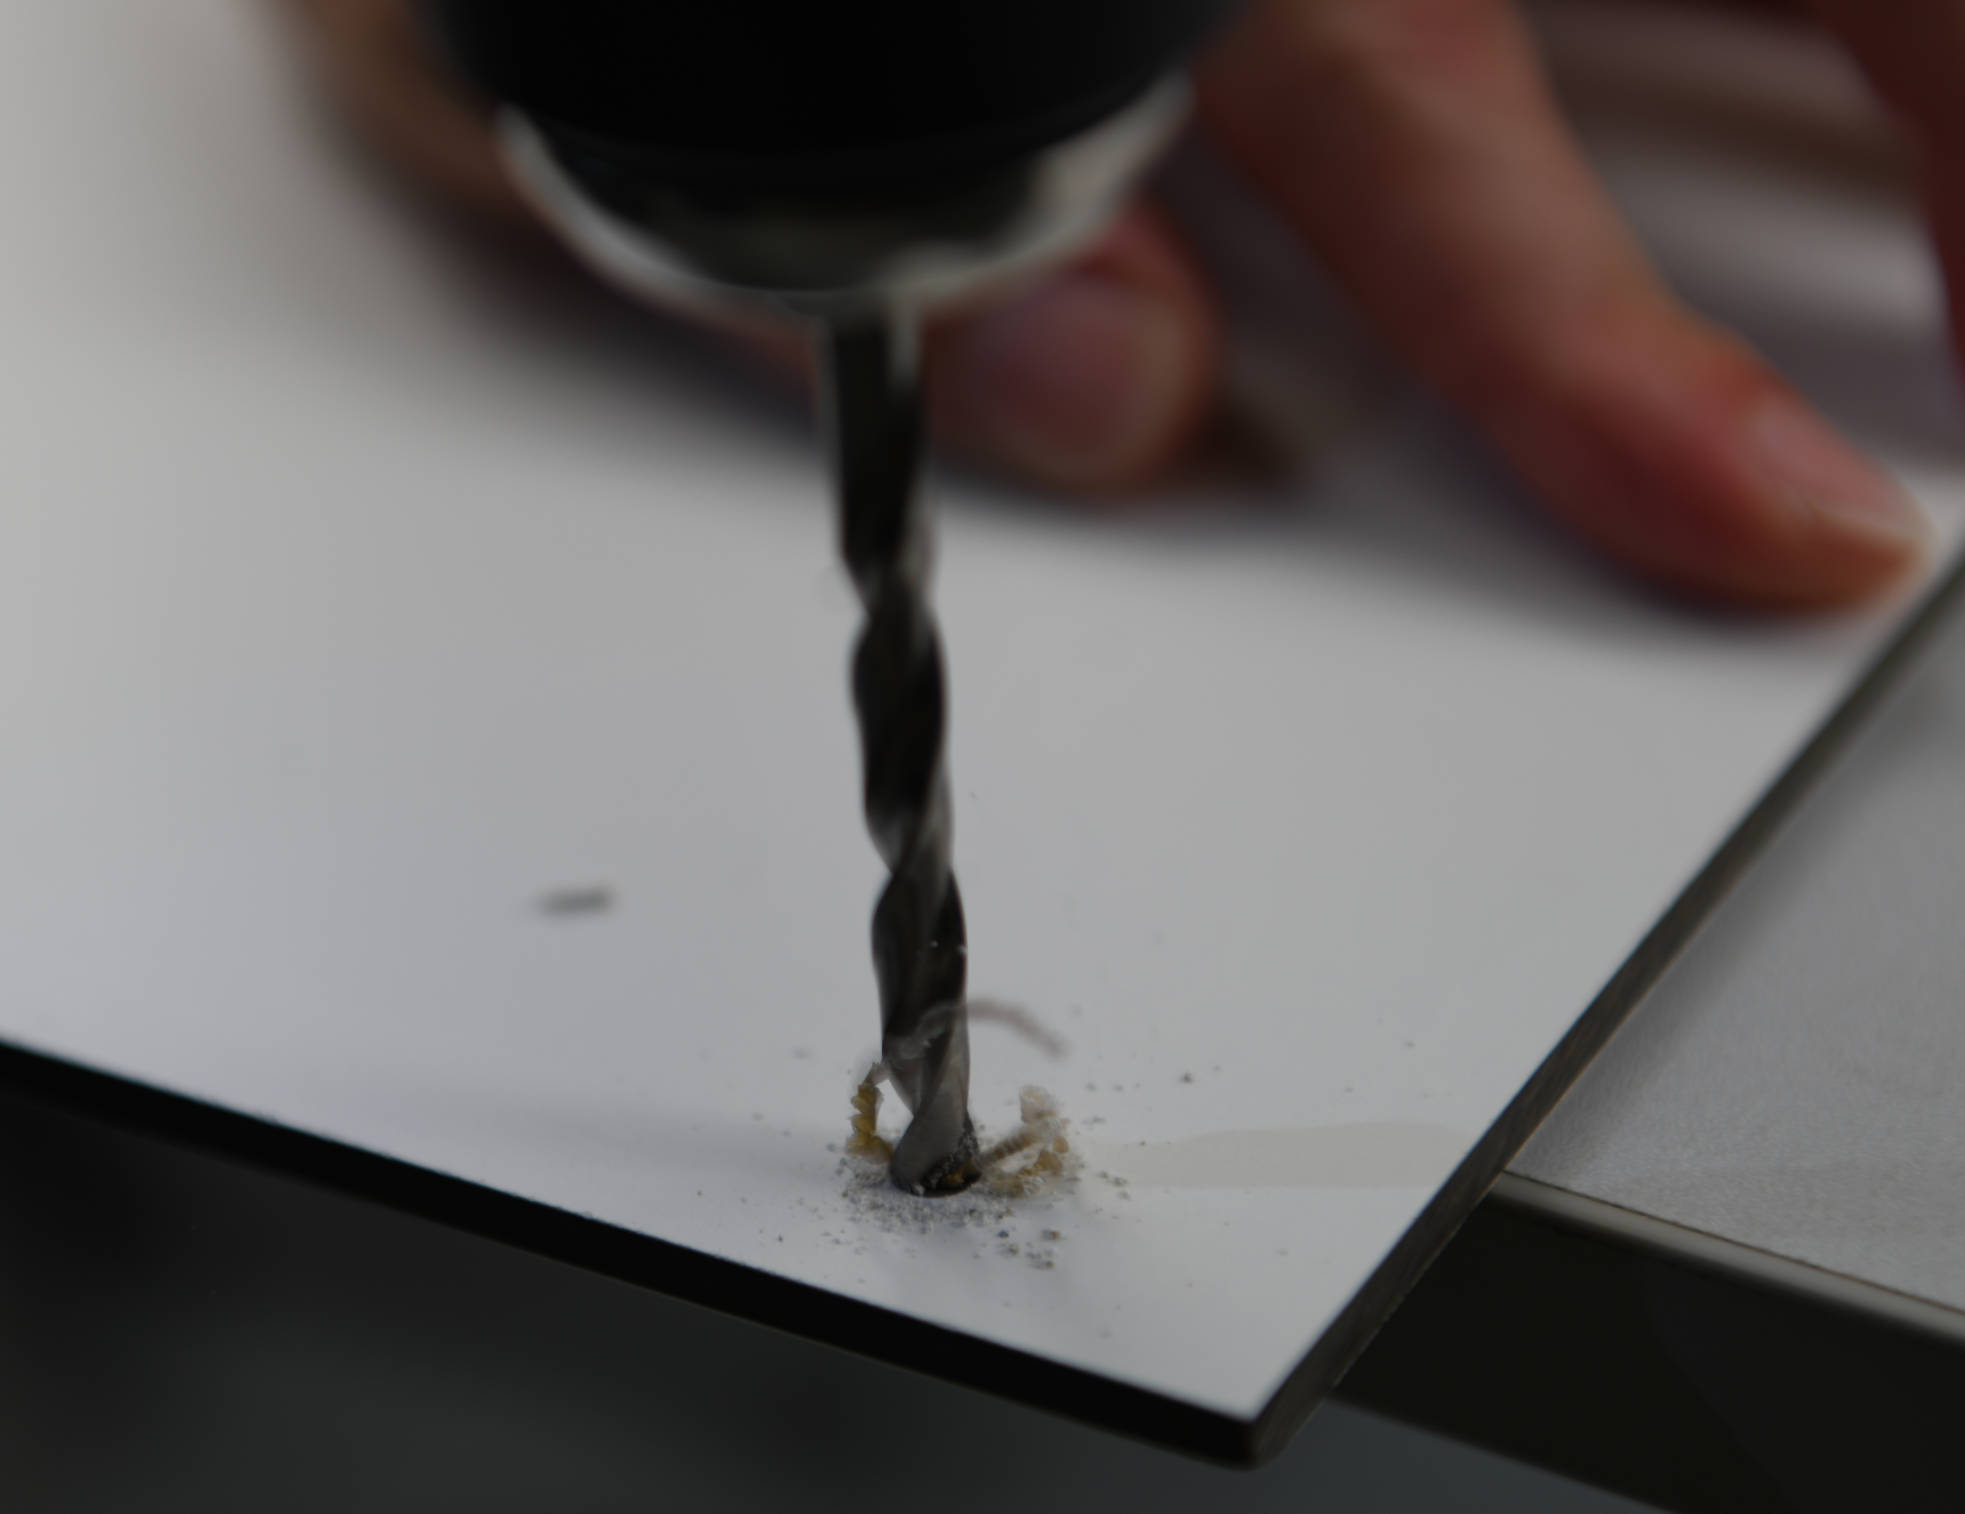
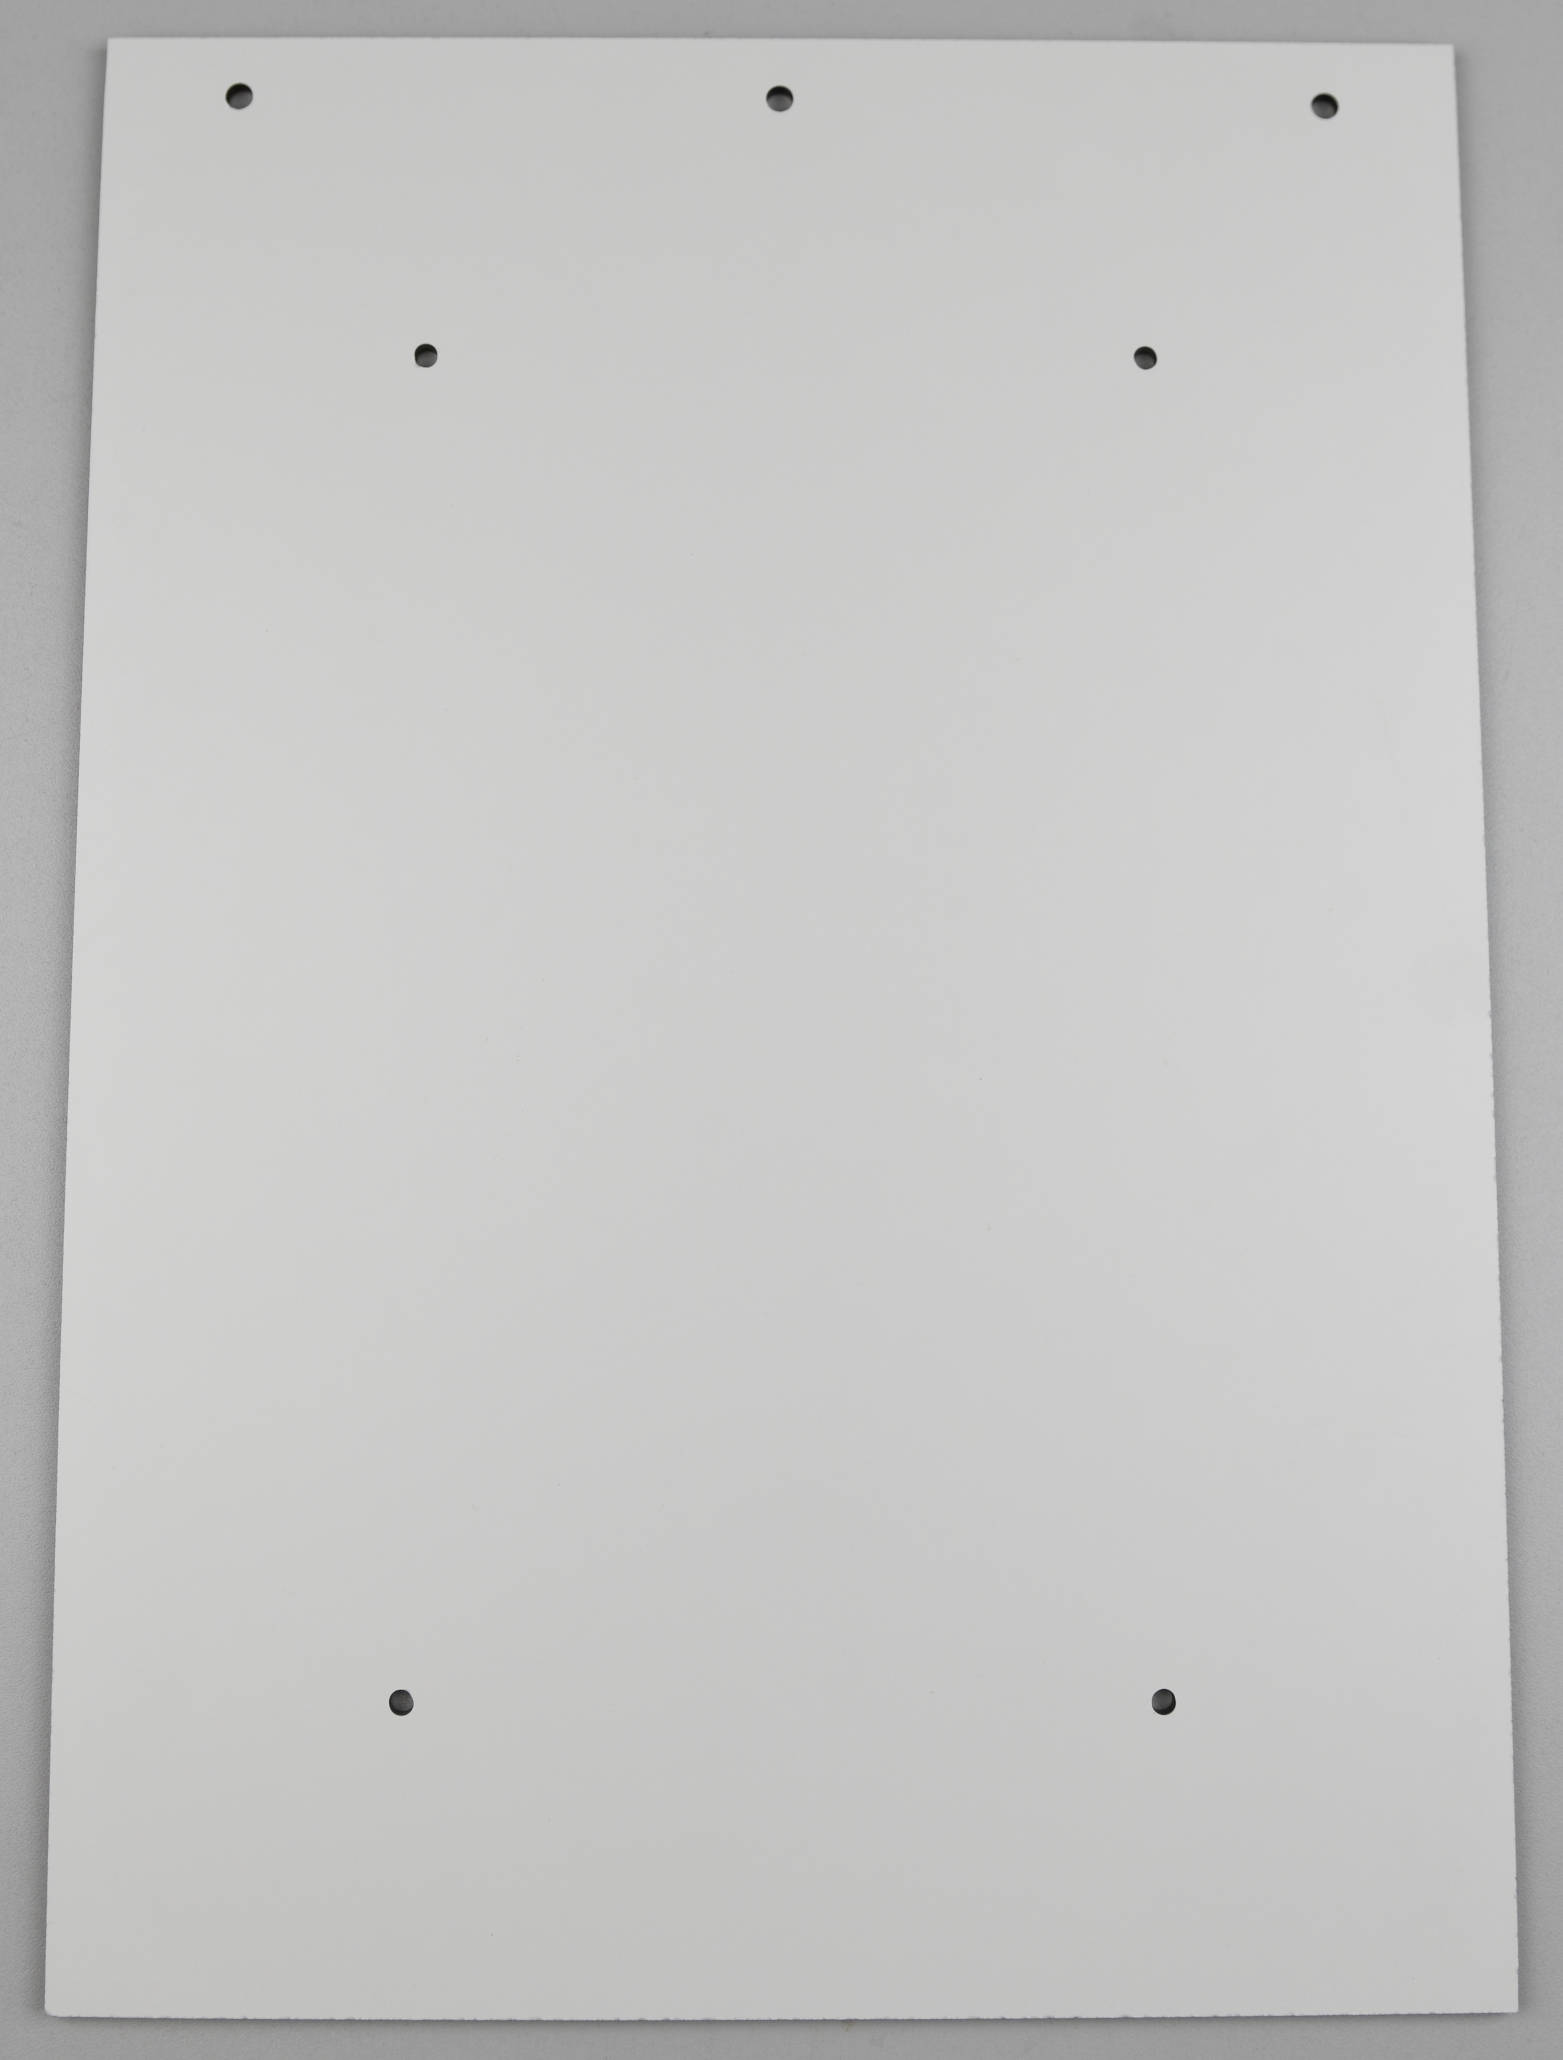
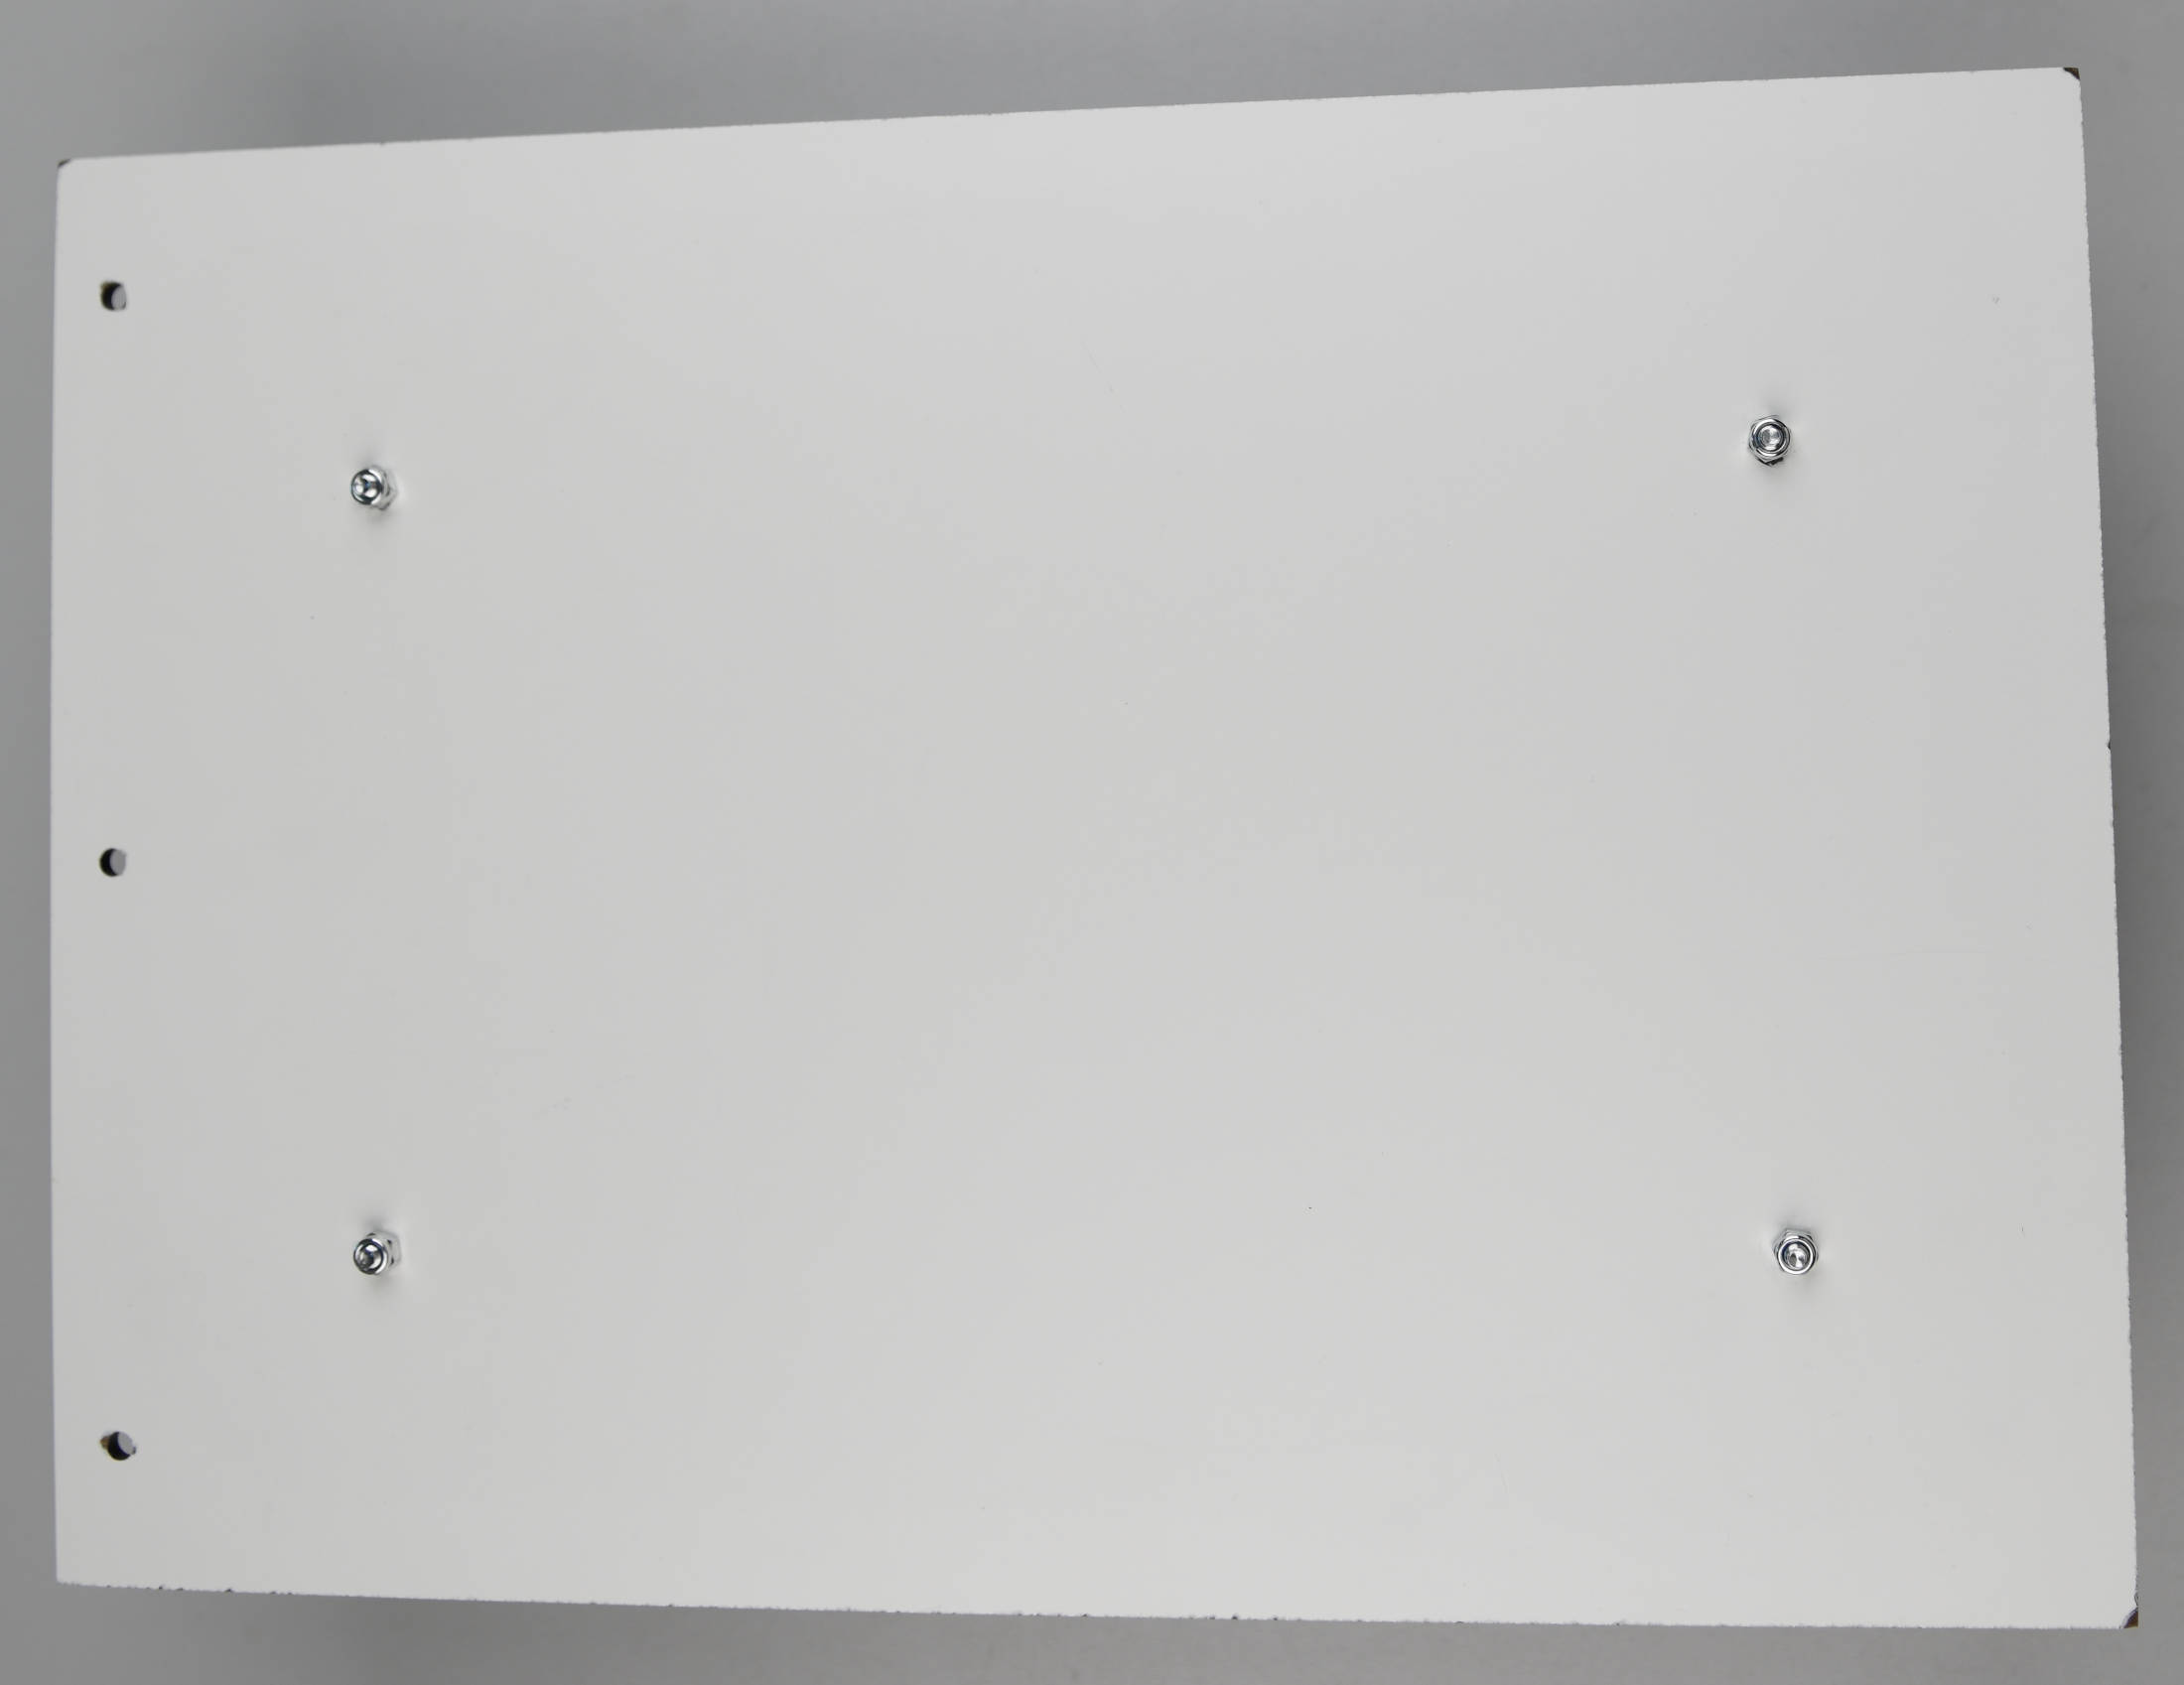
We are going to start by marking the four positions where the enclosure will be fixed in the center of the HPL sheet and the three positions where the aluminium tube and pipe clamp will be attached for mounting on a tubular post. Place the enclosure on the marks and look through the holes in the enclosure to check their correct position before drilling.

Drill the seven 4 mm holes at the marked positions with a 4 mm metal drill bit. The drilling might take some time, as HPL is a very dense material.
Enclosure to HPL connection
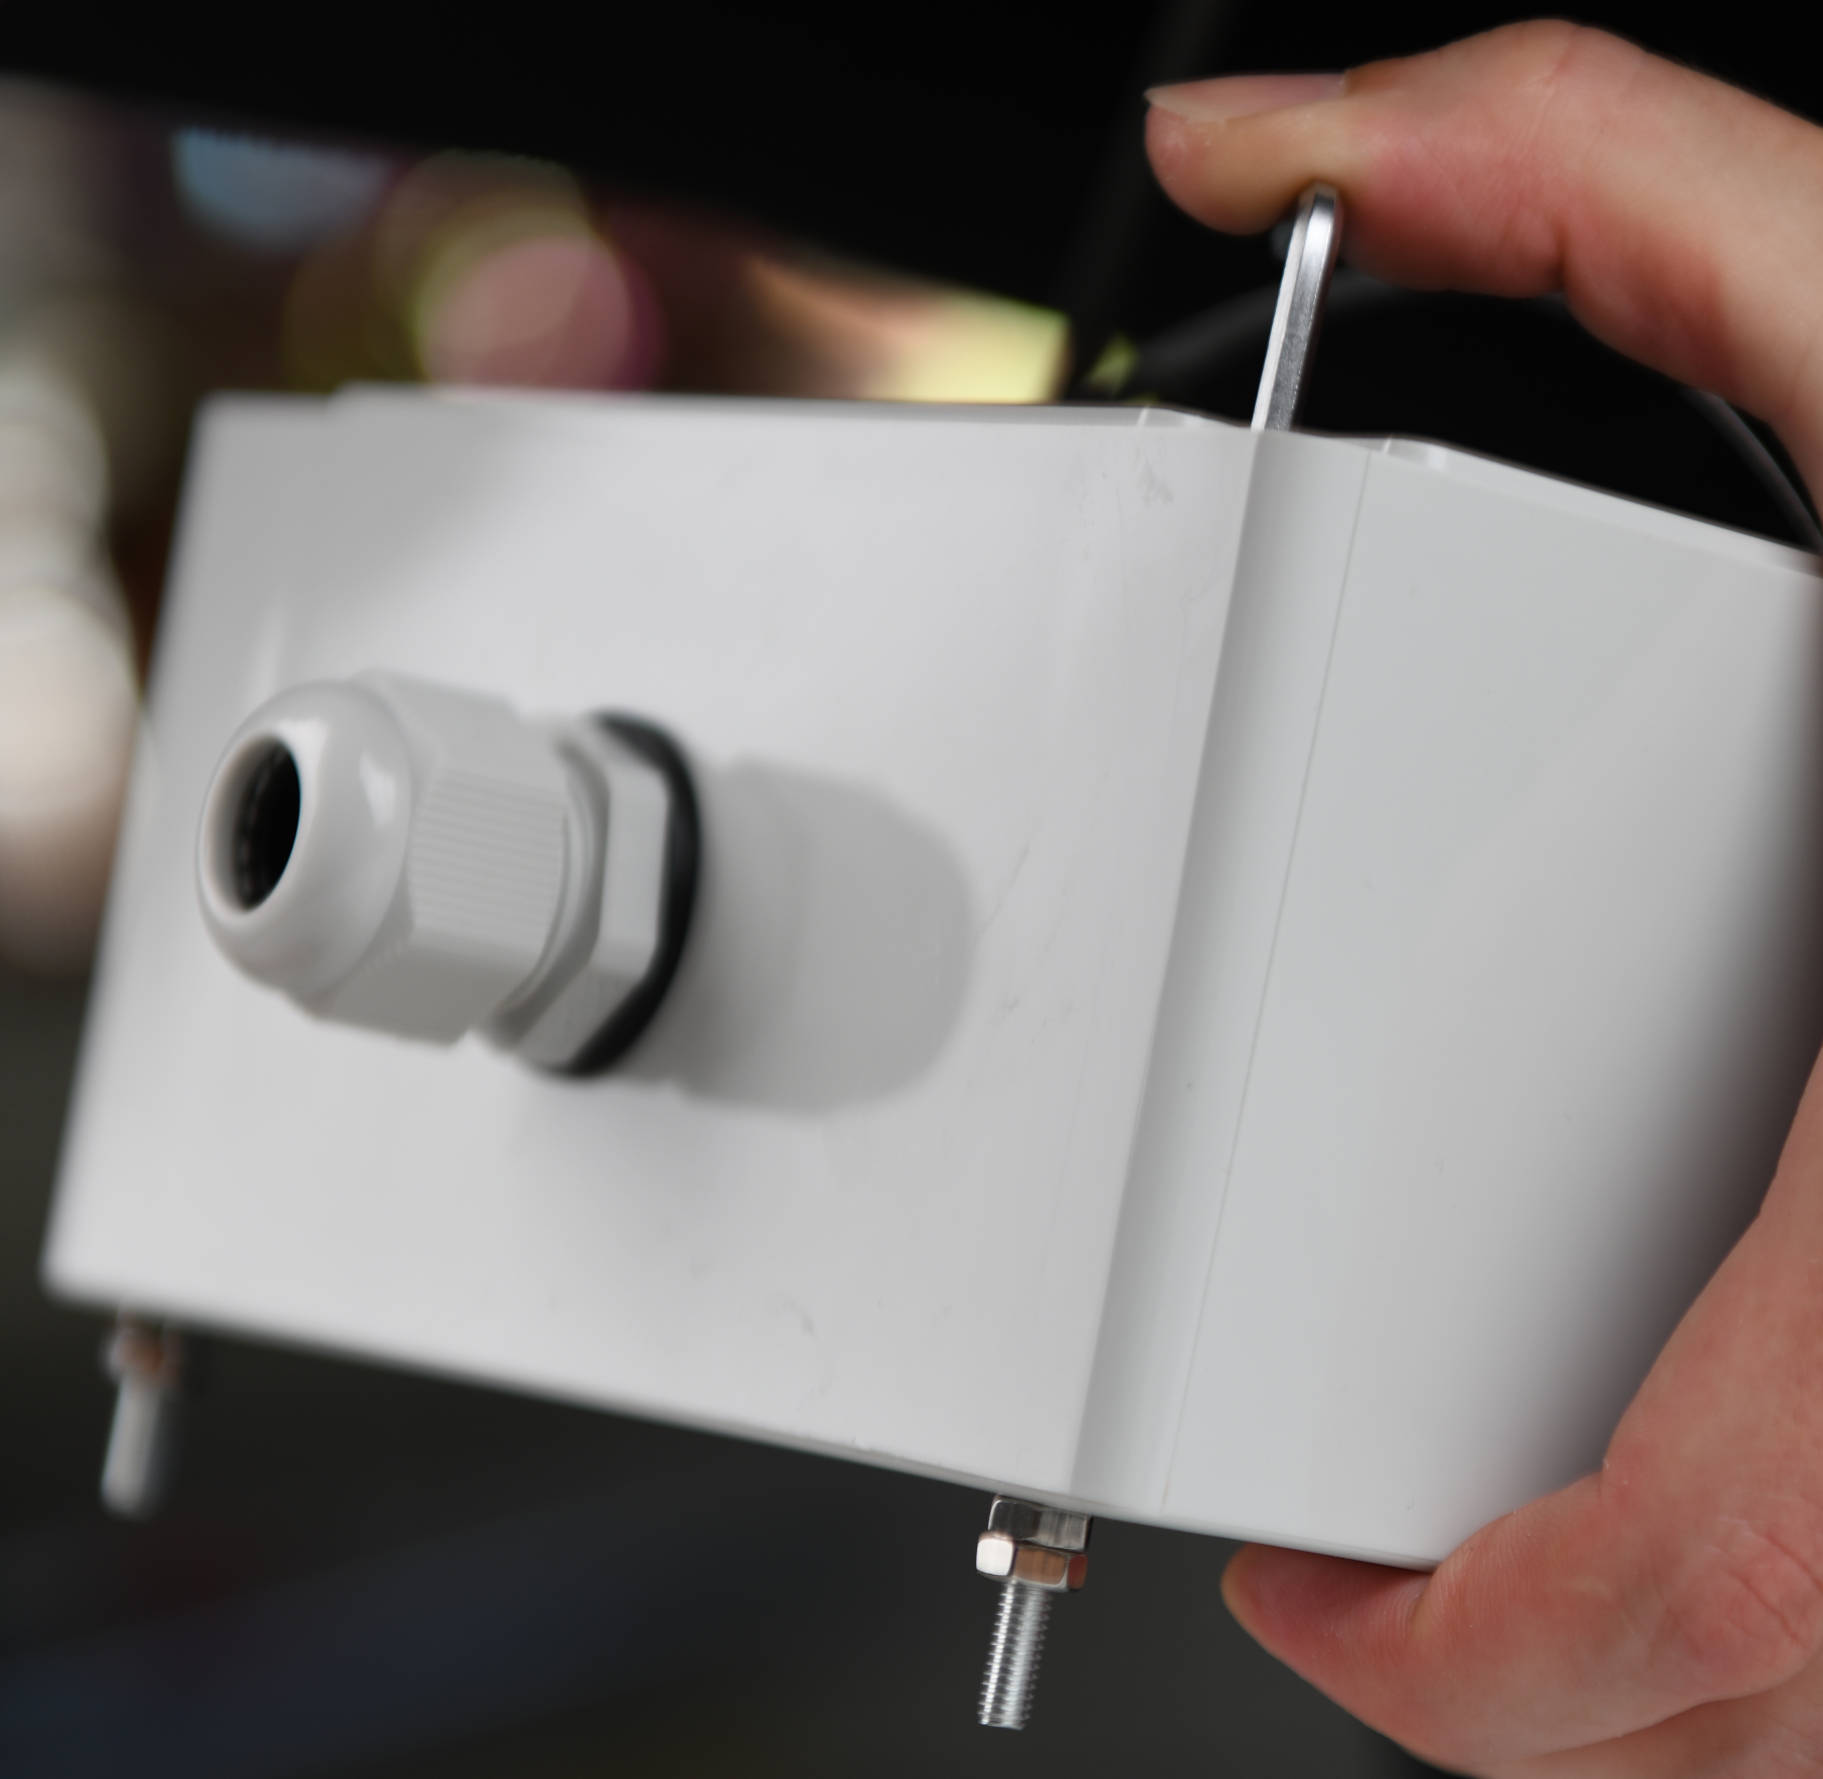
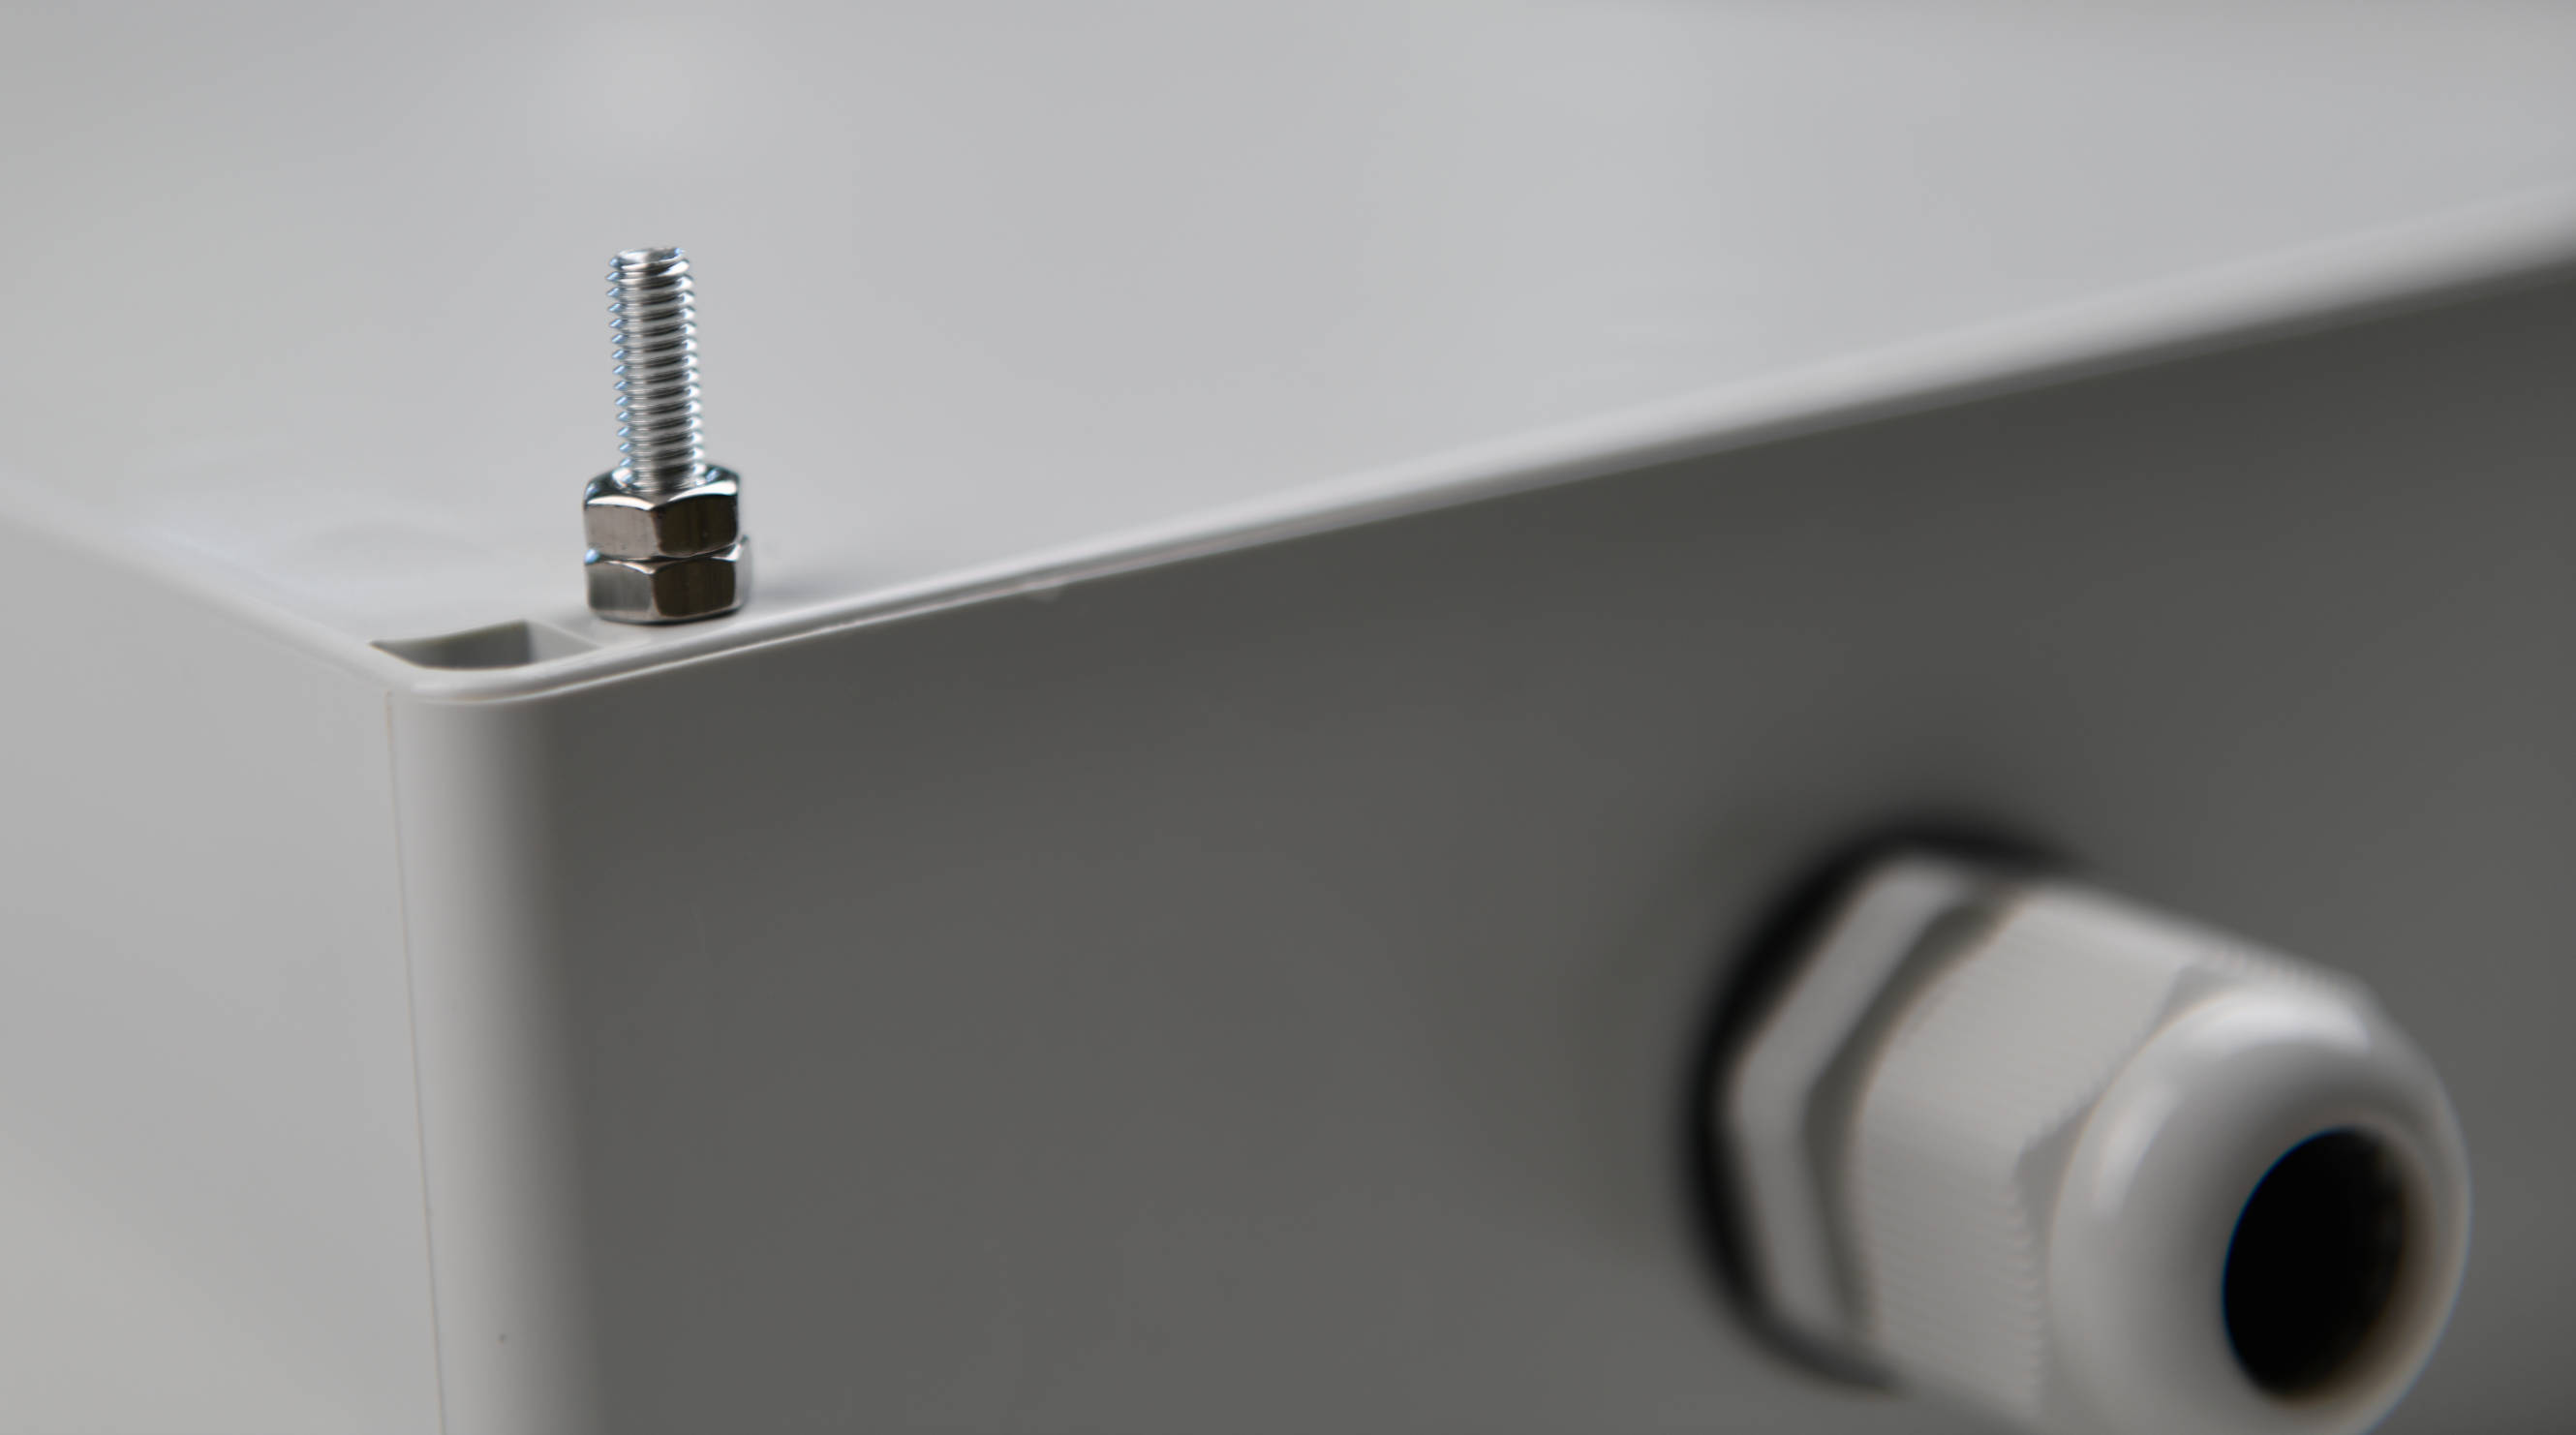
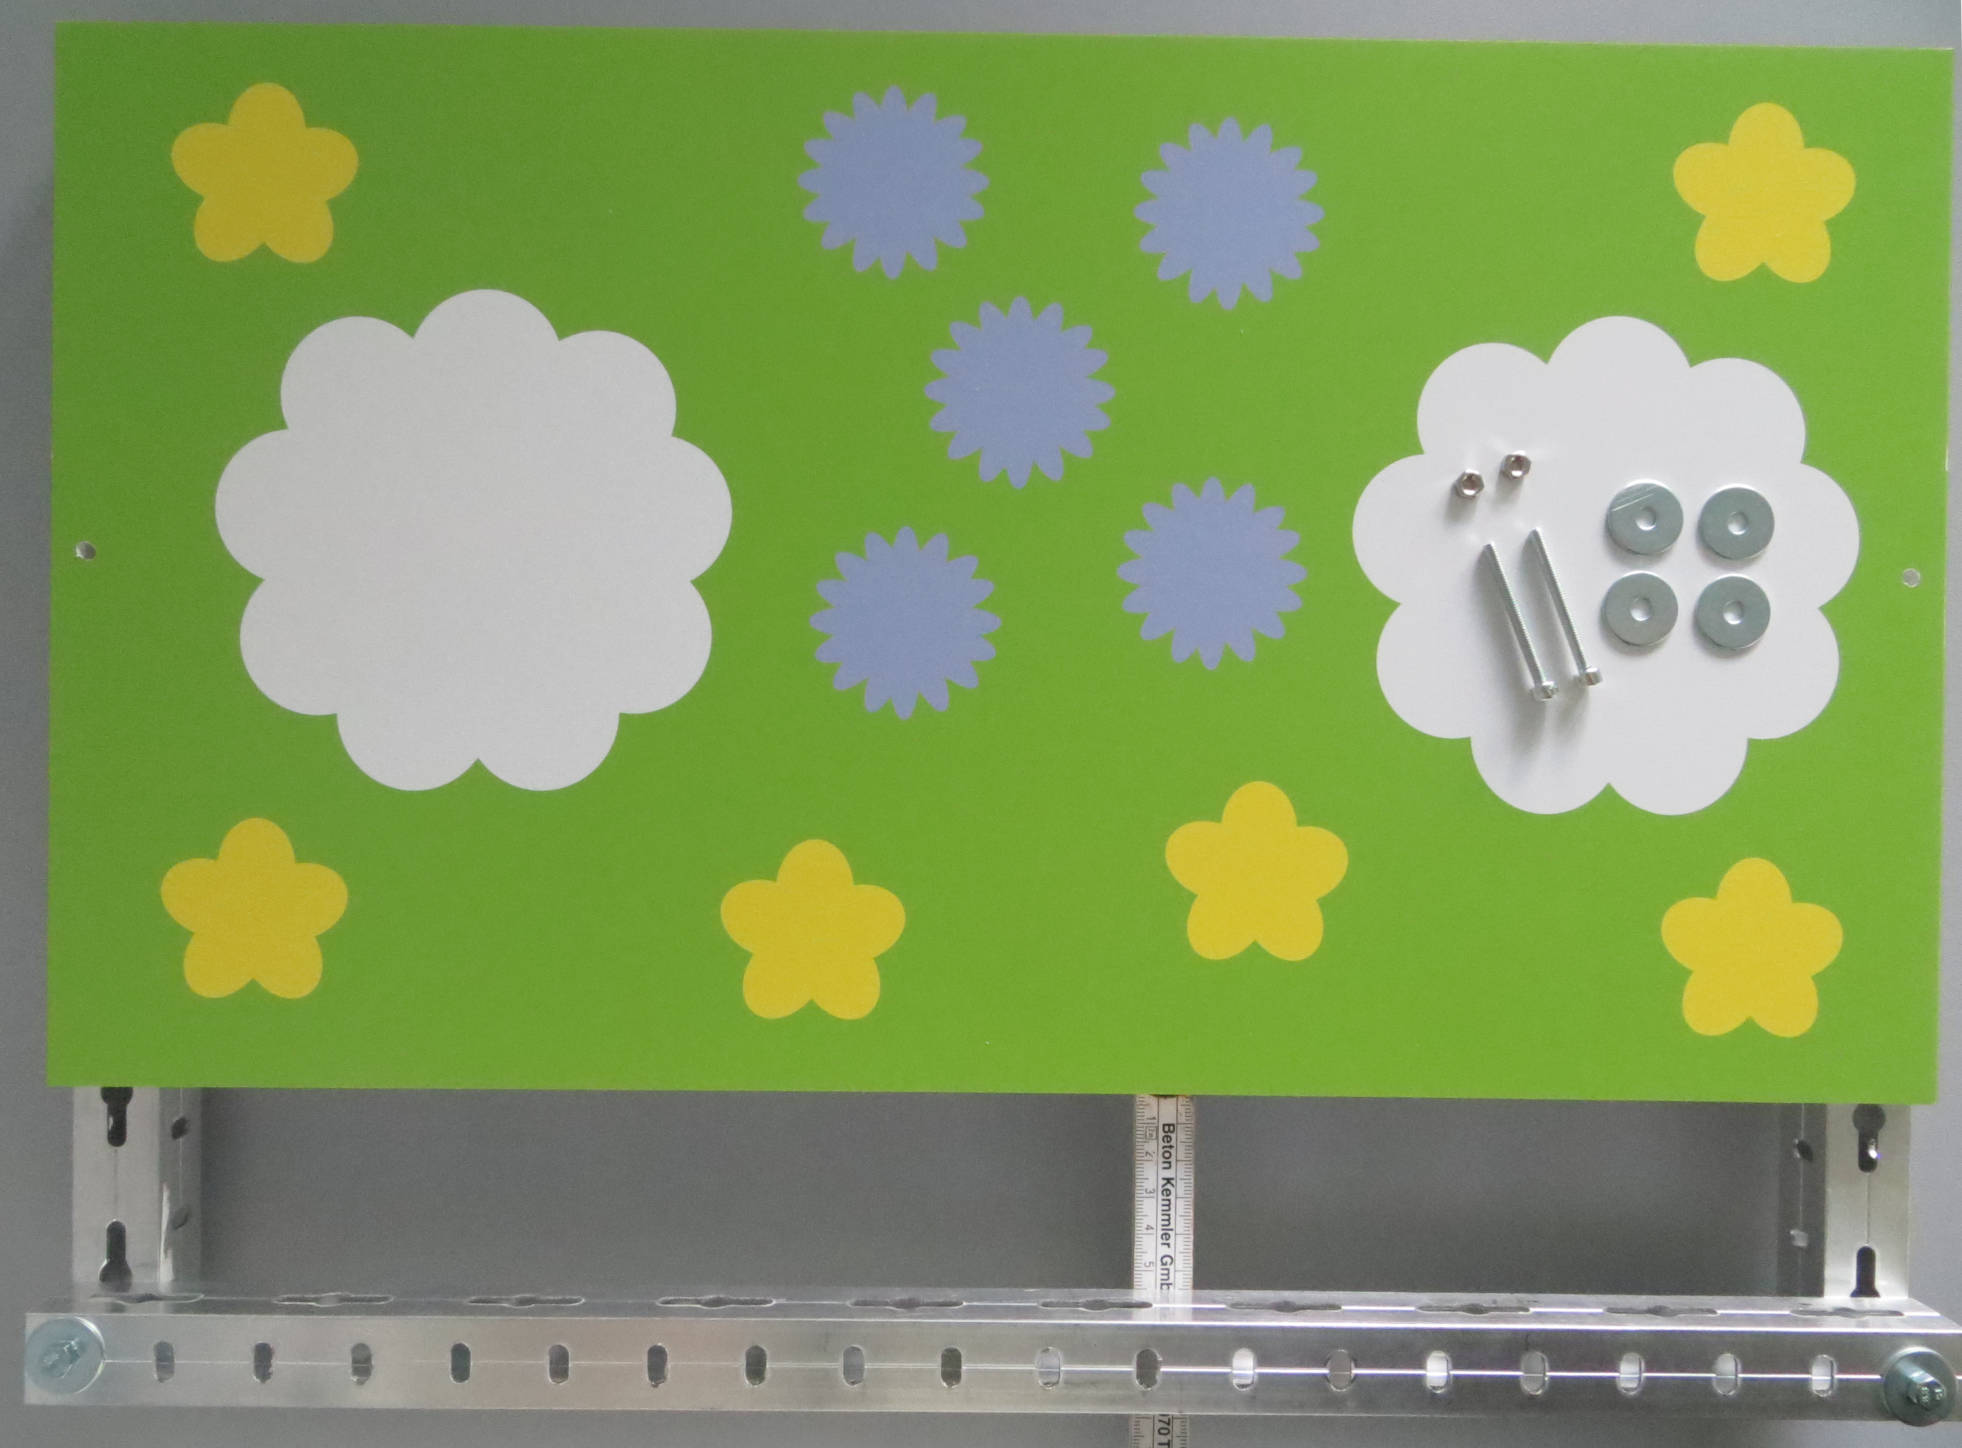
Now that we have prepared the HPL sheet, we can put the four M4 20 mm screws through the holes of the enclosure for fixing it to the HPL sheet.
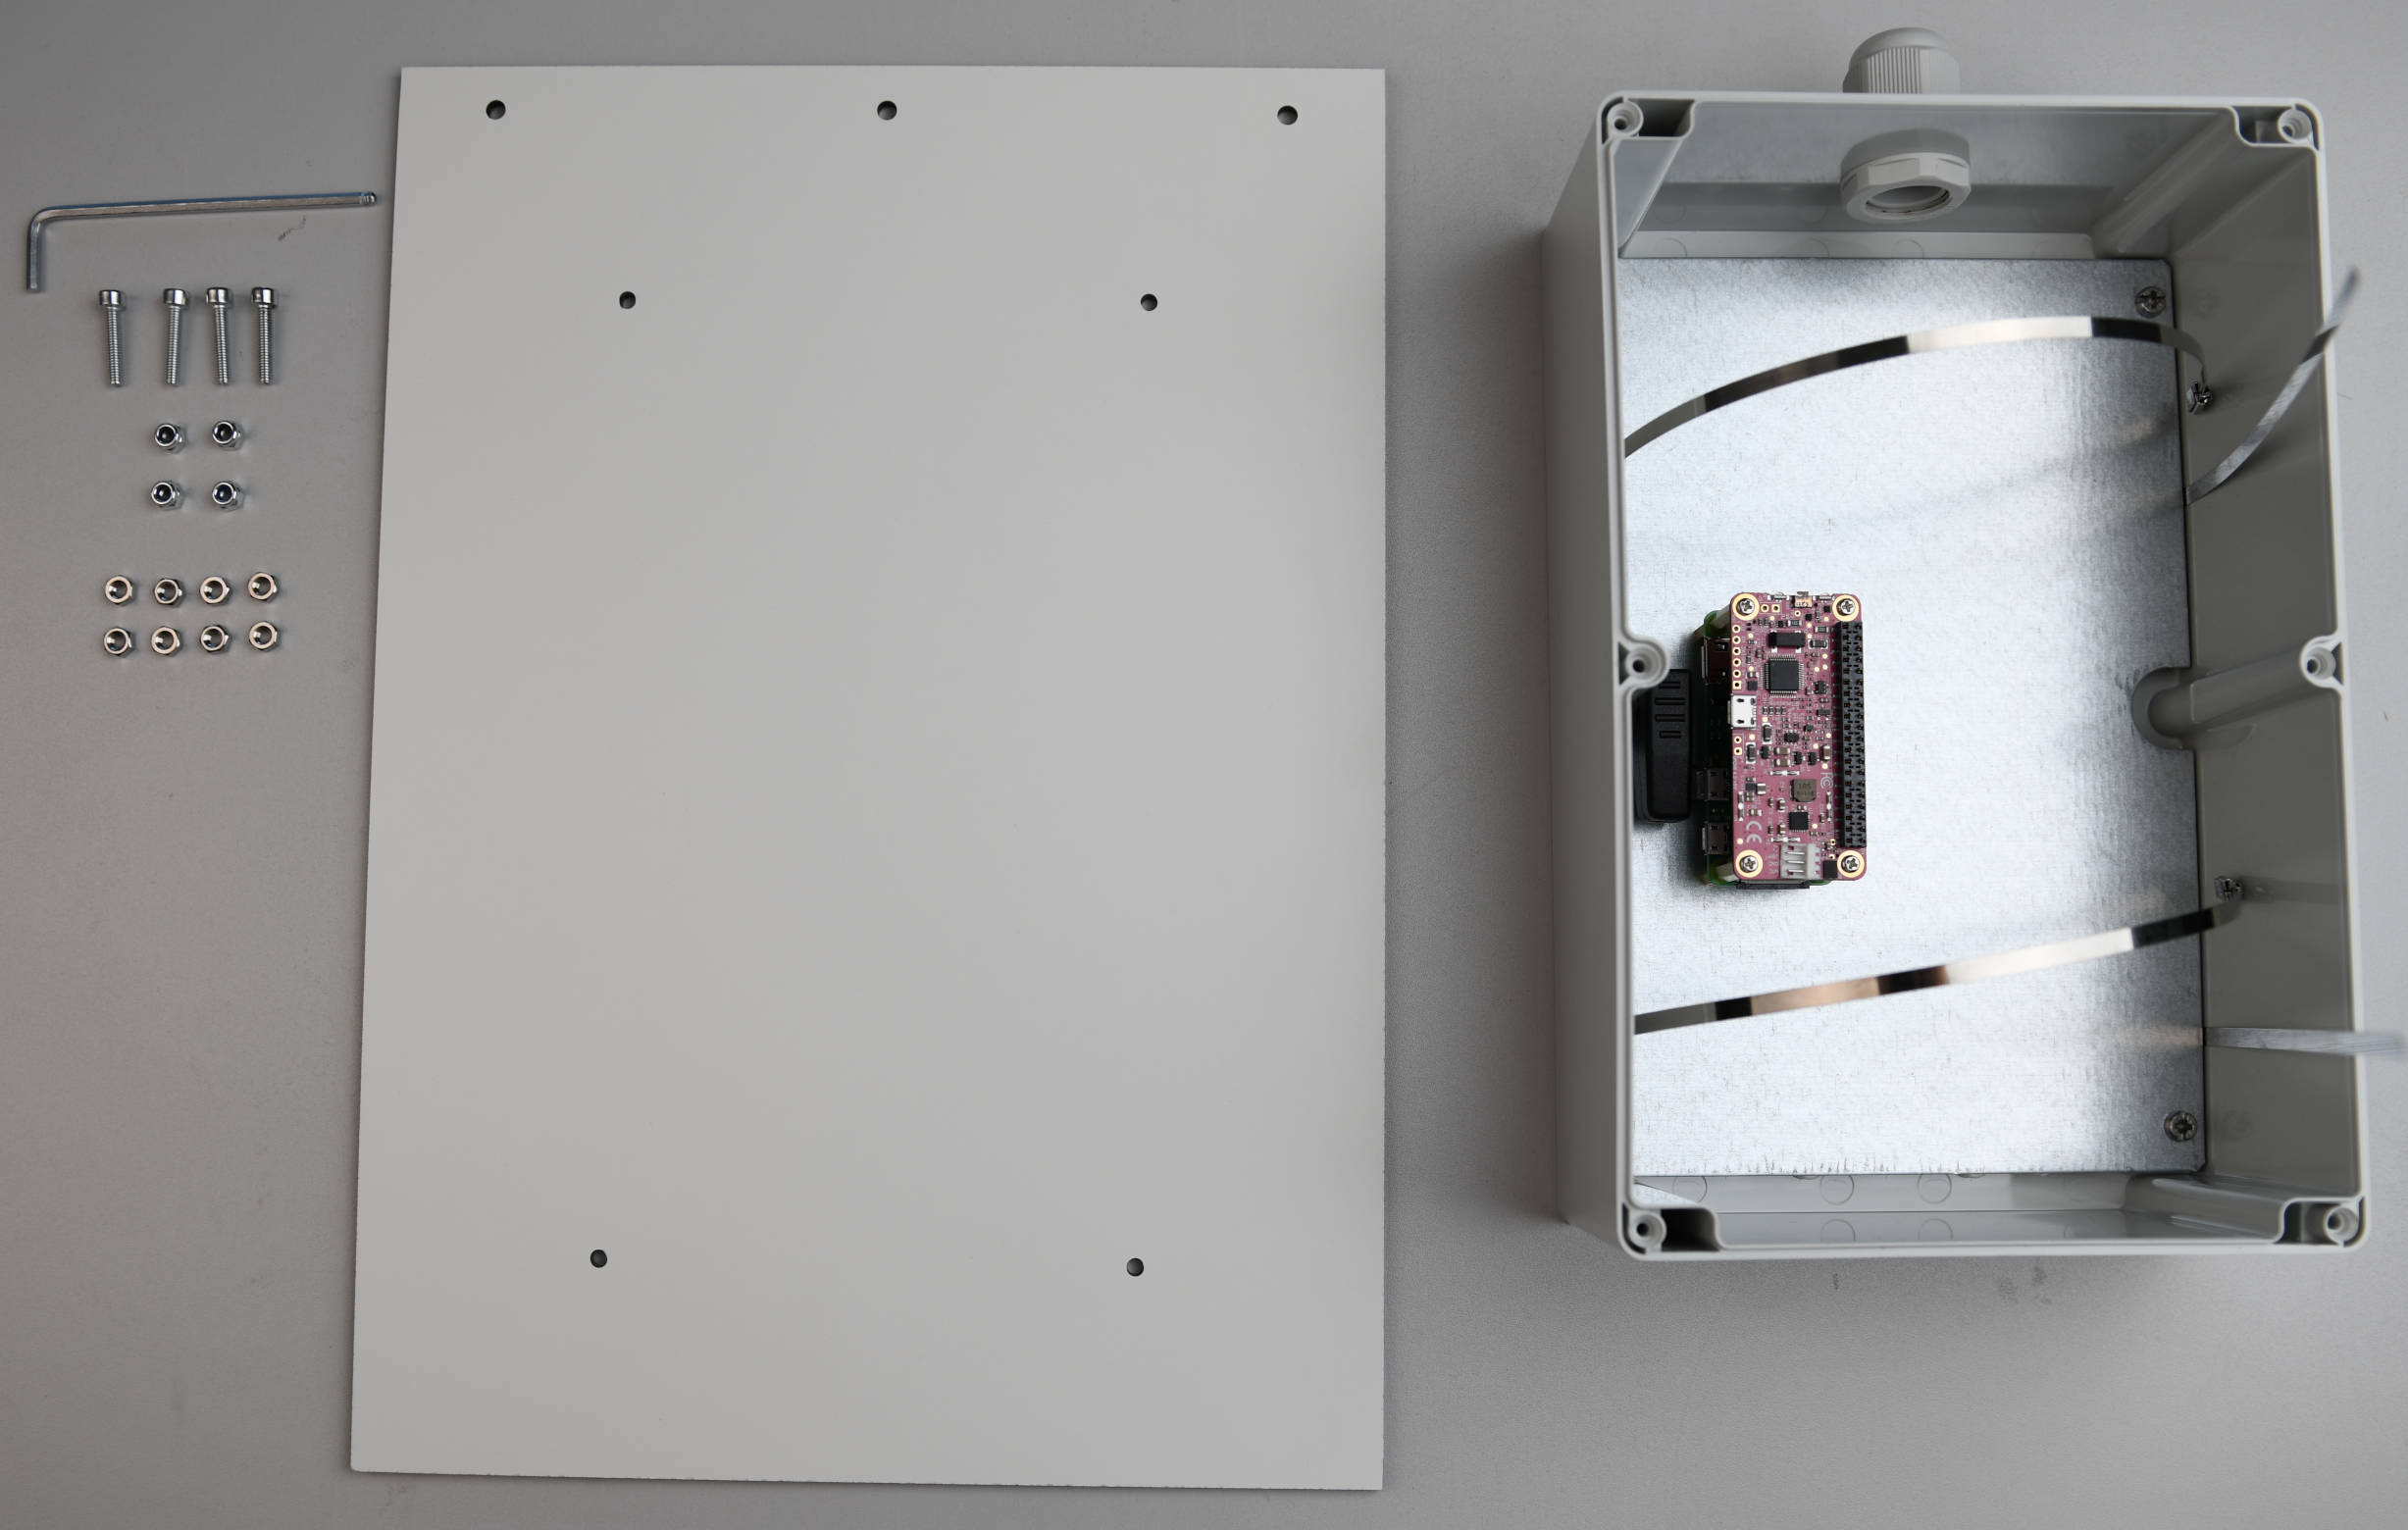
Be sure to keep the M4 screws in place with the 3 mm allen wrench, while tightening them with two of the M4 hex nuts per screw. This will allow air to flow between the enclosure and the HPL sheet to increase heat dissipation.
After the four M4 screws are fixed with the eight hex nuts, we can put them through the holes of the HPL sheet. Please make sure that the cable gland is pointing towards the other three holes.
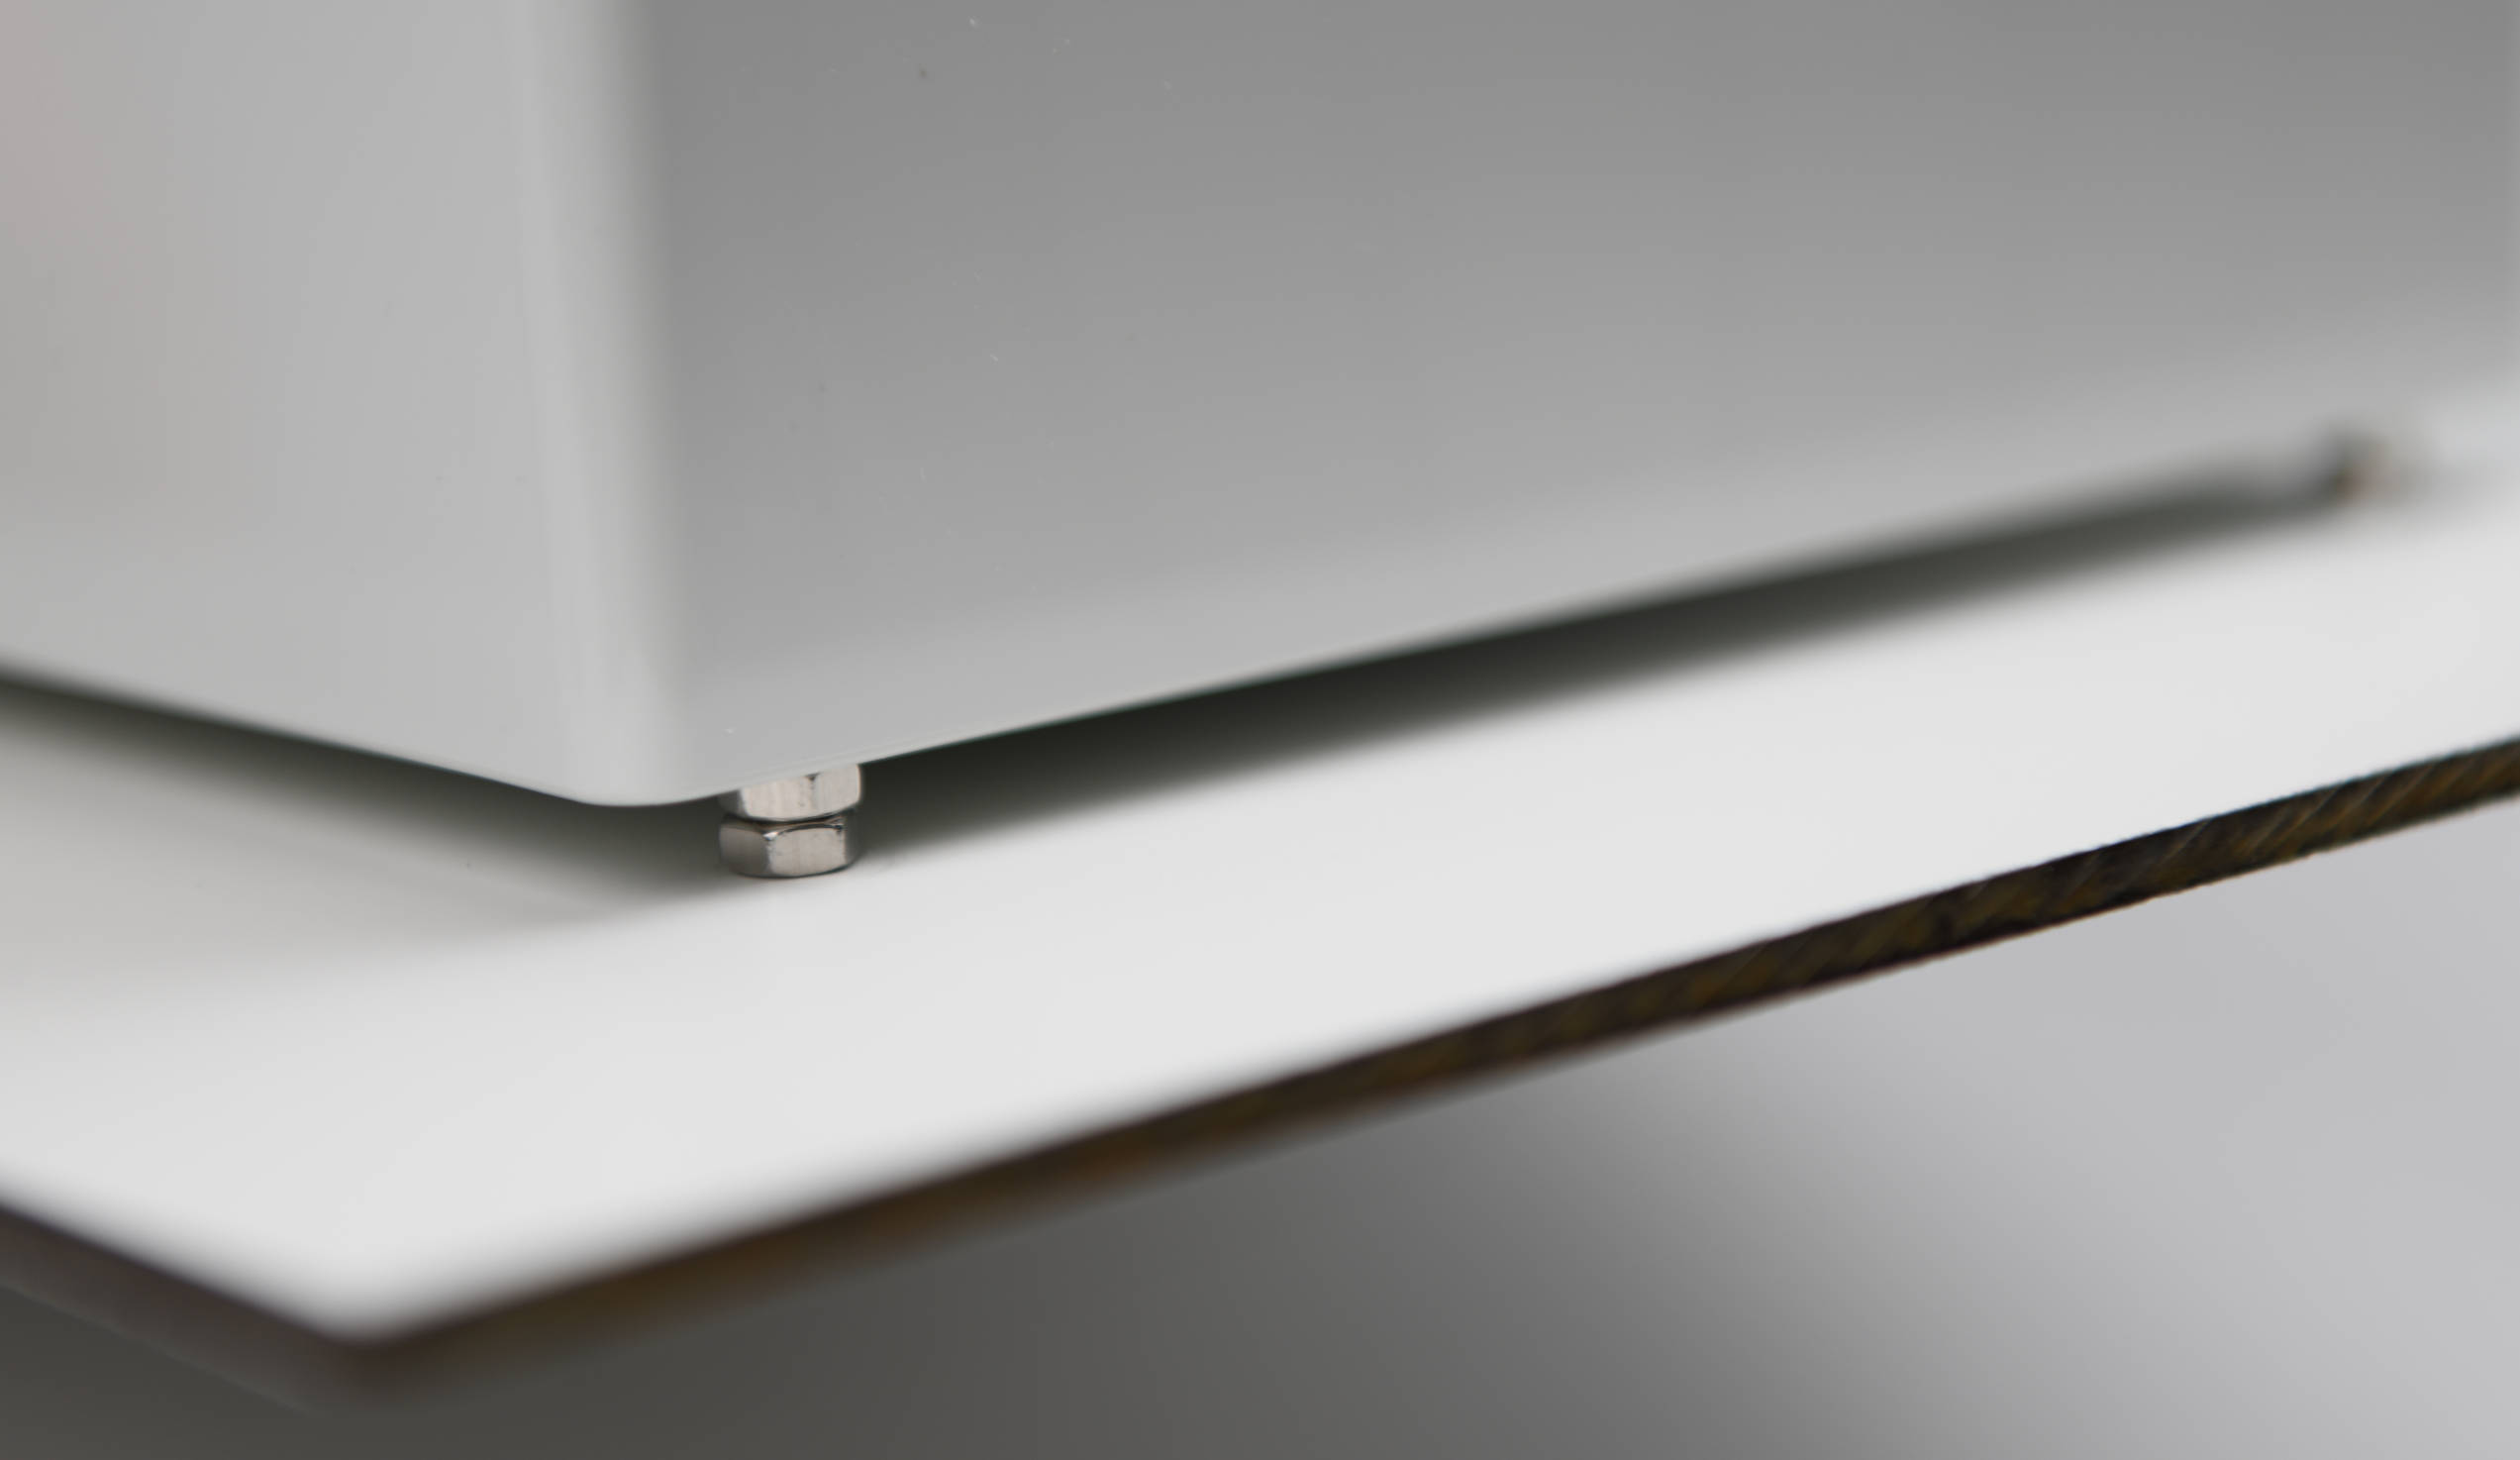
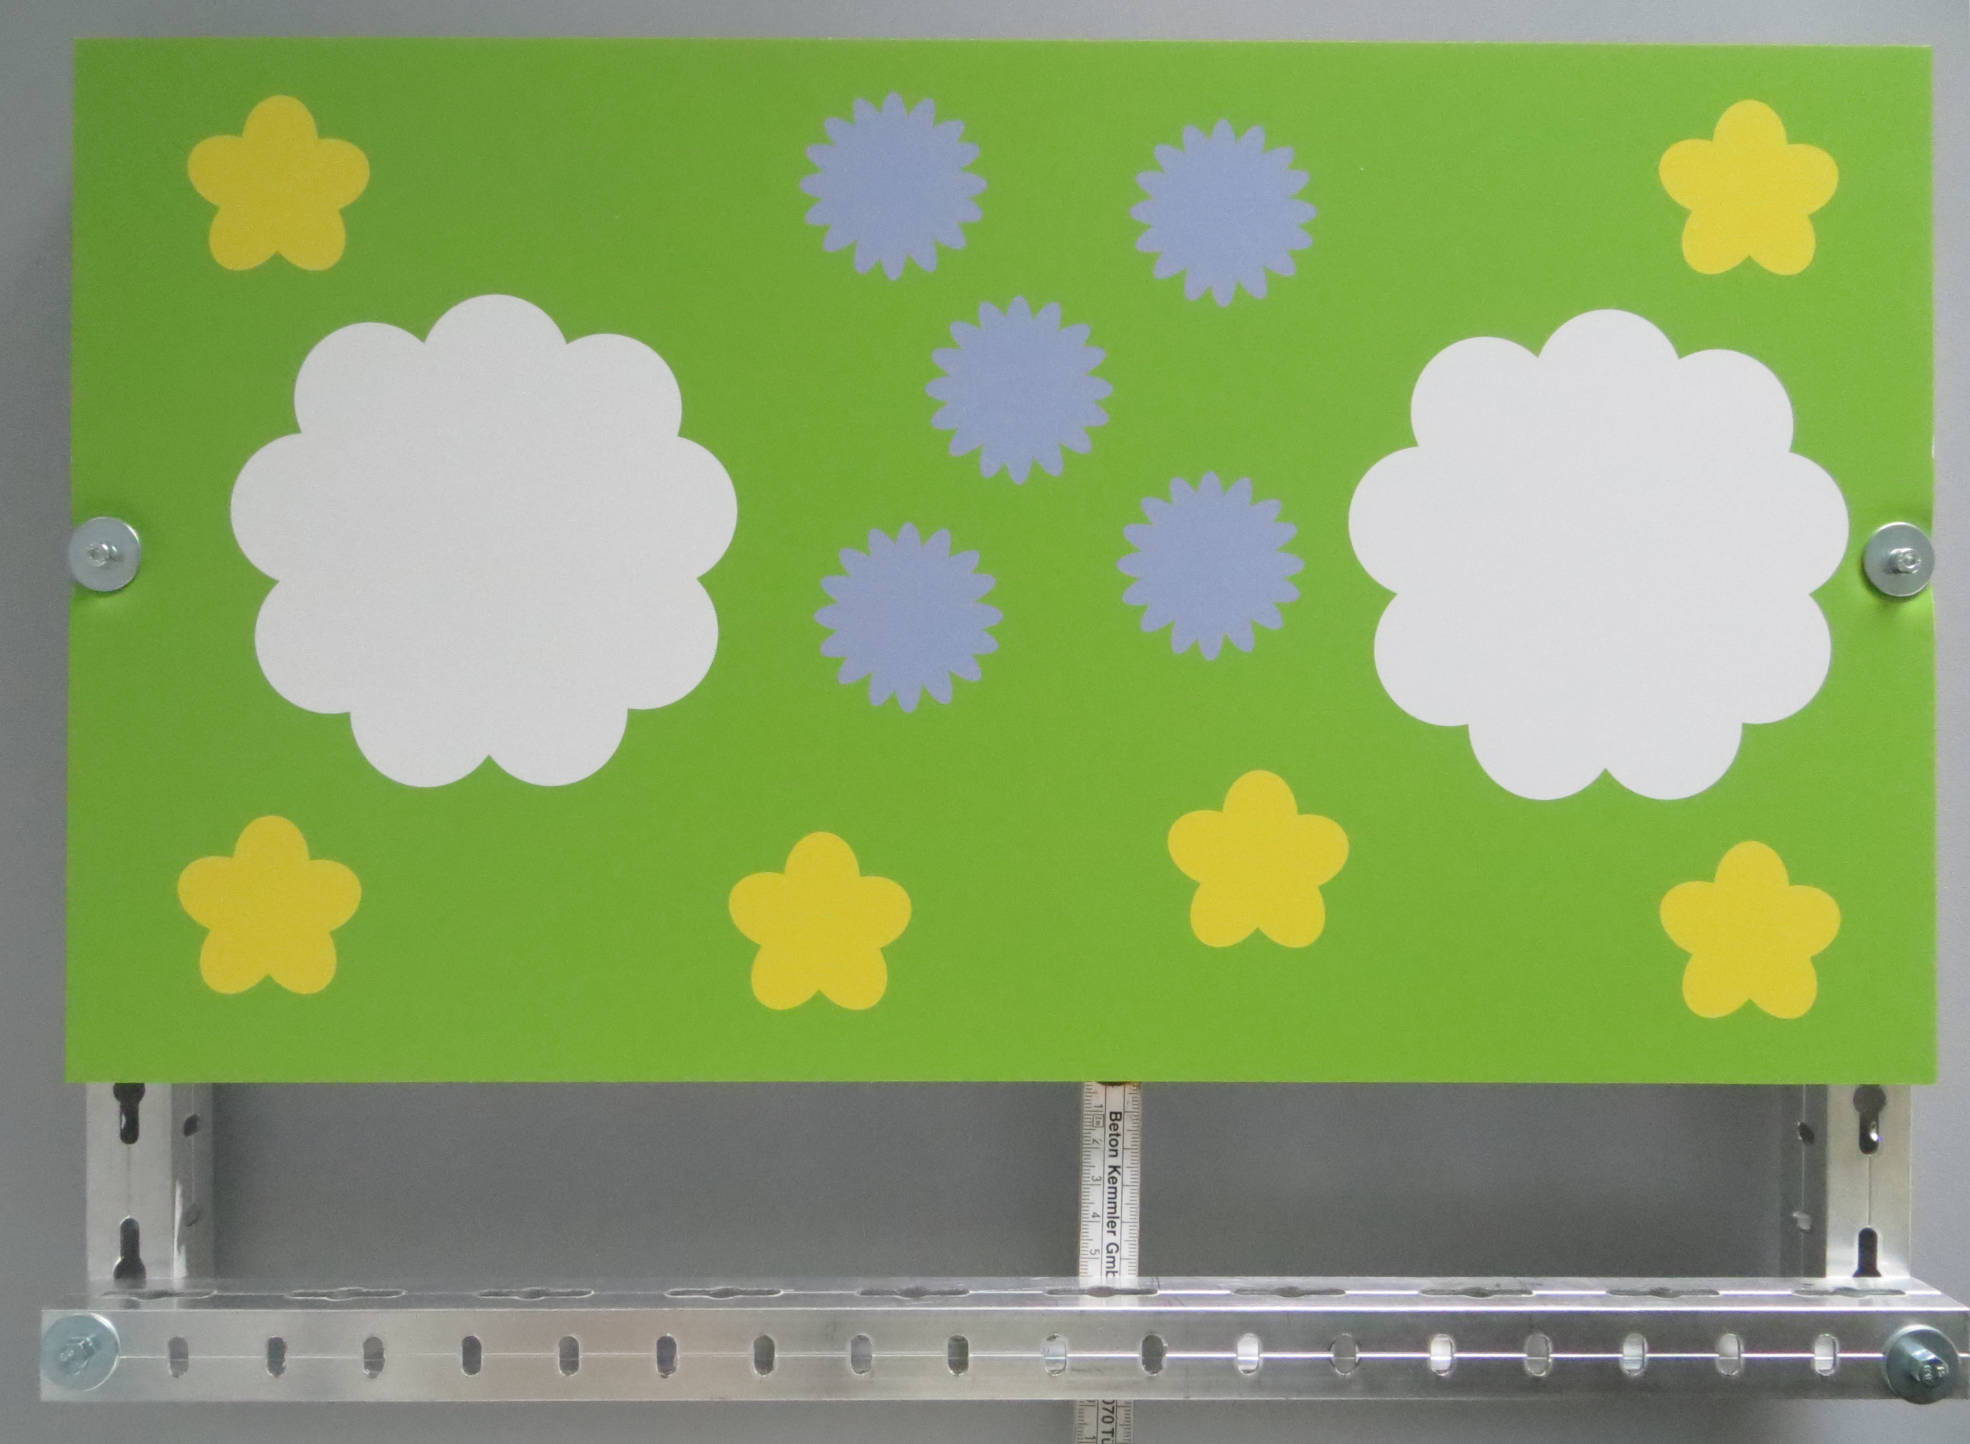
Now you can fasten the hex nuts on the other side of the HPL sheet to securely attach the enclosure to it.
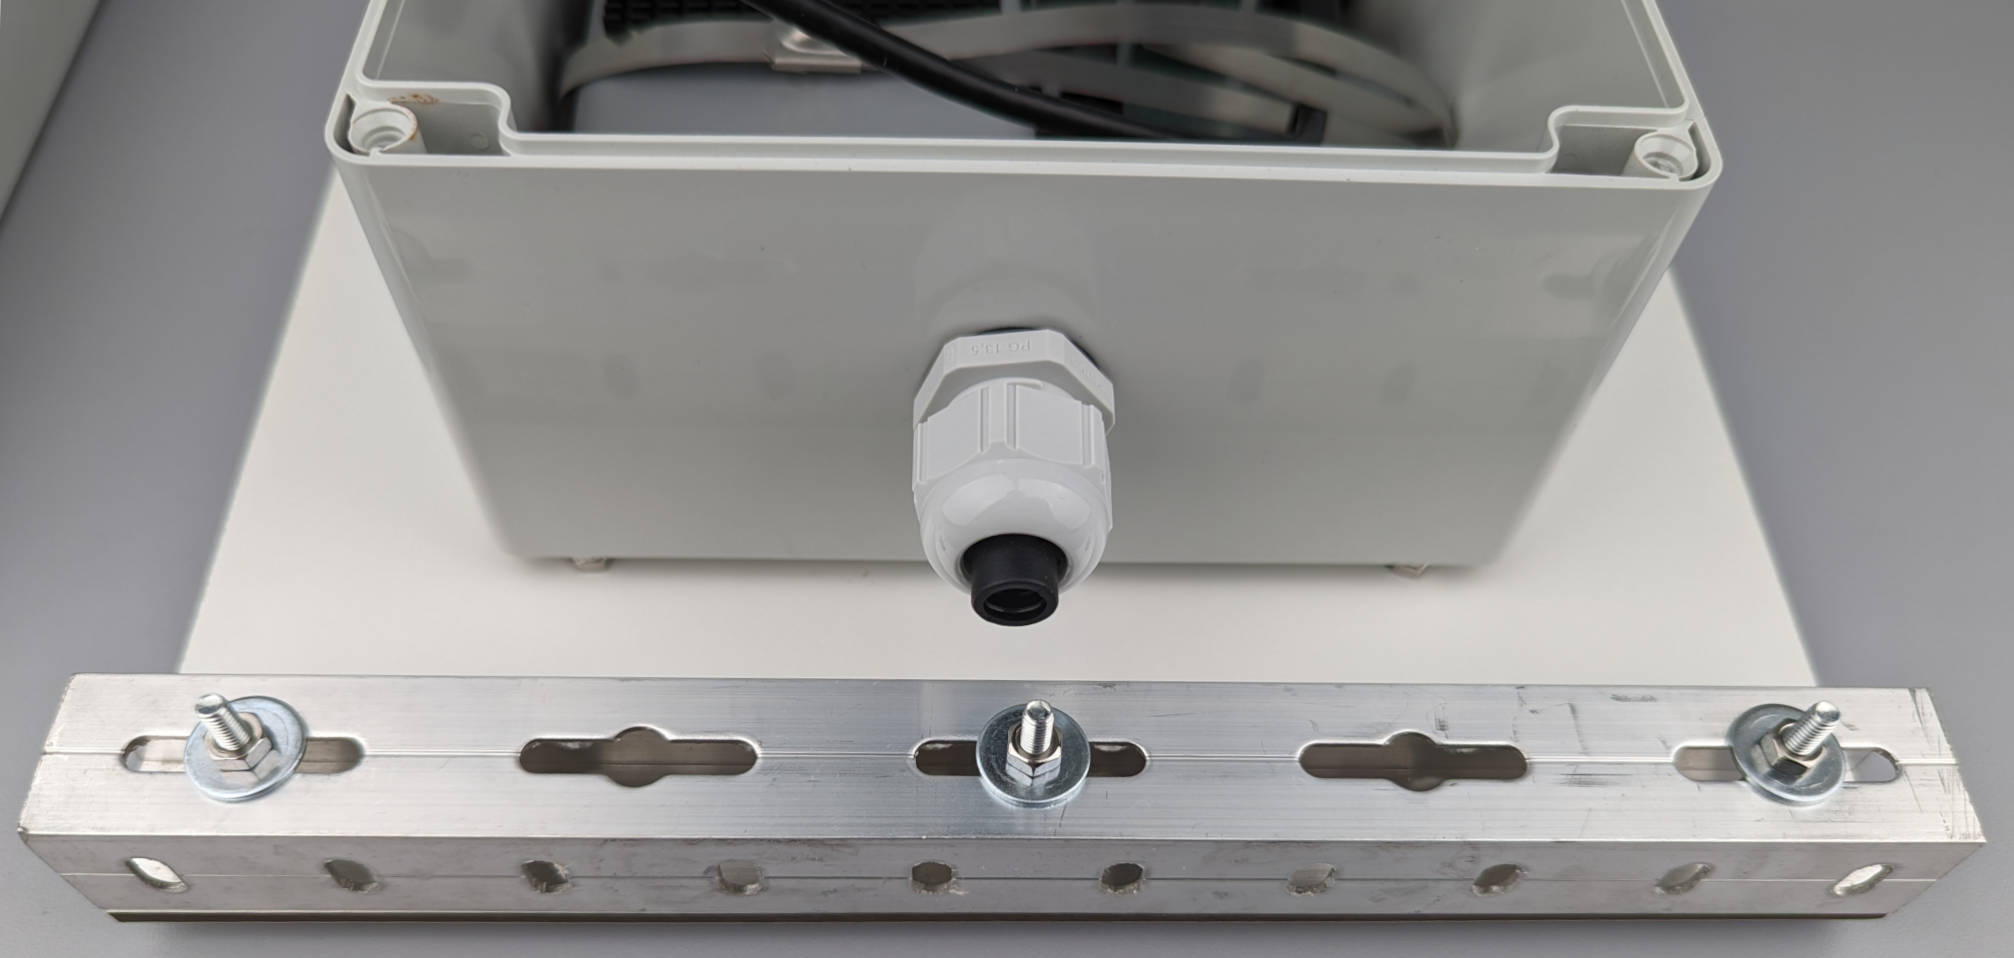
Attaching the aluminium tube
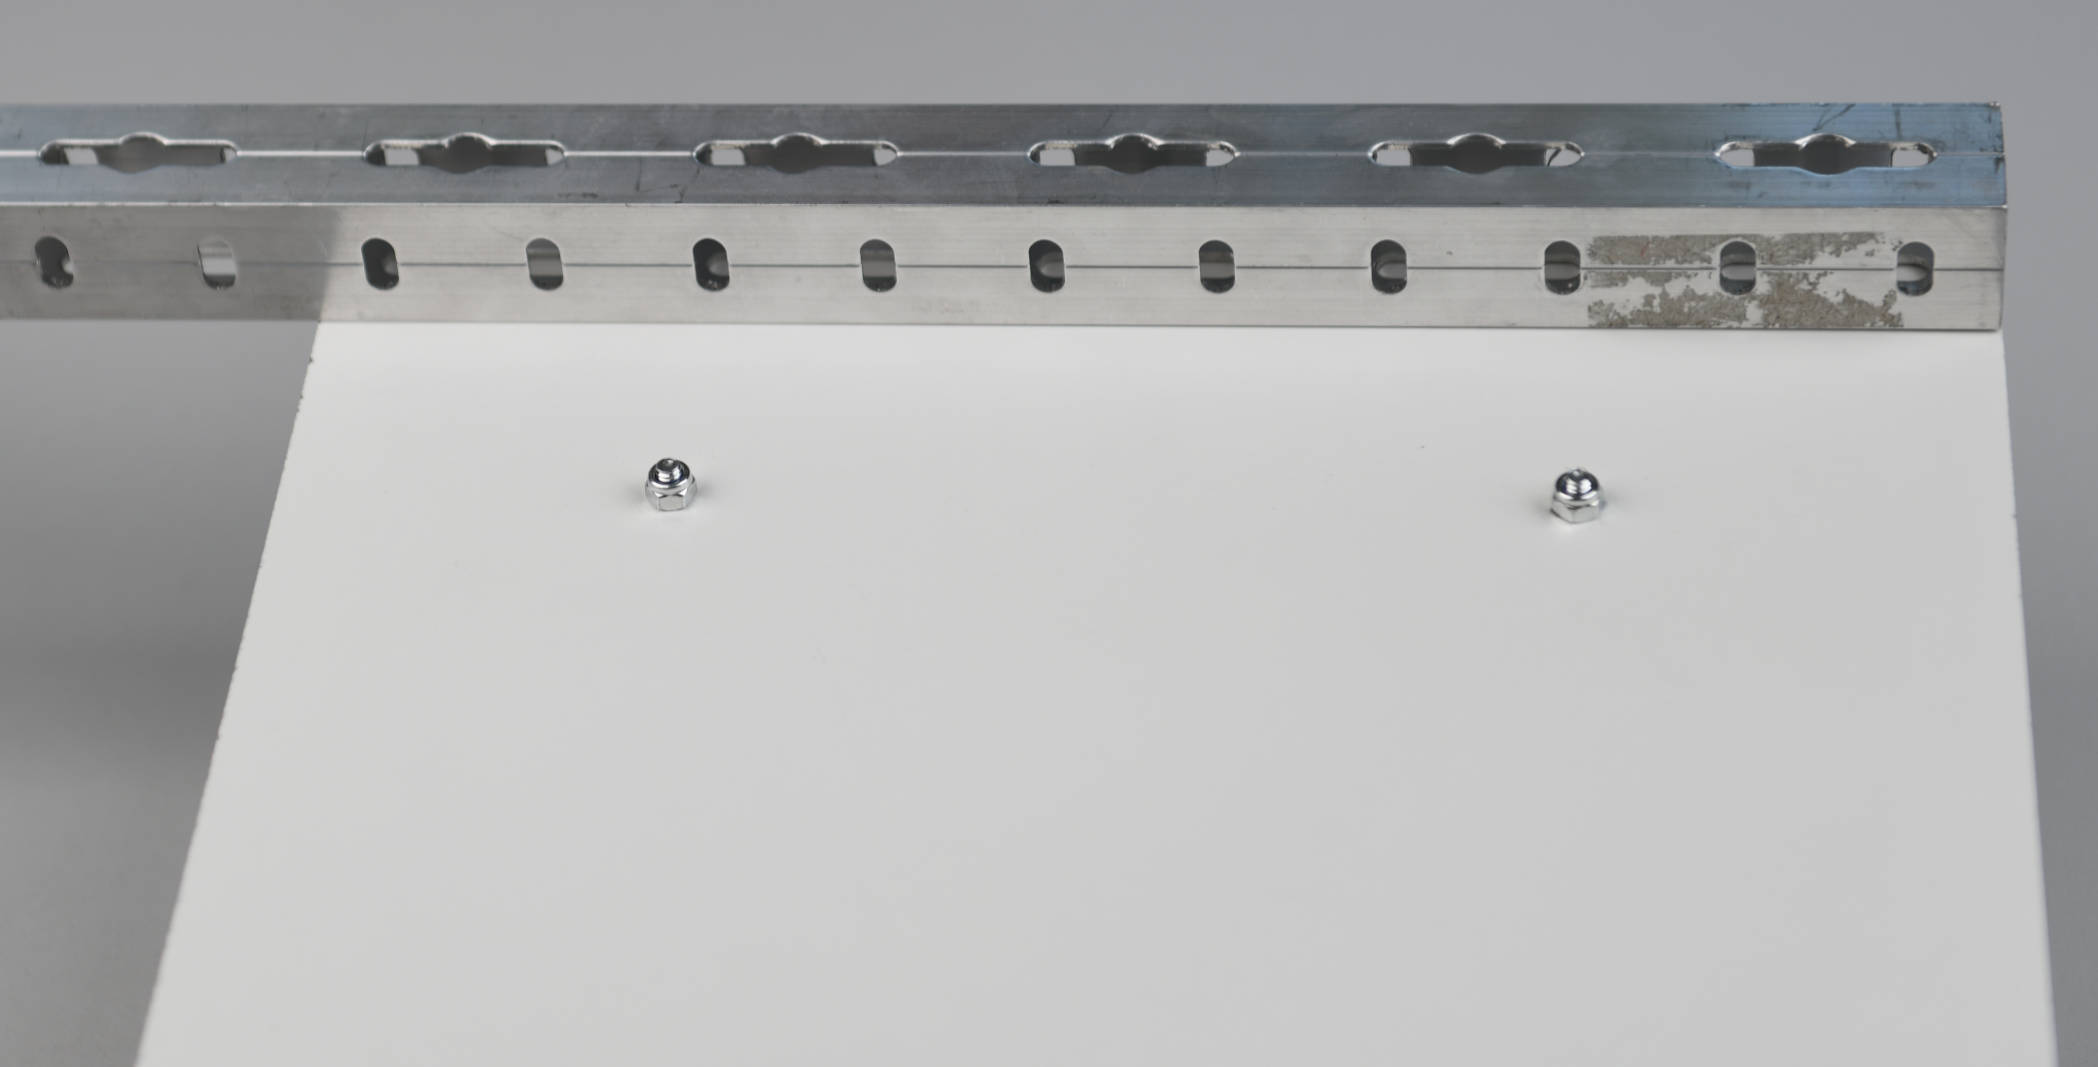
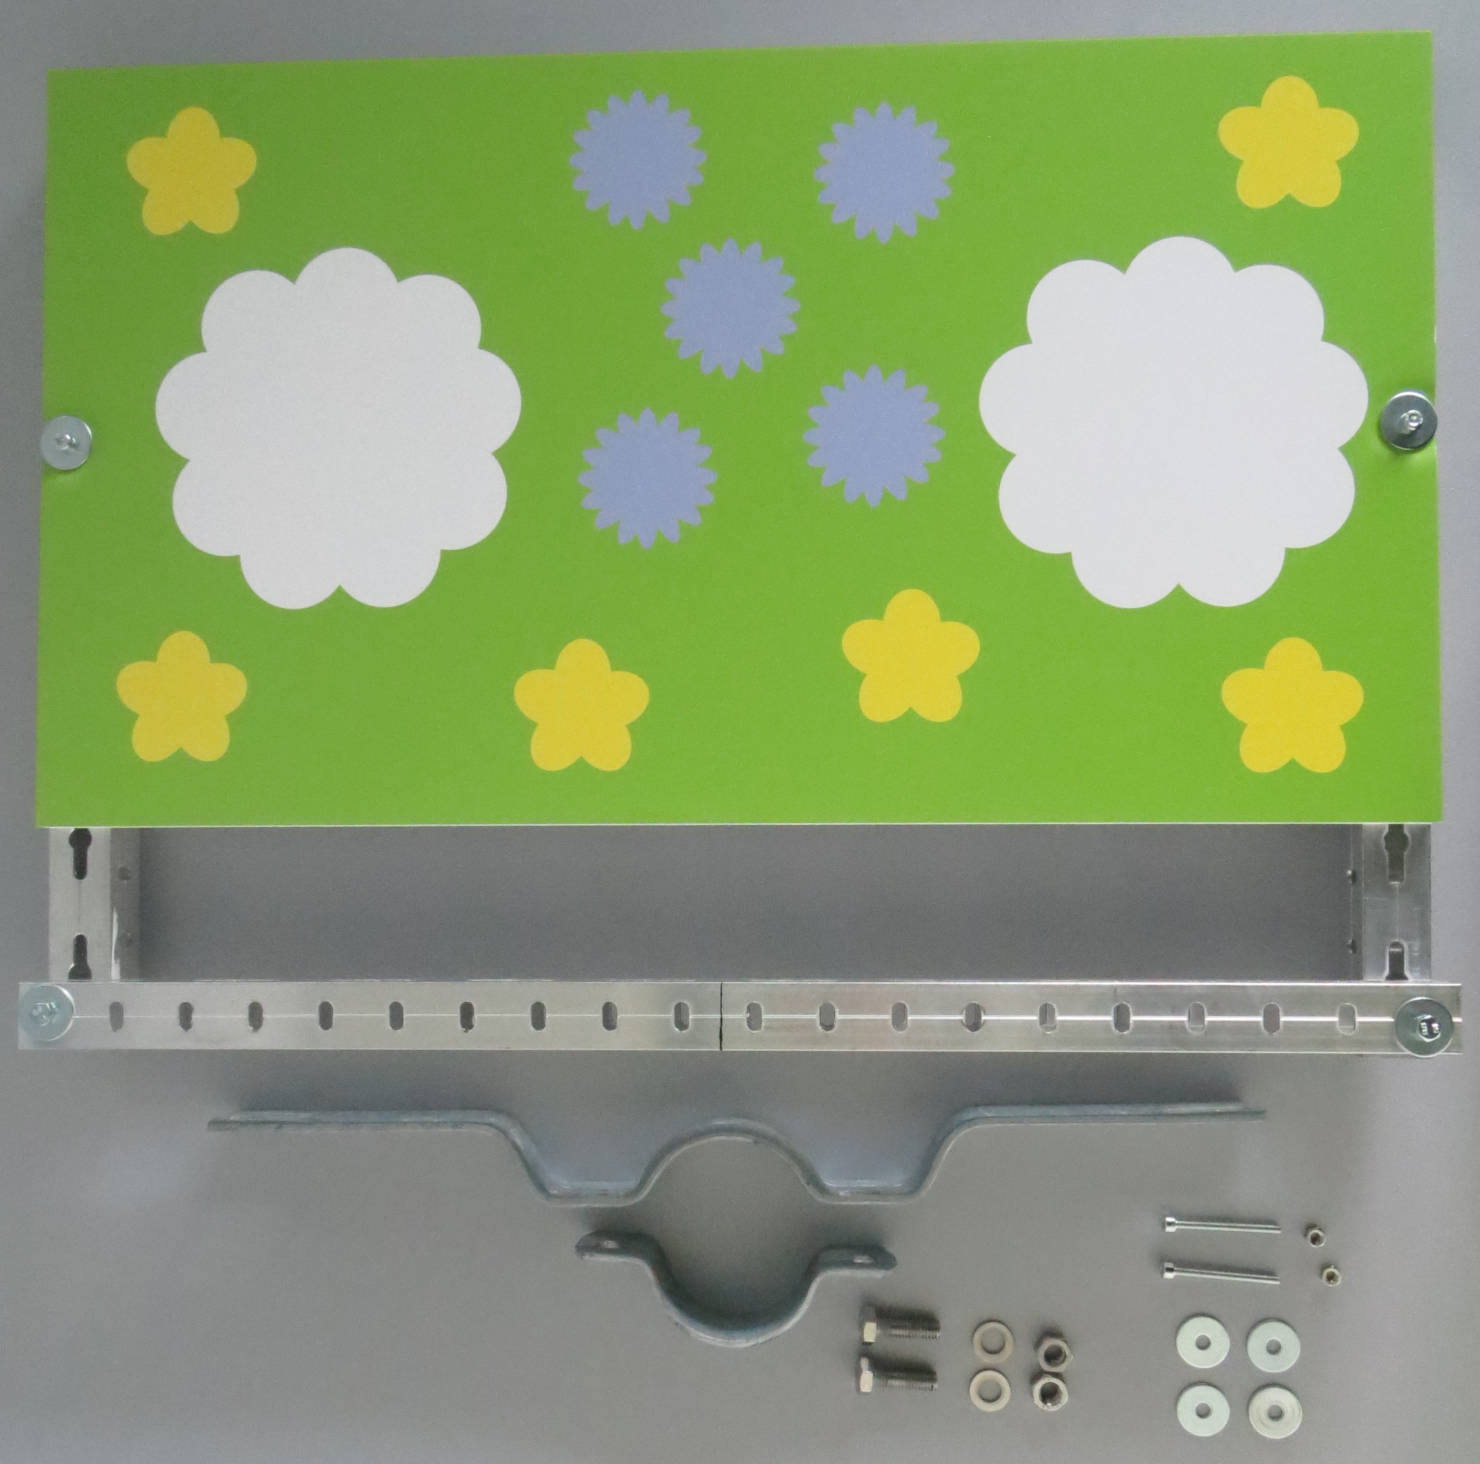
We are going to attach a 250 mm piece of the aluminium tube to the short side of the HPL sheet, which will serve as connection for the pipe clamp. Put your aluminium tube flush on the HPL sheet and make sure that the openings line up with the holes in the HPL sheet to put the screws through in the next step. Now you can draw a marking line at the correct position, to saw the aluminium tube to the required length.
For the kind of aluminium tube that we are using in this example, with a material thickness of 1.5 mm, a small metal saw is sufficient to cut the tube to the required length of 250 mm.
To attach the 250 mm piece of aluminium tube to the HPL sheet, we will need three of the M4 40 mm screws and hex nuts, as well as six of the flat washers. Put a washer under each of the screws and under each of the hex nuts to ensure a good stability.

Attaching the pipe clamp
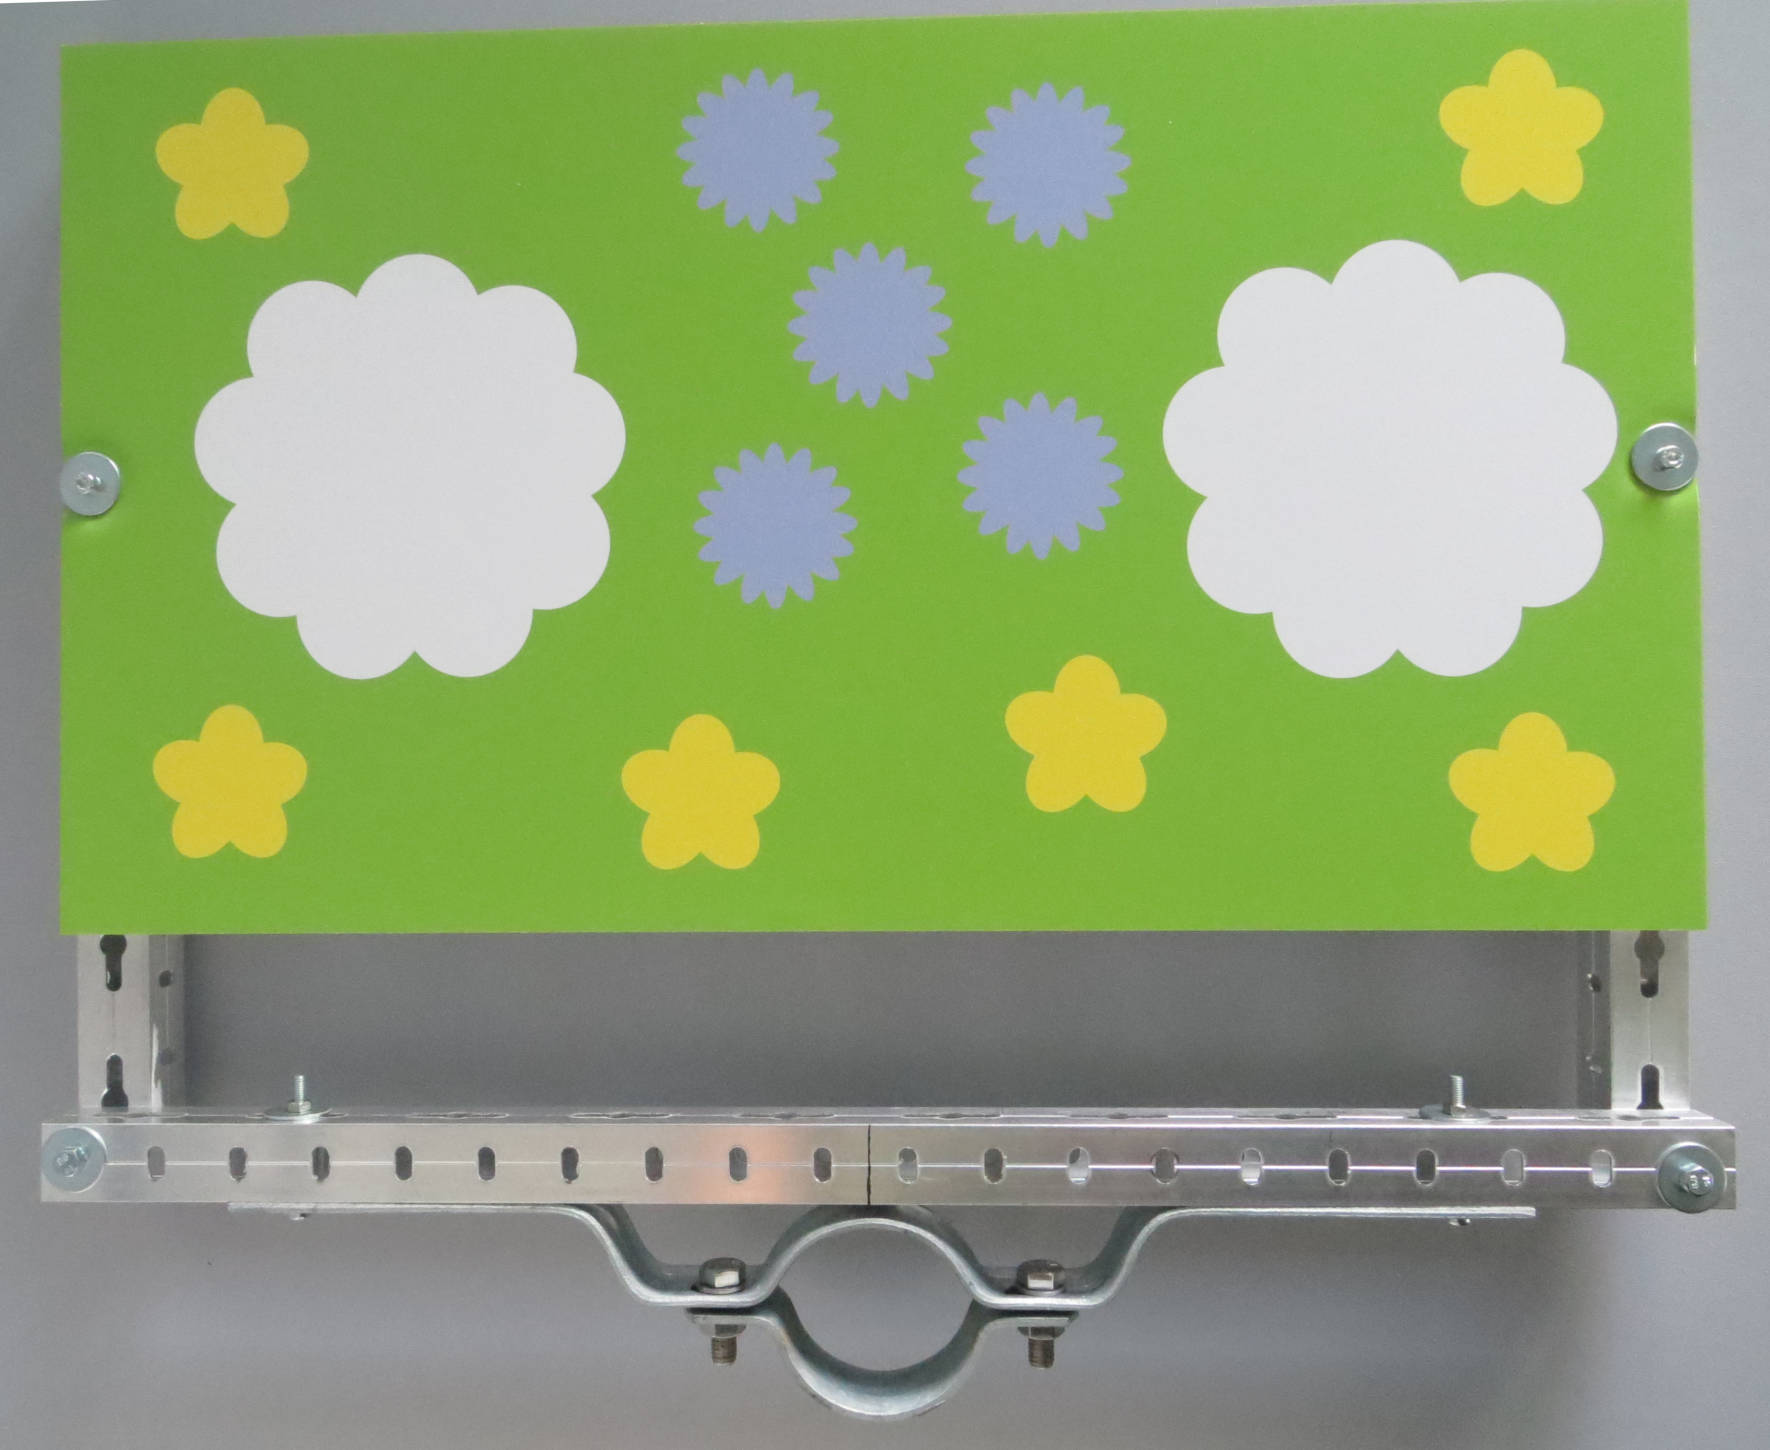
In the last step, we are going to attach the pipe clamp to the aluminium tube, to later mount the camera trap on a tubular post.
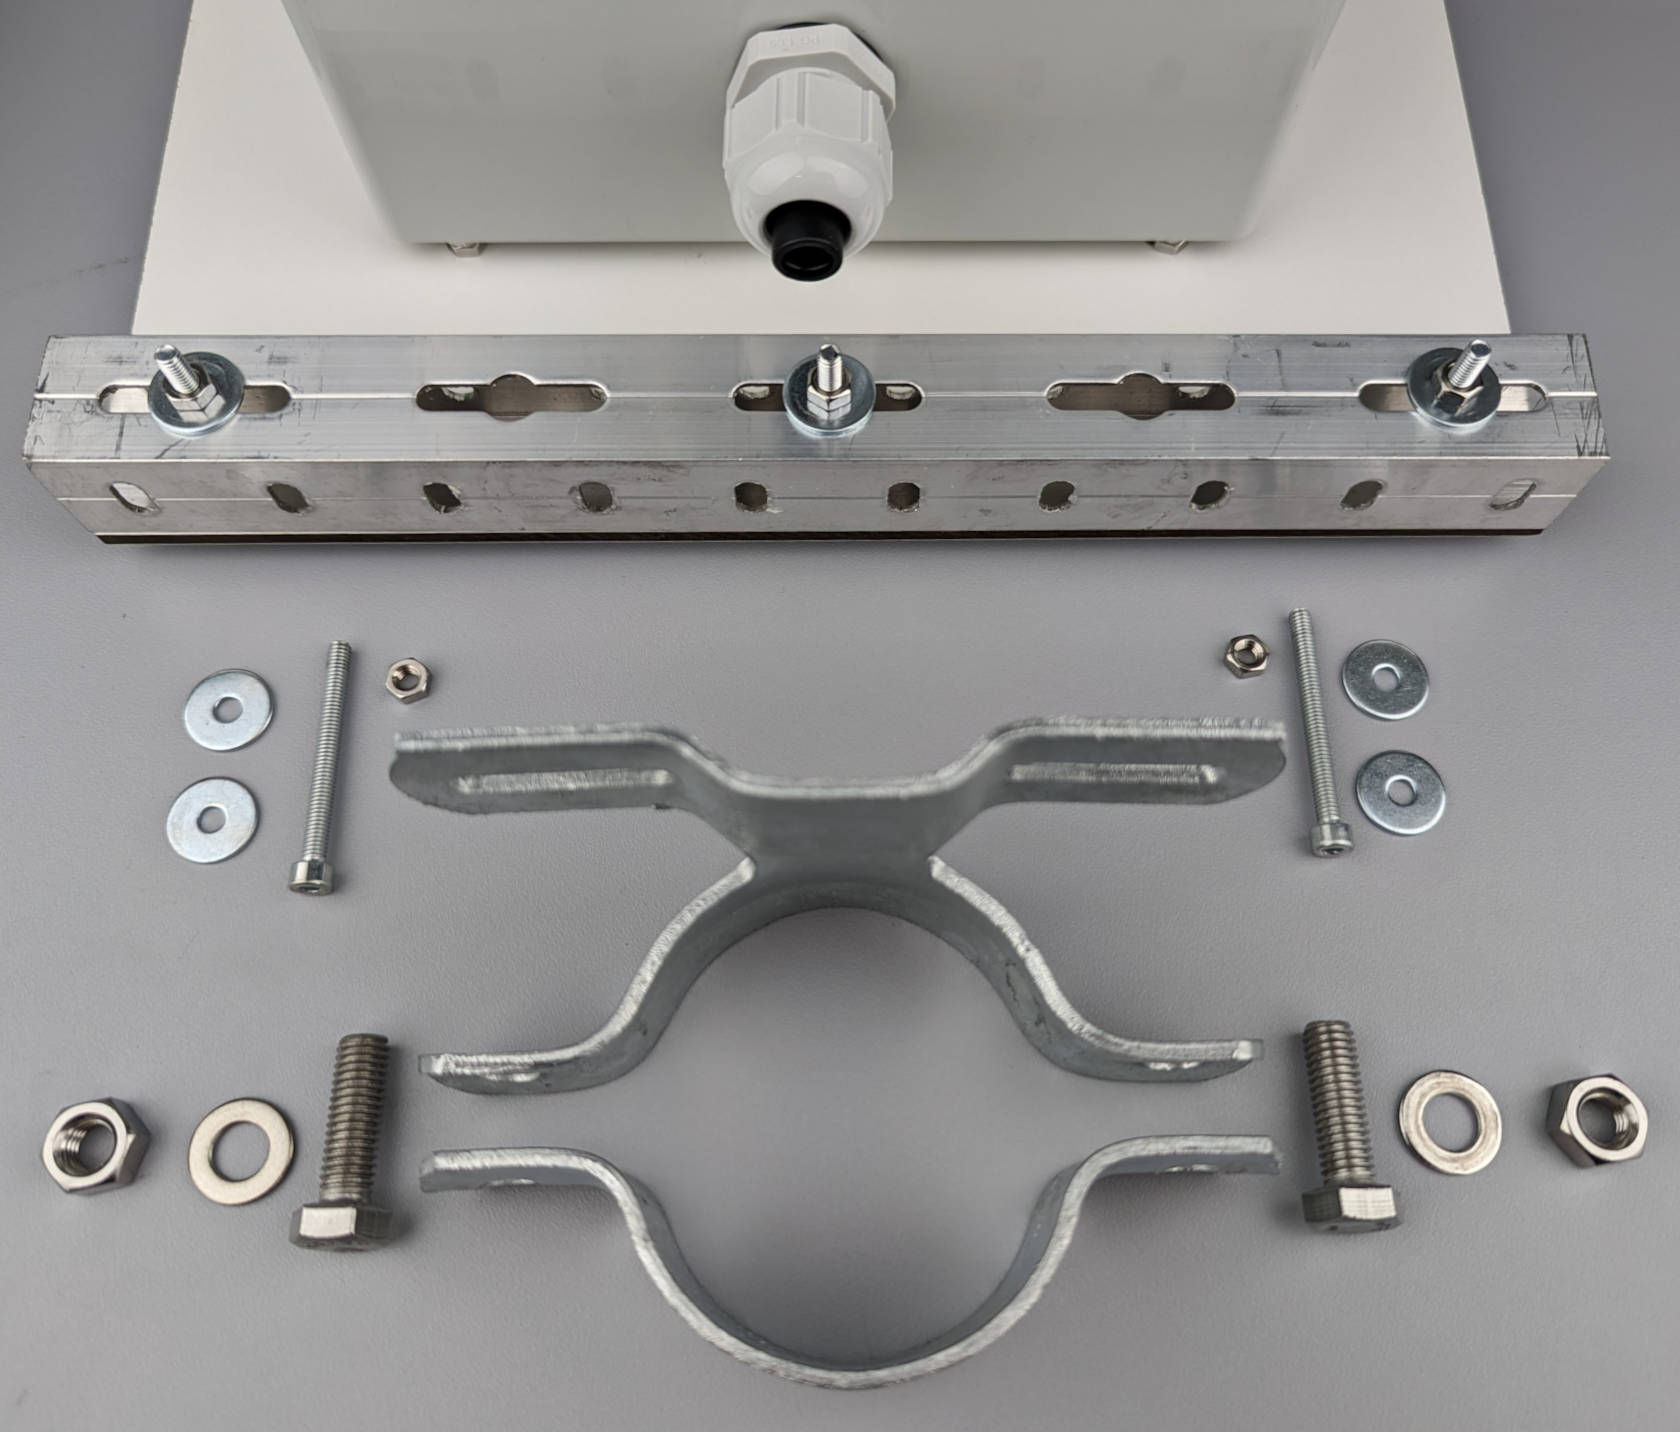
Use two of the M4 40 mm screws and hex nuts together with four of the washers (one on each side) to fix the pipe clamp to the aluminium tube.

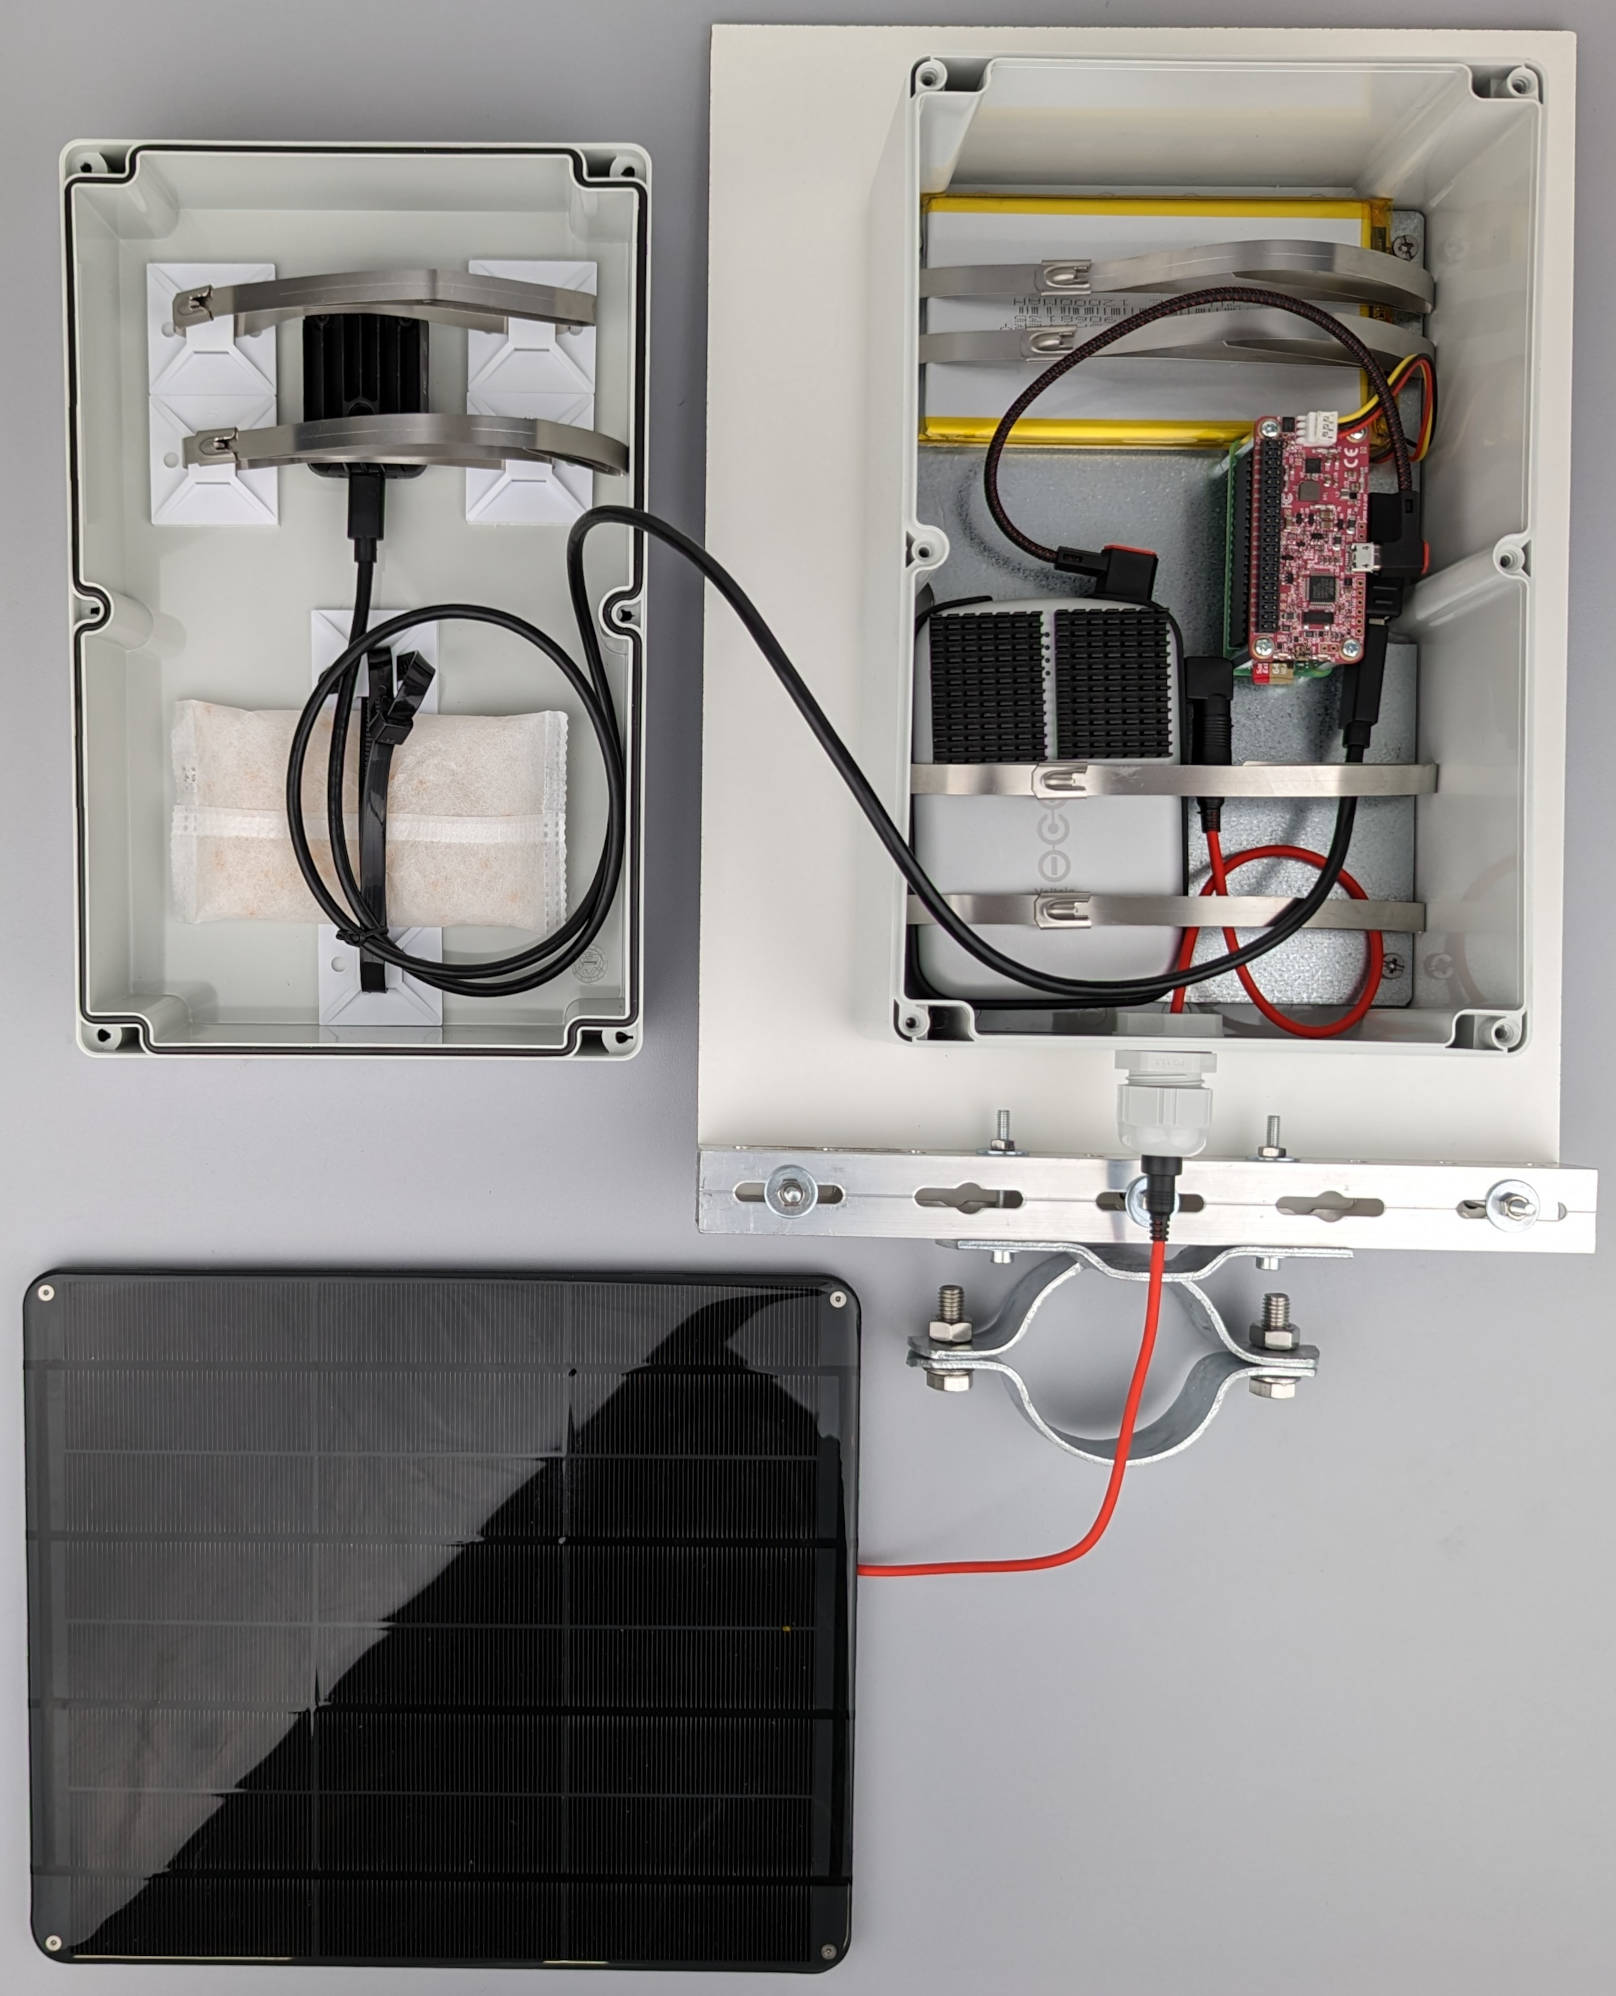
Your ready-to-mount camera trap should look like this:
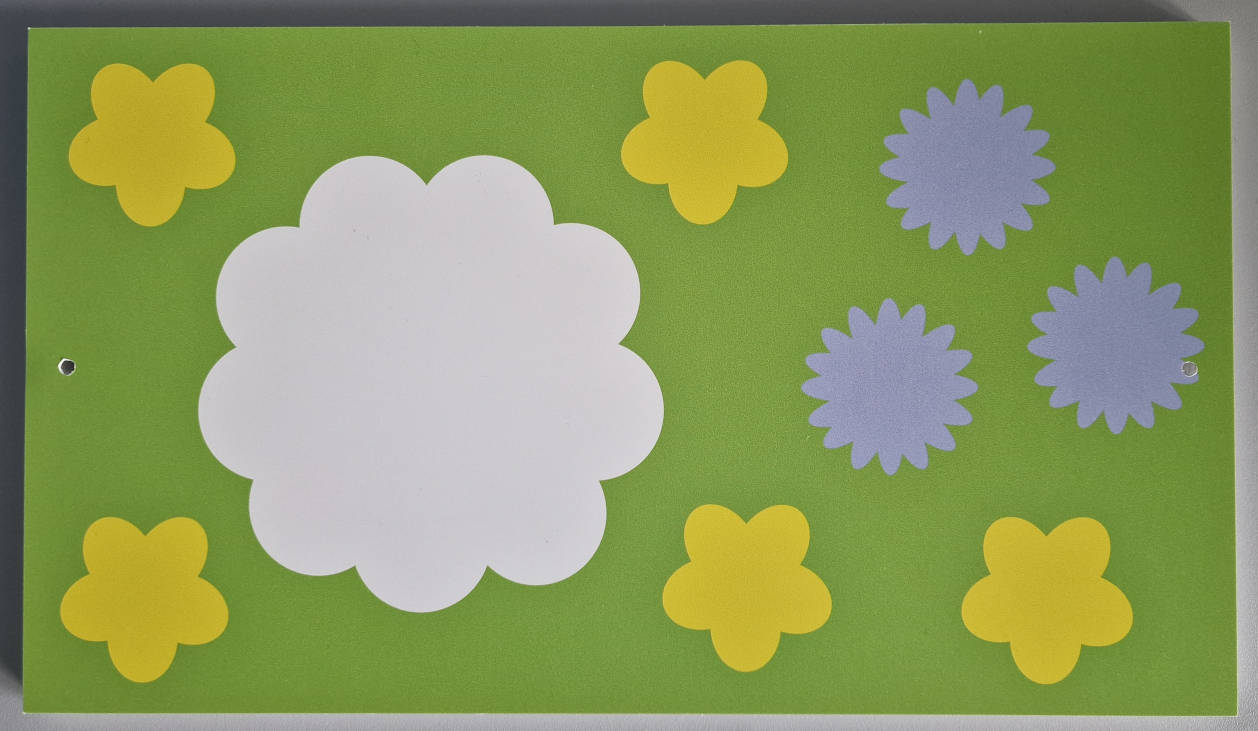
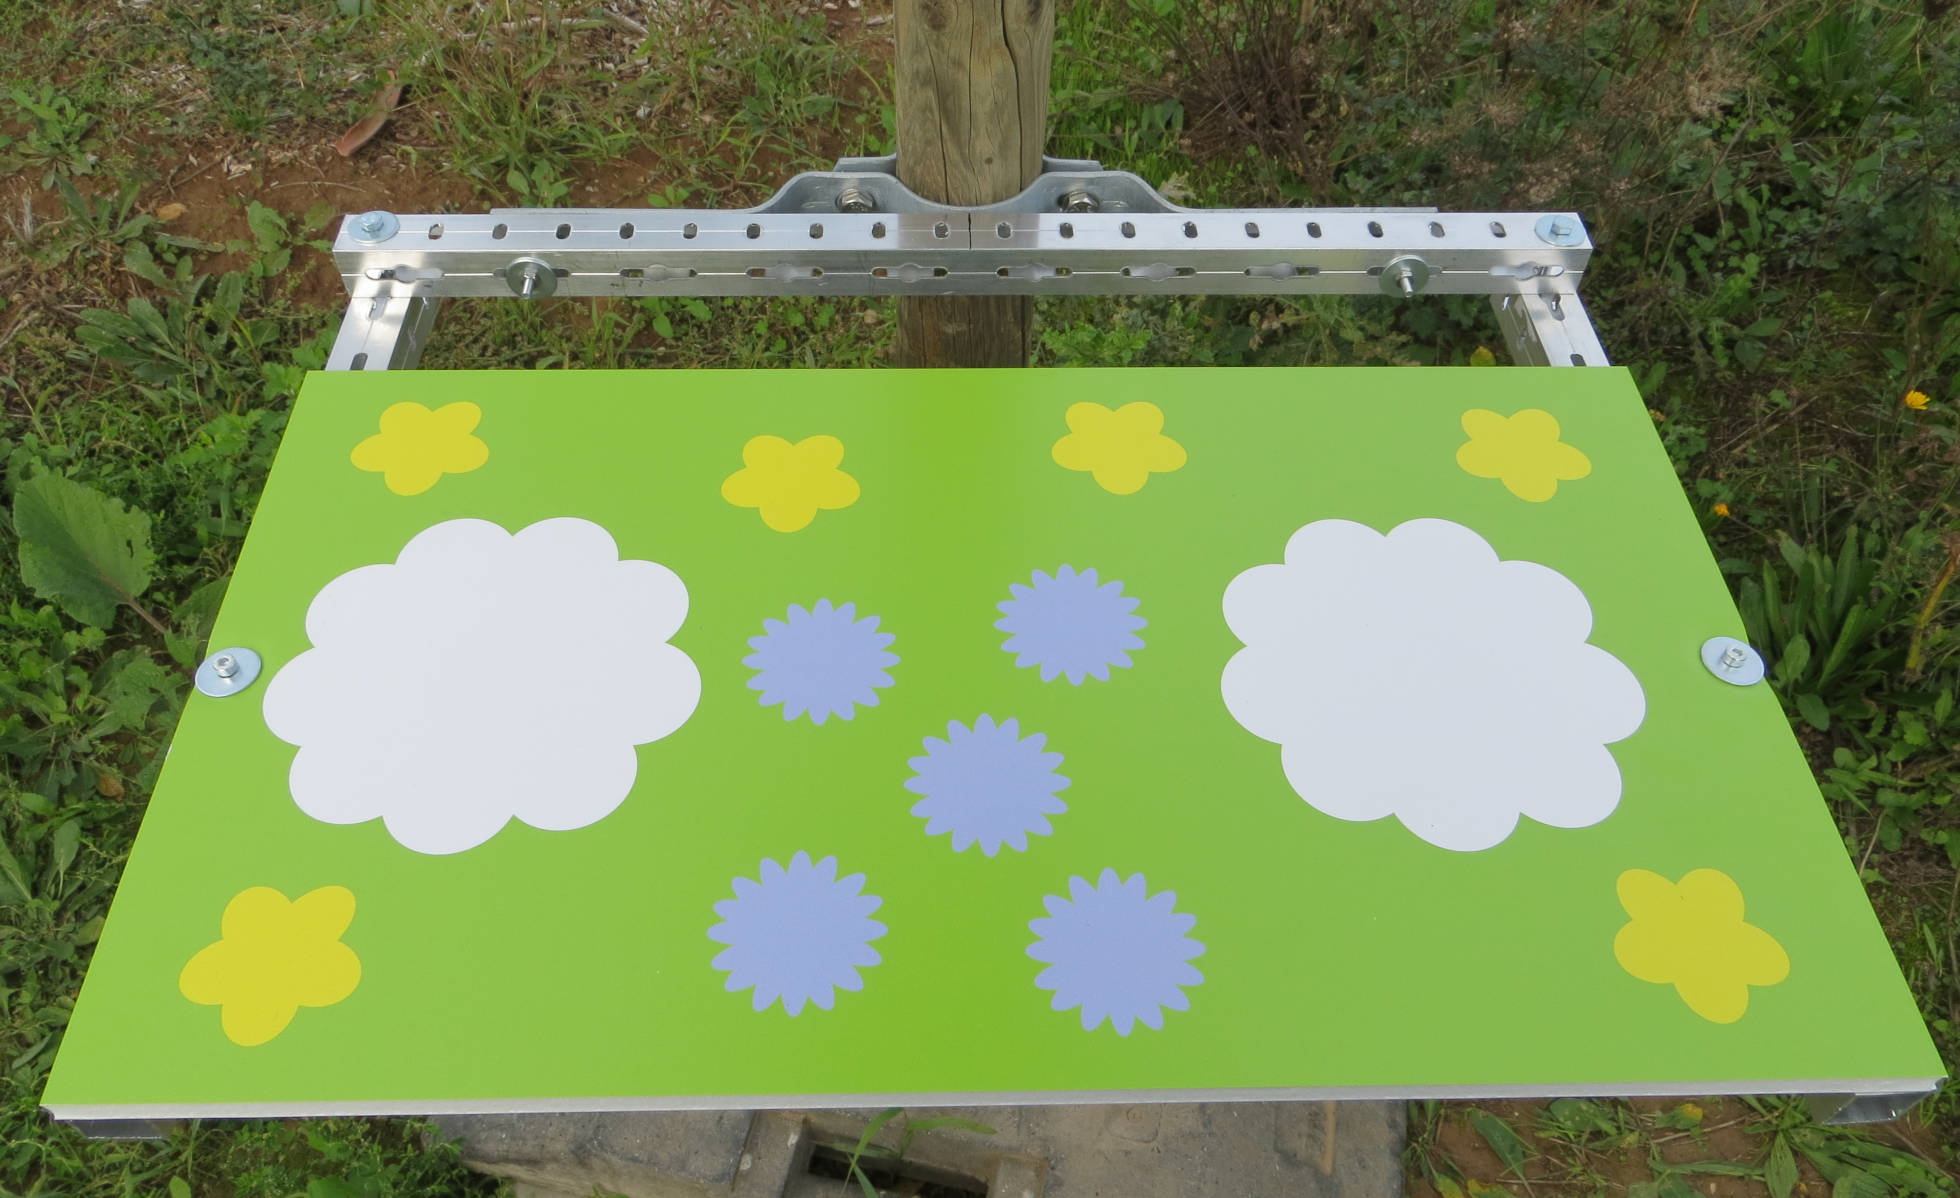
Preparing the flower platform
You can download the PDF templates for two different sizes of the flower platform at the
insect-detect-docs
GitHub repo. You will also find the Inkscape
.svg files in the same folder, which you can use as template for your own platform design.
The bigger platform (500x280 mm) should be mounted at a distance of 40 cm from camera to platform, the smaller platform (350x200 mm) should be mounted at a distance of 28 cm from camera to platform. This will ensure that the flower platform fills out the whole frame of the OAK-1 camera when using 1080p/4K resolution for the HQ frames. Using the smaller platform at a lower distance will result in a higher resolution of the cropped insect images and is recommended for most use cases.
If you want to use different platform sizes or distances from camera to your platform or other background, the aspect ratio of the frame where insects will be detected (for 1080p/4K resolution: ~1:1.78) should be considered for planning.
It is recommended to print the templates on a weather- and UV-resistant material, e.g. lightweight foam board or acrylic glass.
Drill two 4 mm holes at the center of the short sides of your flower platform. For the bigger platform (500x280 mm), mark the positions for drilling at 140 mm, measured from the long side (280 mm / 2) and at 12 mm, measured from the short side (23.5 mm wide aluminium tube / 2).

For the smaller platform (350x200 mm), the positions for drilling should be marked at 100 mm, measured from the long side (200 mm / 2) and at 12 mm, measured from the short side (23.5 mm wide aluminium tube / 2).
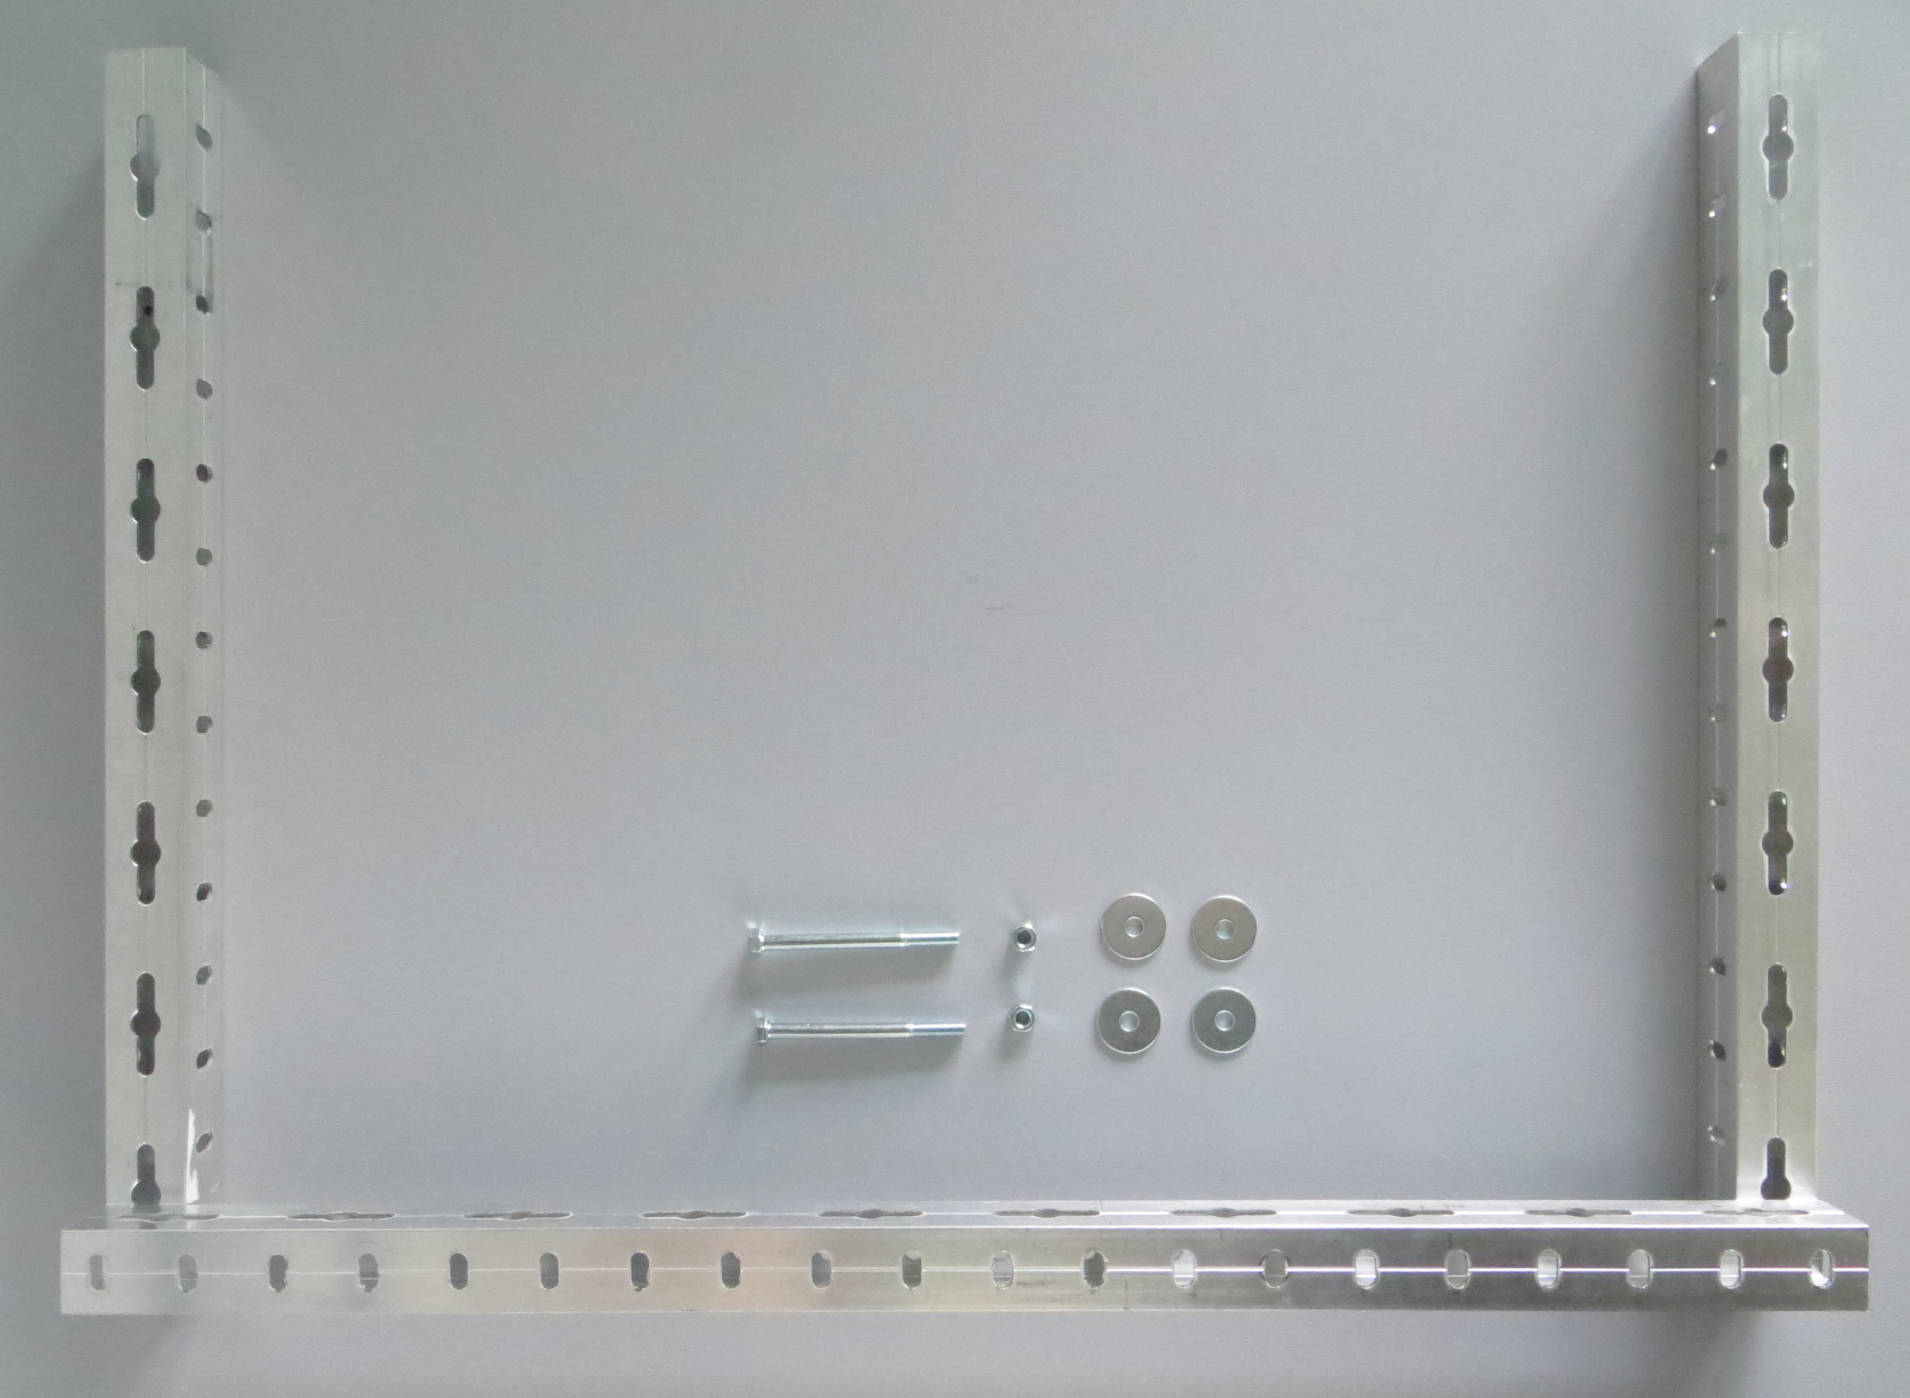
To build the frame, which will hold the flower platform and can be adjusted to different platform sizes, we will need one aluminium tube with the length of the long side of your biggest platform (in our case 500 mm) and two aluminium tubes with a length of about 350-400 mm. If you have a 750 mm piece left from the 1 m tube of which you saw off the 250 mm piece for the HPL plate mounting, you can just cut this leftover piece in half to get 2x 375 mm tube pieces, which will have the optimal length.
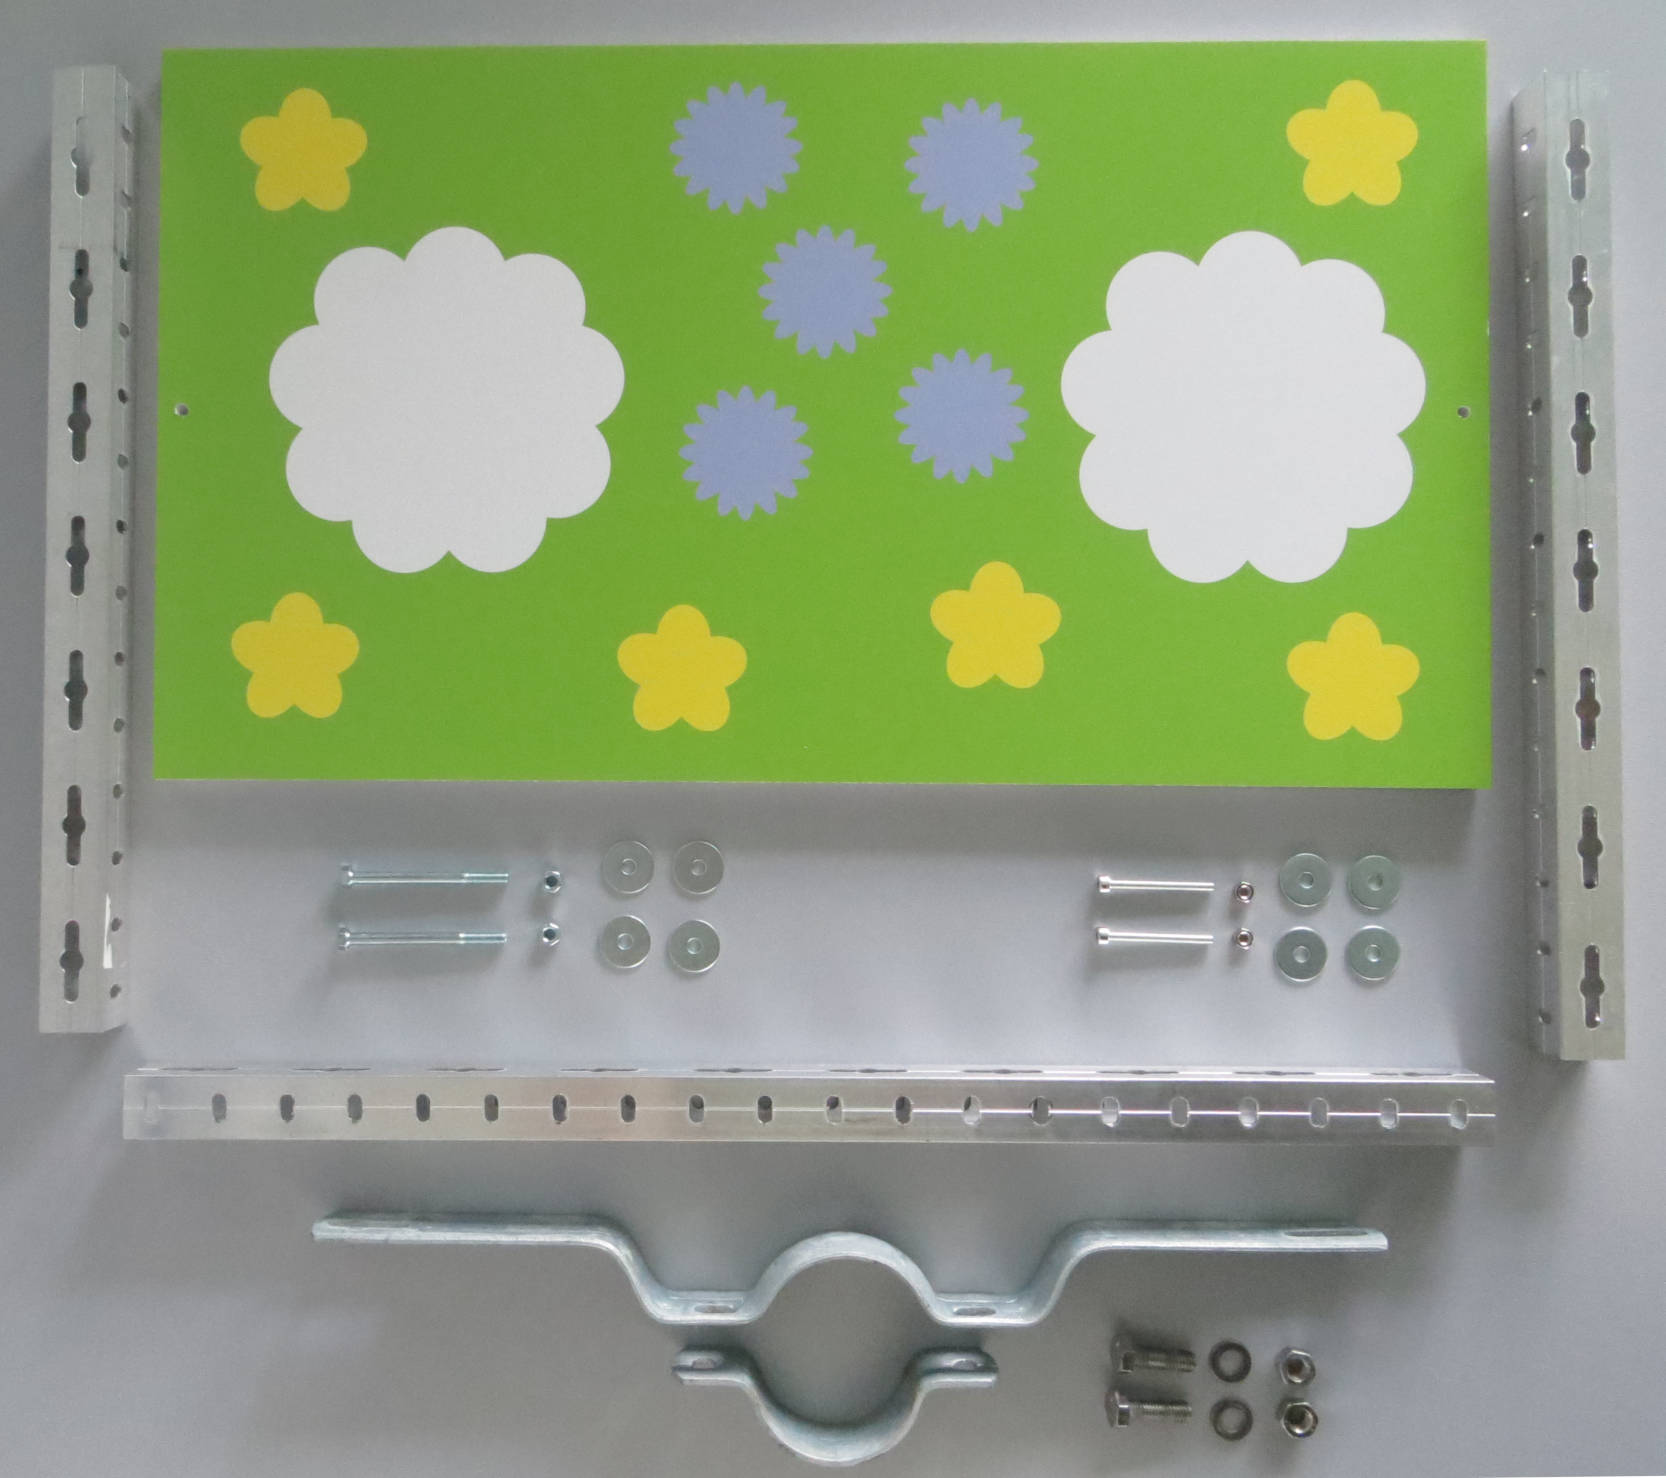
First, we are going to place the longer piece of aluminium tube on top of the two shorter pieces and connect them with the two M4 60 mm screws, two M4 nuts and four washers. Don't tighten too much yet, as we will have to align everything at the end.
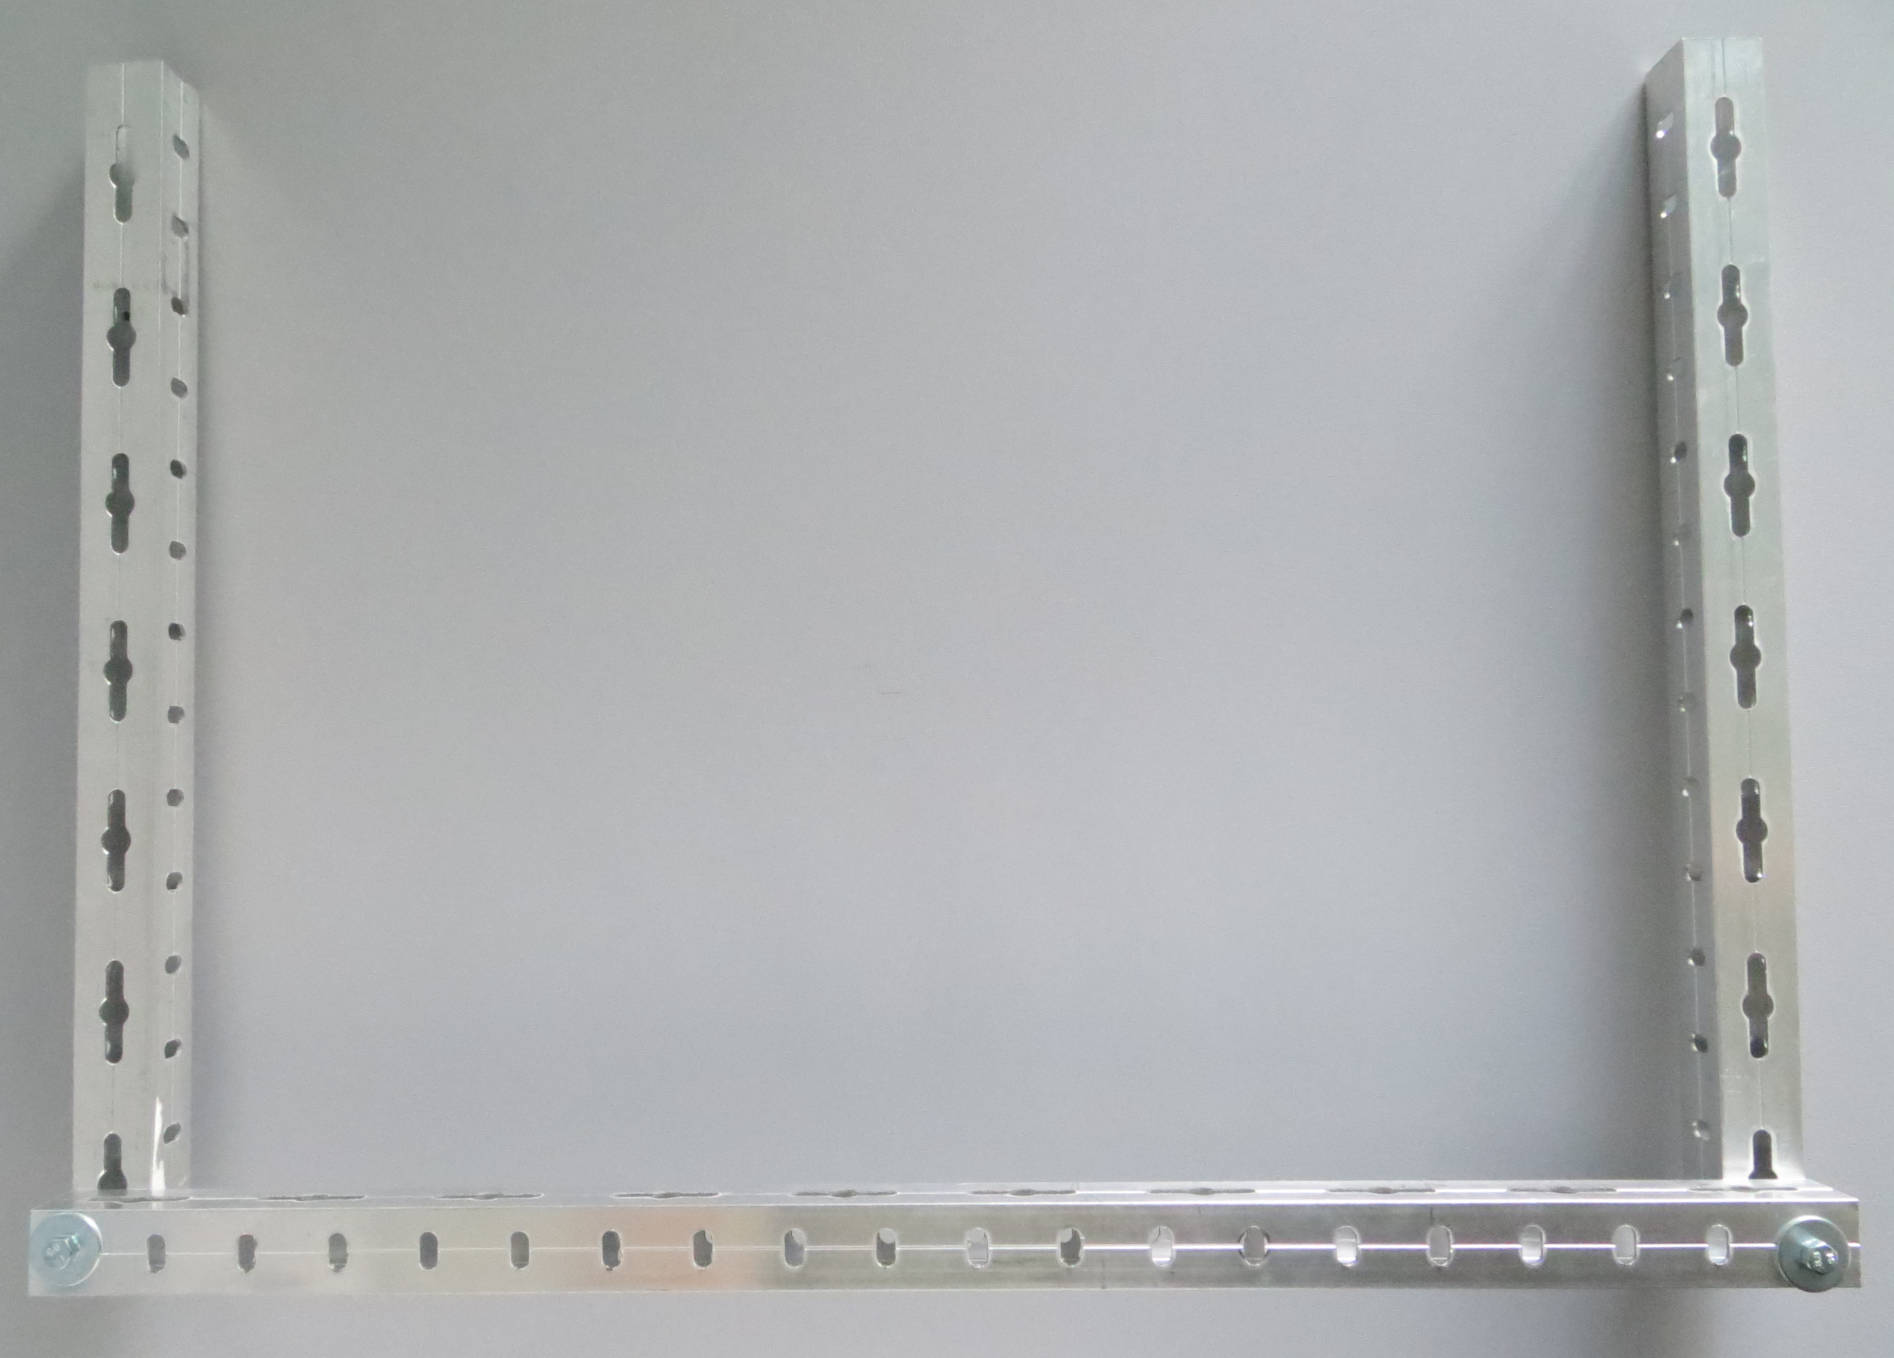
After the frame is prepared, place the flower platform on top of the two short tube pieces and align them with the holes you drilled. If your are using the same platform dimension and pipe clamps as in this example, you can already adjust the platform at 55 mm, measured from the aluminium tube to the platform. For the smaller platform (350x200 mm) this distance should be 115 mm. Attach the platform to the shorter aluminium tubes with two M4 40 mm screws, two M4 nuts and four washers.
Now all we have to do is to connect the pipe clamp with two M4 40 mm screws, two M4 nuts and four washers for mounting the platform on a wooden/steel post. Make sure to align the pipe clamp center with the center of your long aluminium tube piece.
You can now mount the platform on any standard wooden or steel post. Tighten the screws after you checked the correct position. If possible, slightly tilt the post and camera trap system forwards, that rainwater can run off the platform.
If you want to change the bigger platform with the smaller platform, you only have to adjust the smaller aluminium tube pieces and decrease the distance from camera (= enclosure) to the platform to 28 cm.
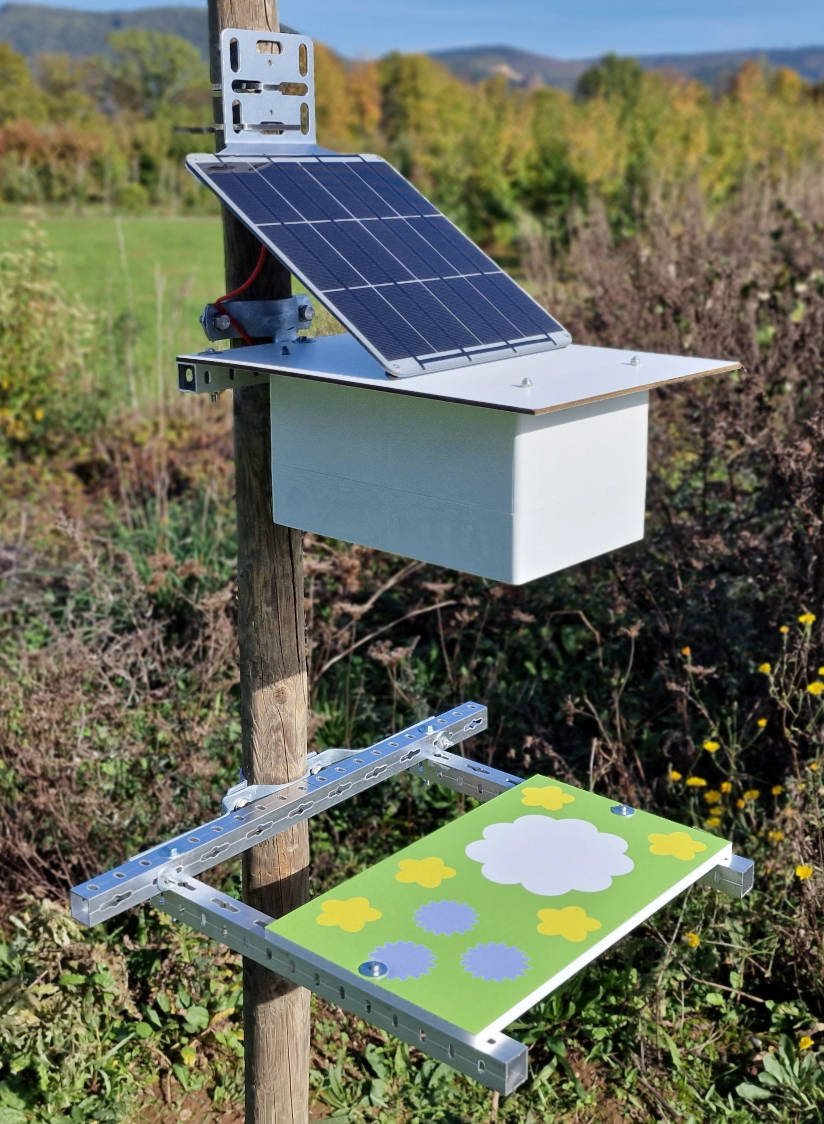
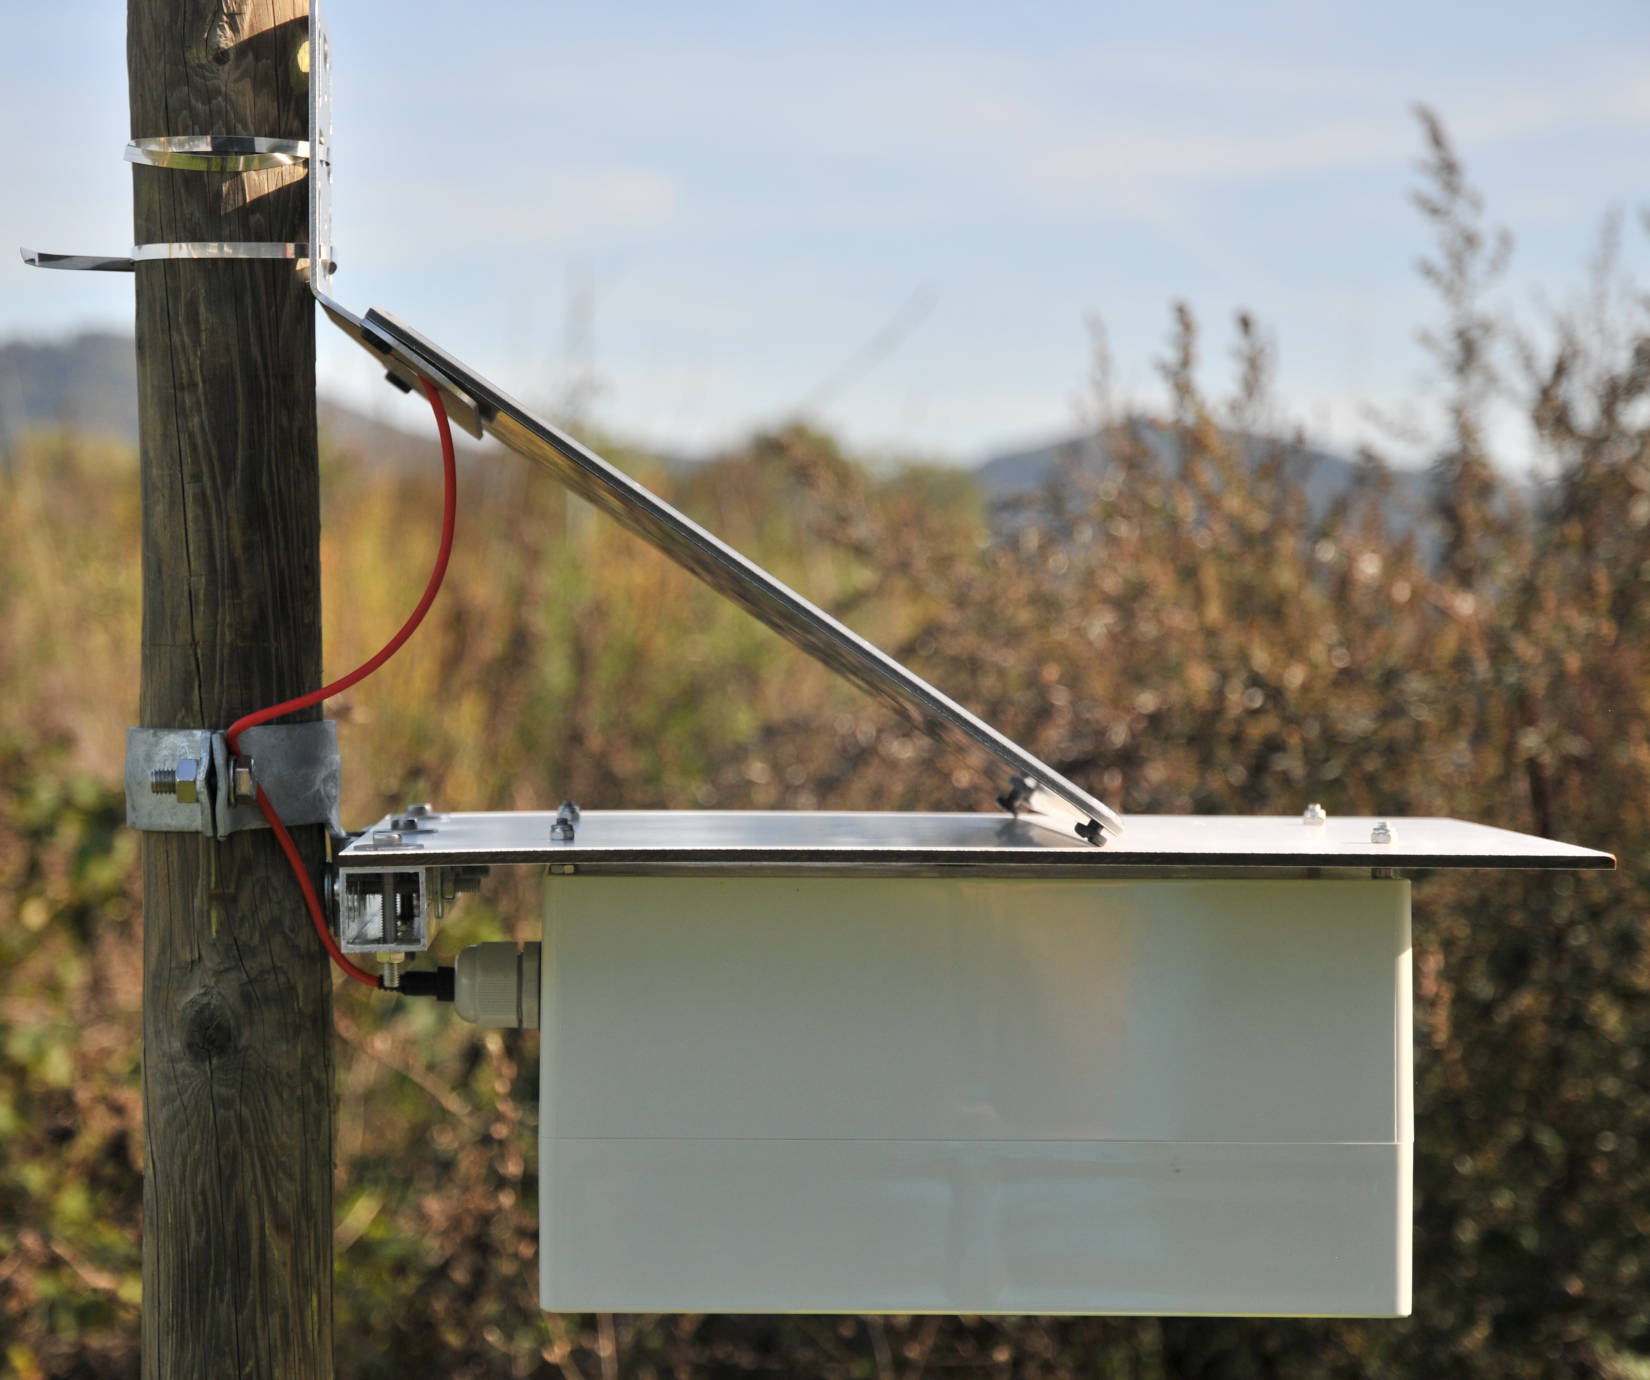
Mounting the solar panel
It is recommended to orient the camera trap and flower platform towards the south to optimize the efficiency of the solar panel. You can also use an app or a website to find the path of the sun at your location for a specific time of year. Check out this blog article for more information on how to estimate the potential generated power of your solar panel depending on your location and time of year.
There are many possible DIY solutions to mount the solar panel at the best angle for your location. In our case this is about 30° (southwestern Germany). In the following picture, we used two wooden wedges fixed with some double-sided tape.

If you want a prettier mounting solution, you can get the medium mounting bracket, which will fit perfectly for the 6V 9W Voltaic panel and allow more airflow above the enclosure to potentially keep it cooler during hot days.
If you are using the 500x280 mm platform, make sure that the distance between the camera (measured from the enclosure) and the flower platform surface is 40 cm. For the smaller 350x200 mm platform, the distance between camera and platform should be 28 cm. With these distances and platform sizes, the frame of the camera sensor in which insects are detected will be completely filled out by the platform. This will make sure that insects can not move in and out of the frame while walking on the platform, as the object tracker counts every insect coming back into the frame as new individual (new tracking ID).
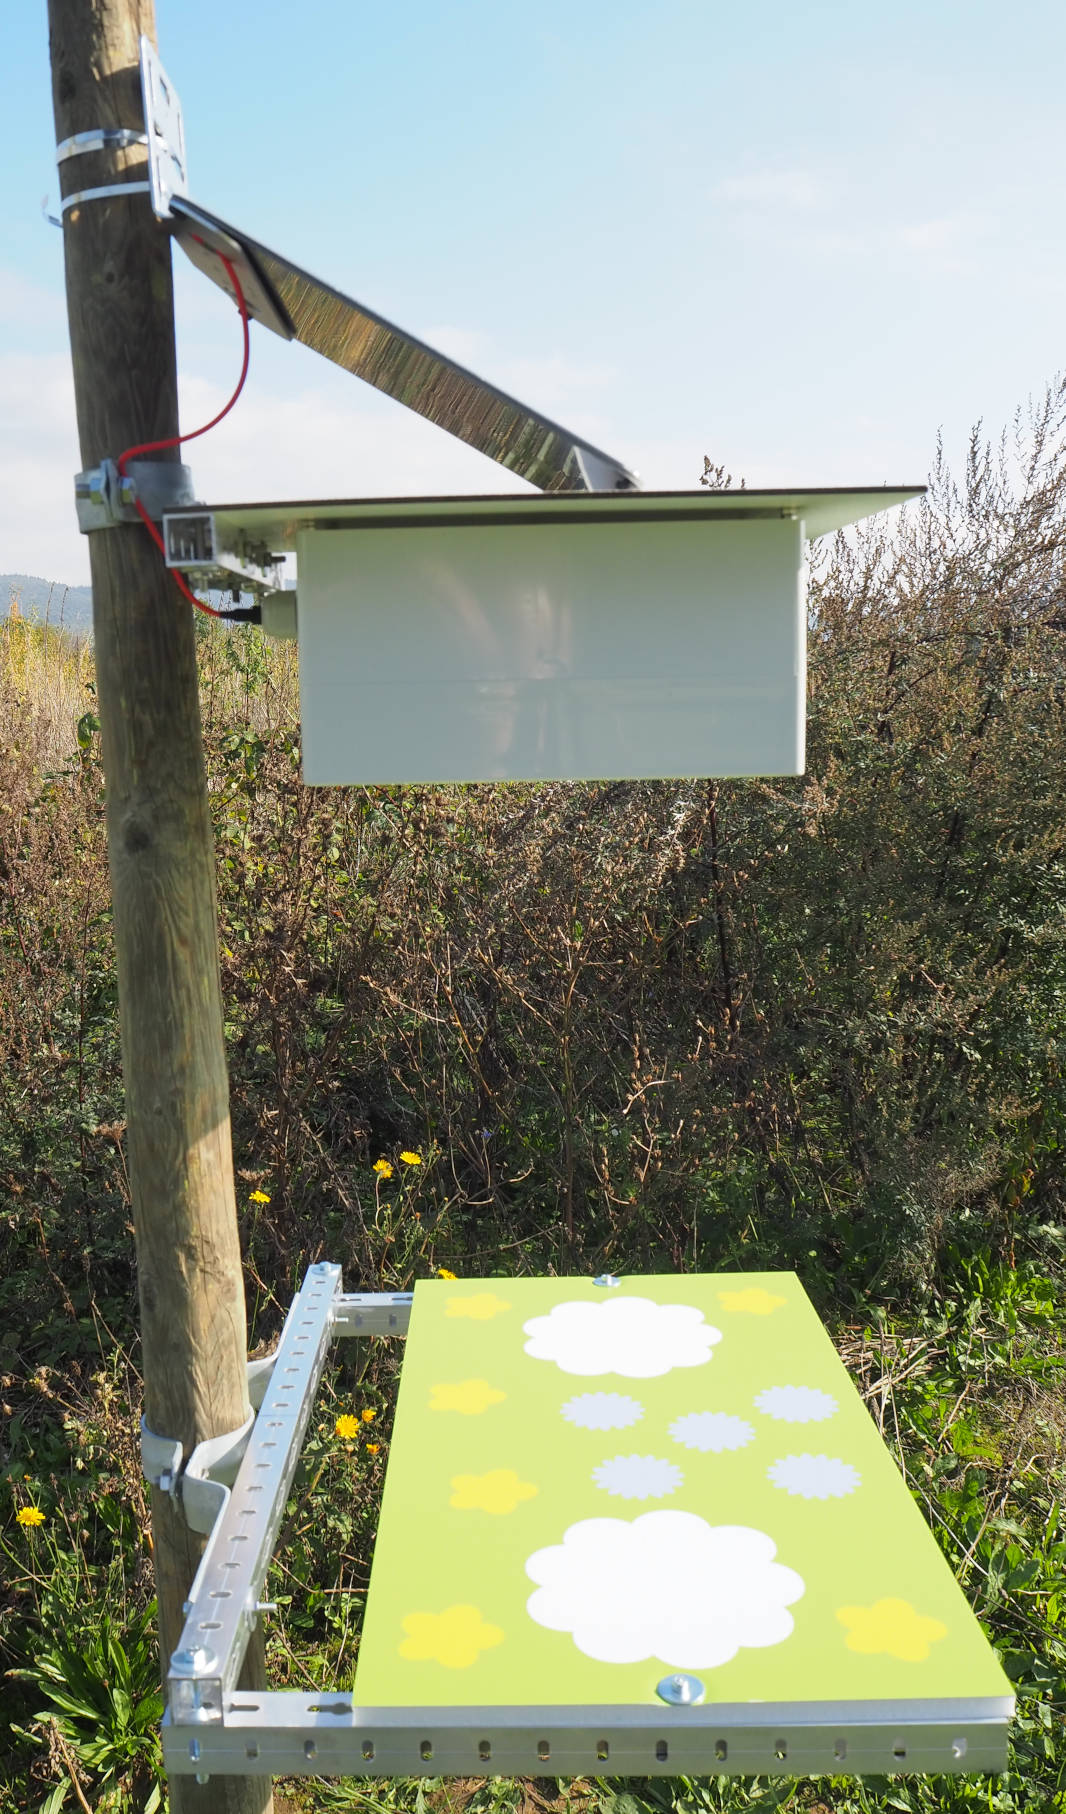
After that your Insect Detect DIY camera trap for automated insect monitoring is finished! Let's move on to the next steps and set up the Software.
