Preparing the Enclosure
What you will need
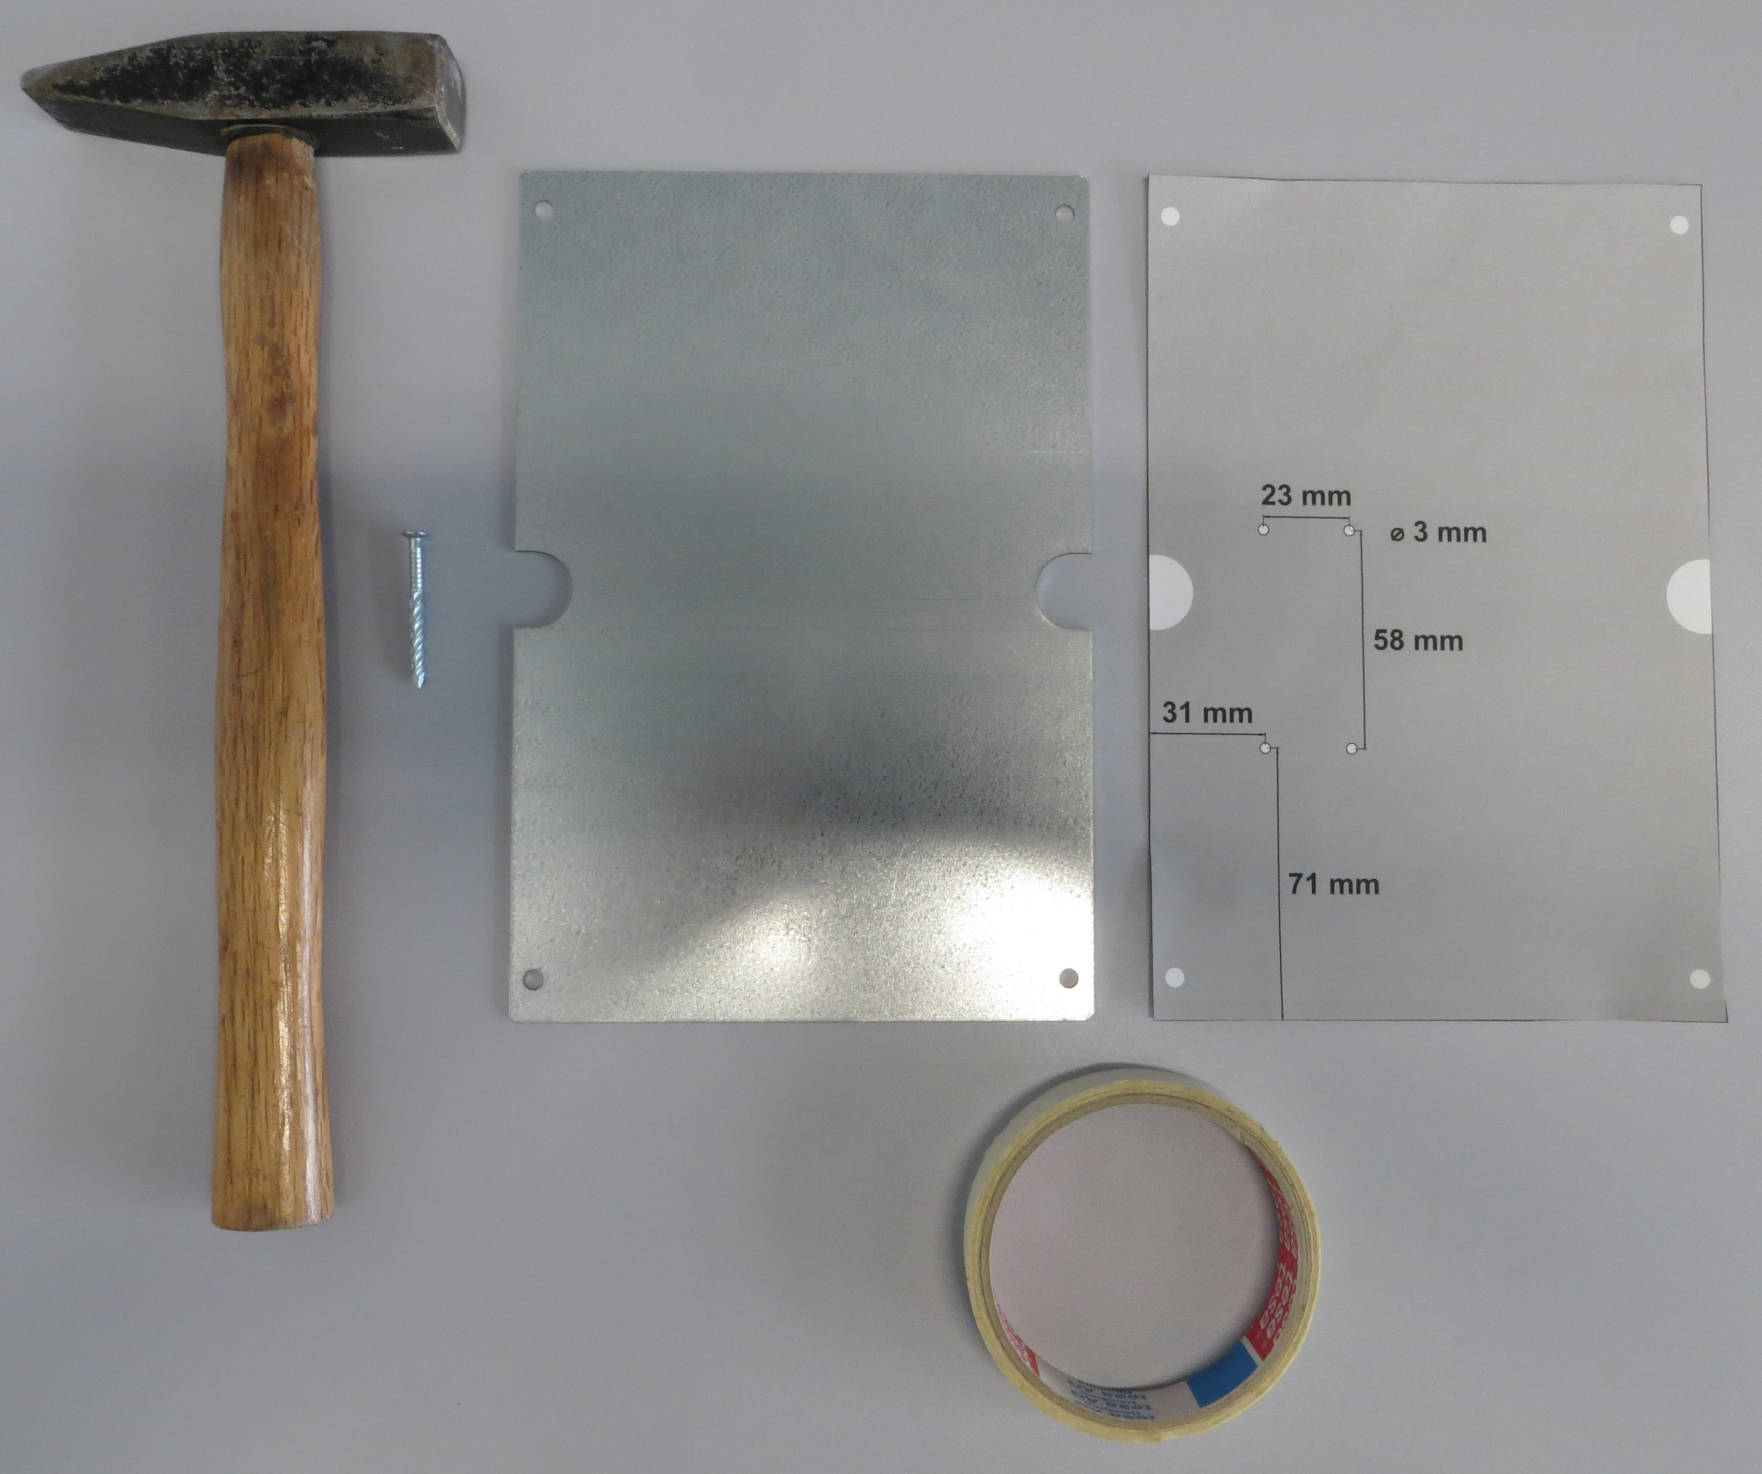
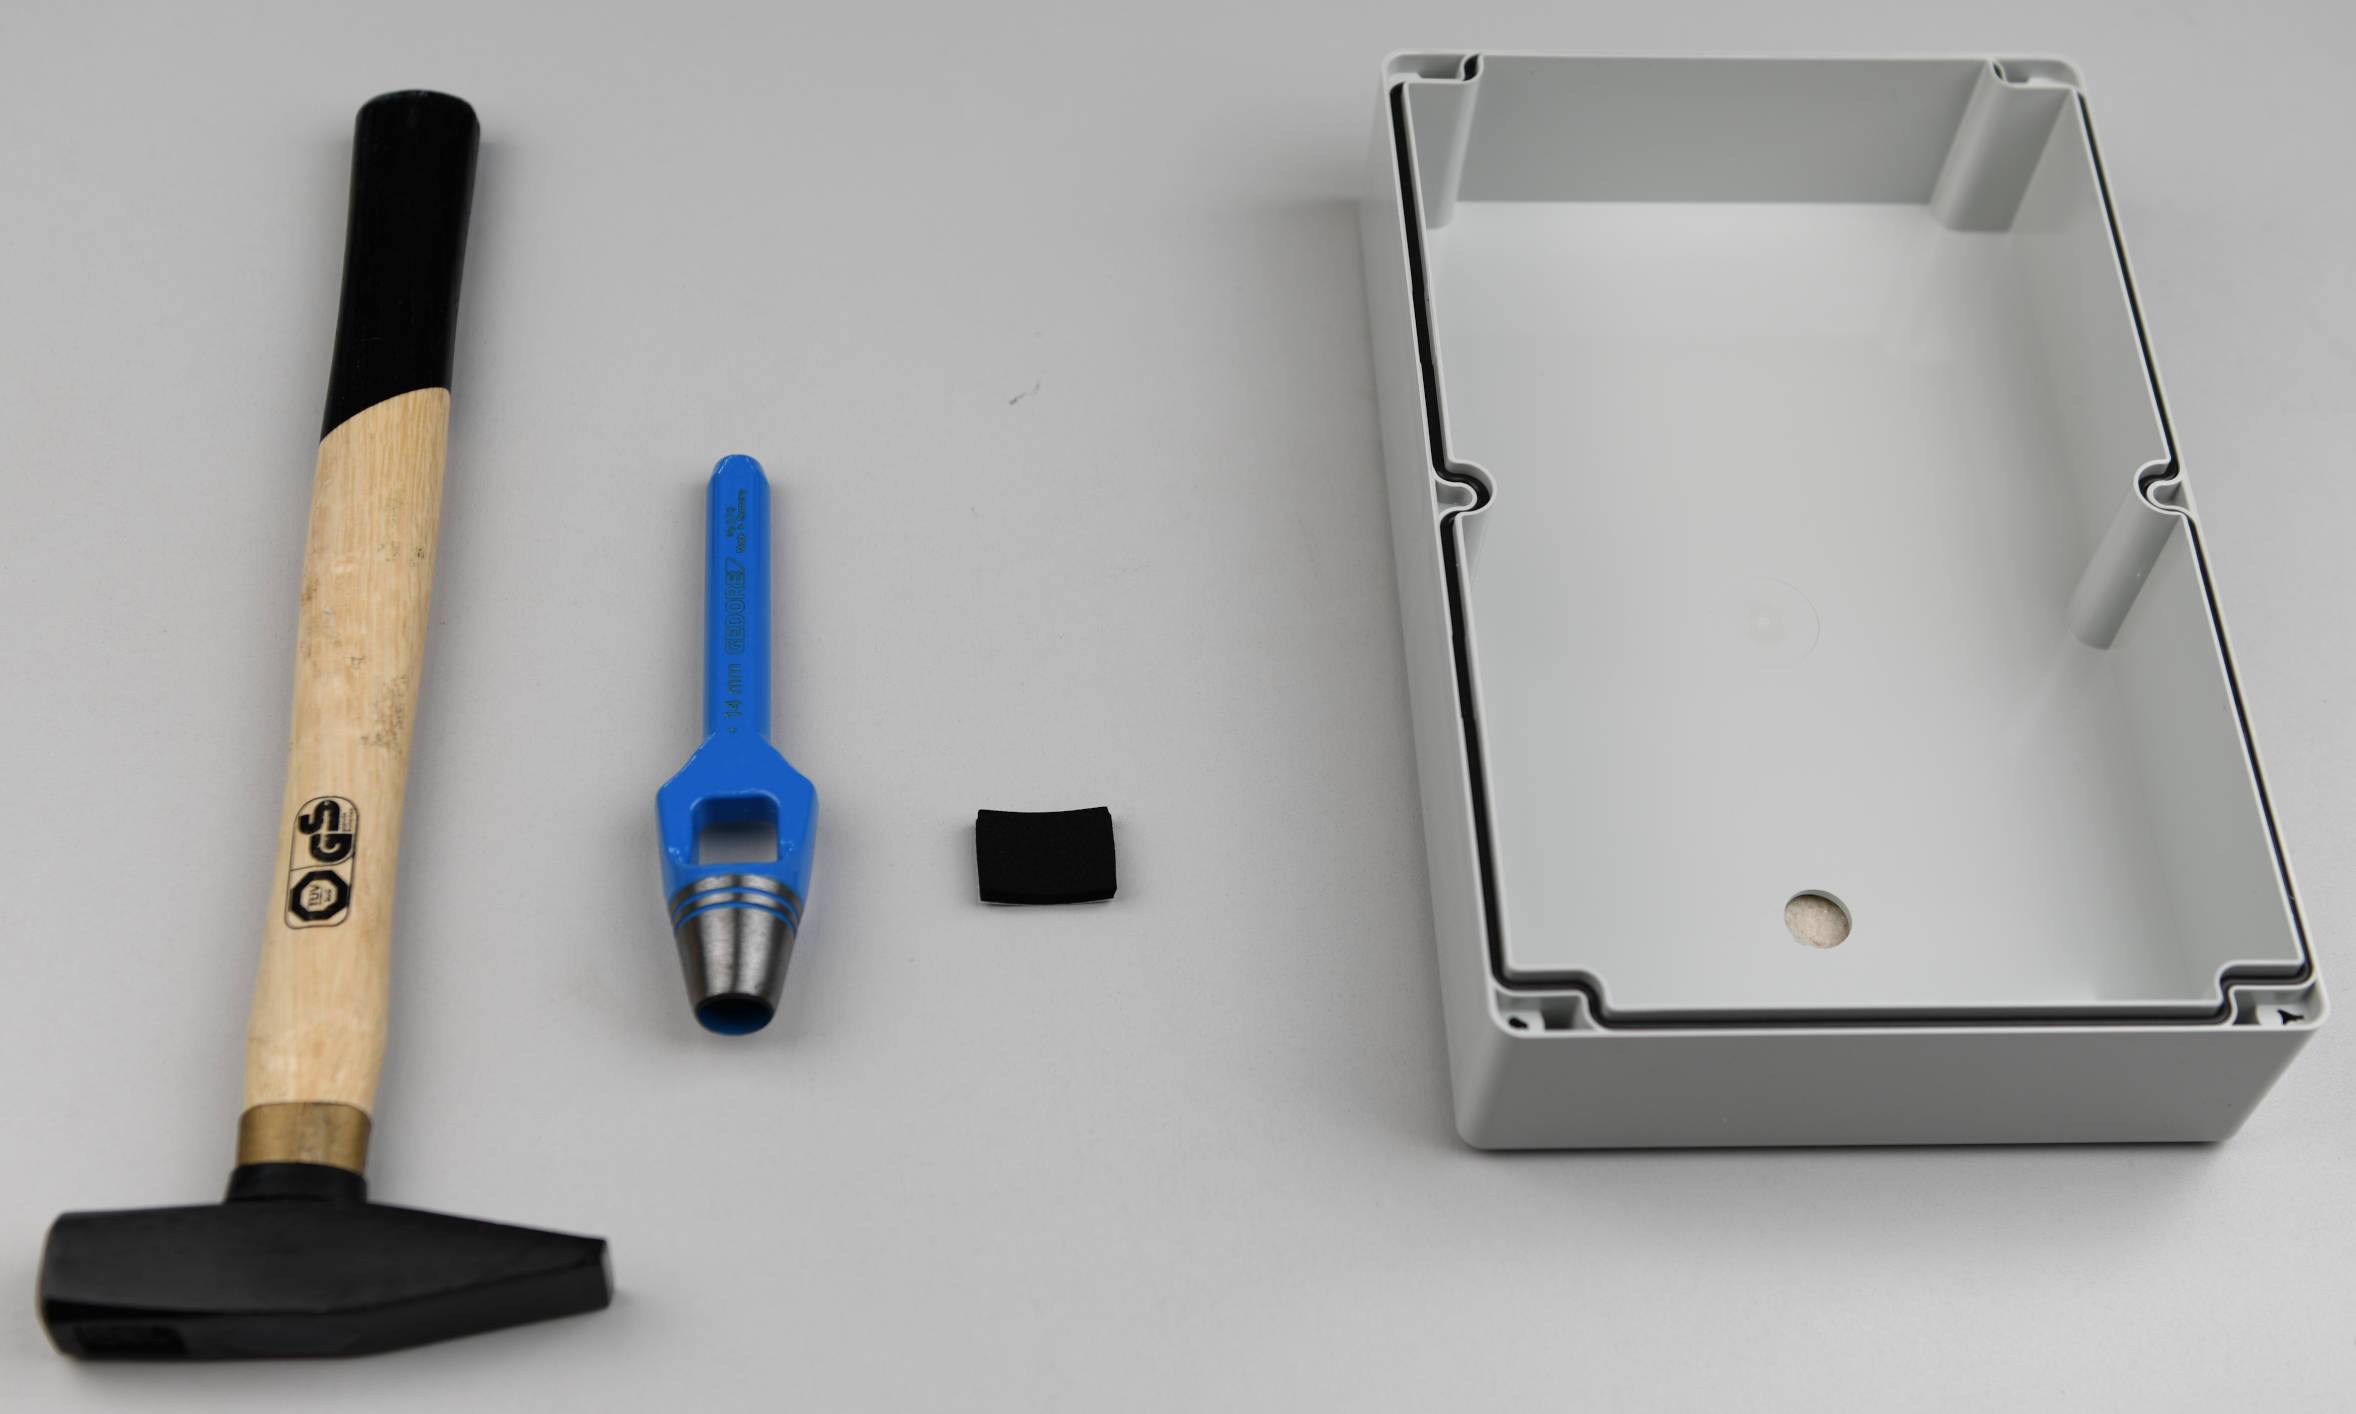
Required tools & components
- Drilling machine
- Metal Drill Bit 3 mm
- Metal Step Drill Bit (with 14 and 20 mm step)
- Crepe tape
- Sealing Glue
- Scissors
- 14 mm Hole Punch
- Hammer
- Fibox TM 1625 Mounting Plate
- Fibox PC 162513 Enclosure
- Cable Gland + Locknut PG 13.5
- Acrylic Glas (2 mm) 40x40 mm
- EPDM Sealing Strip 20x5 mm
Drilling the mounting plate holes
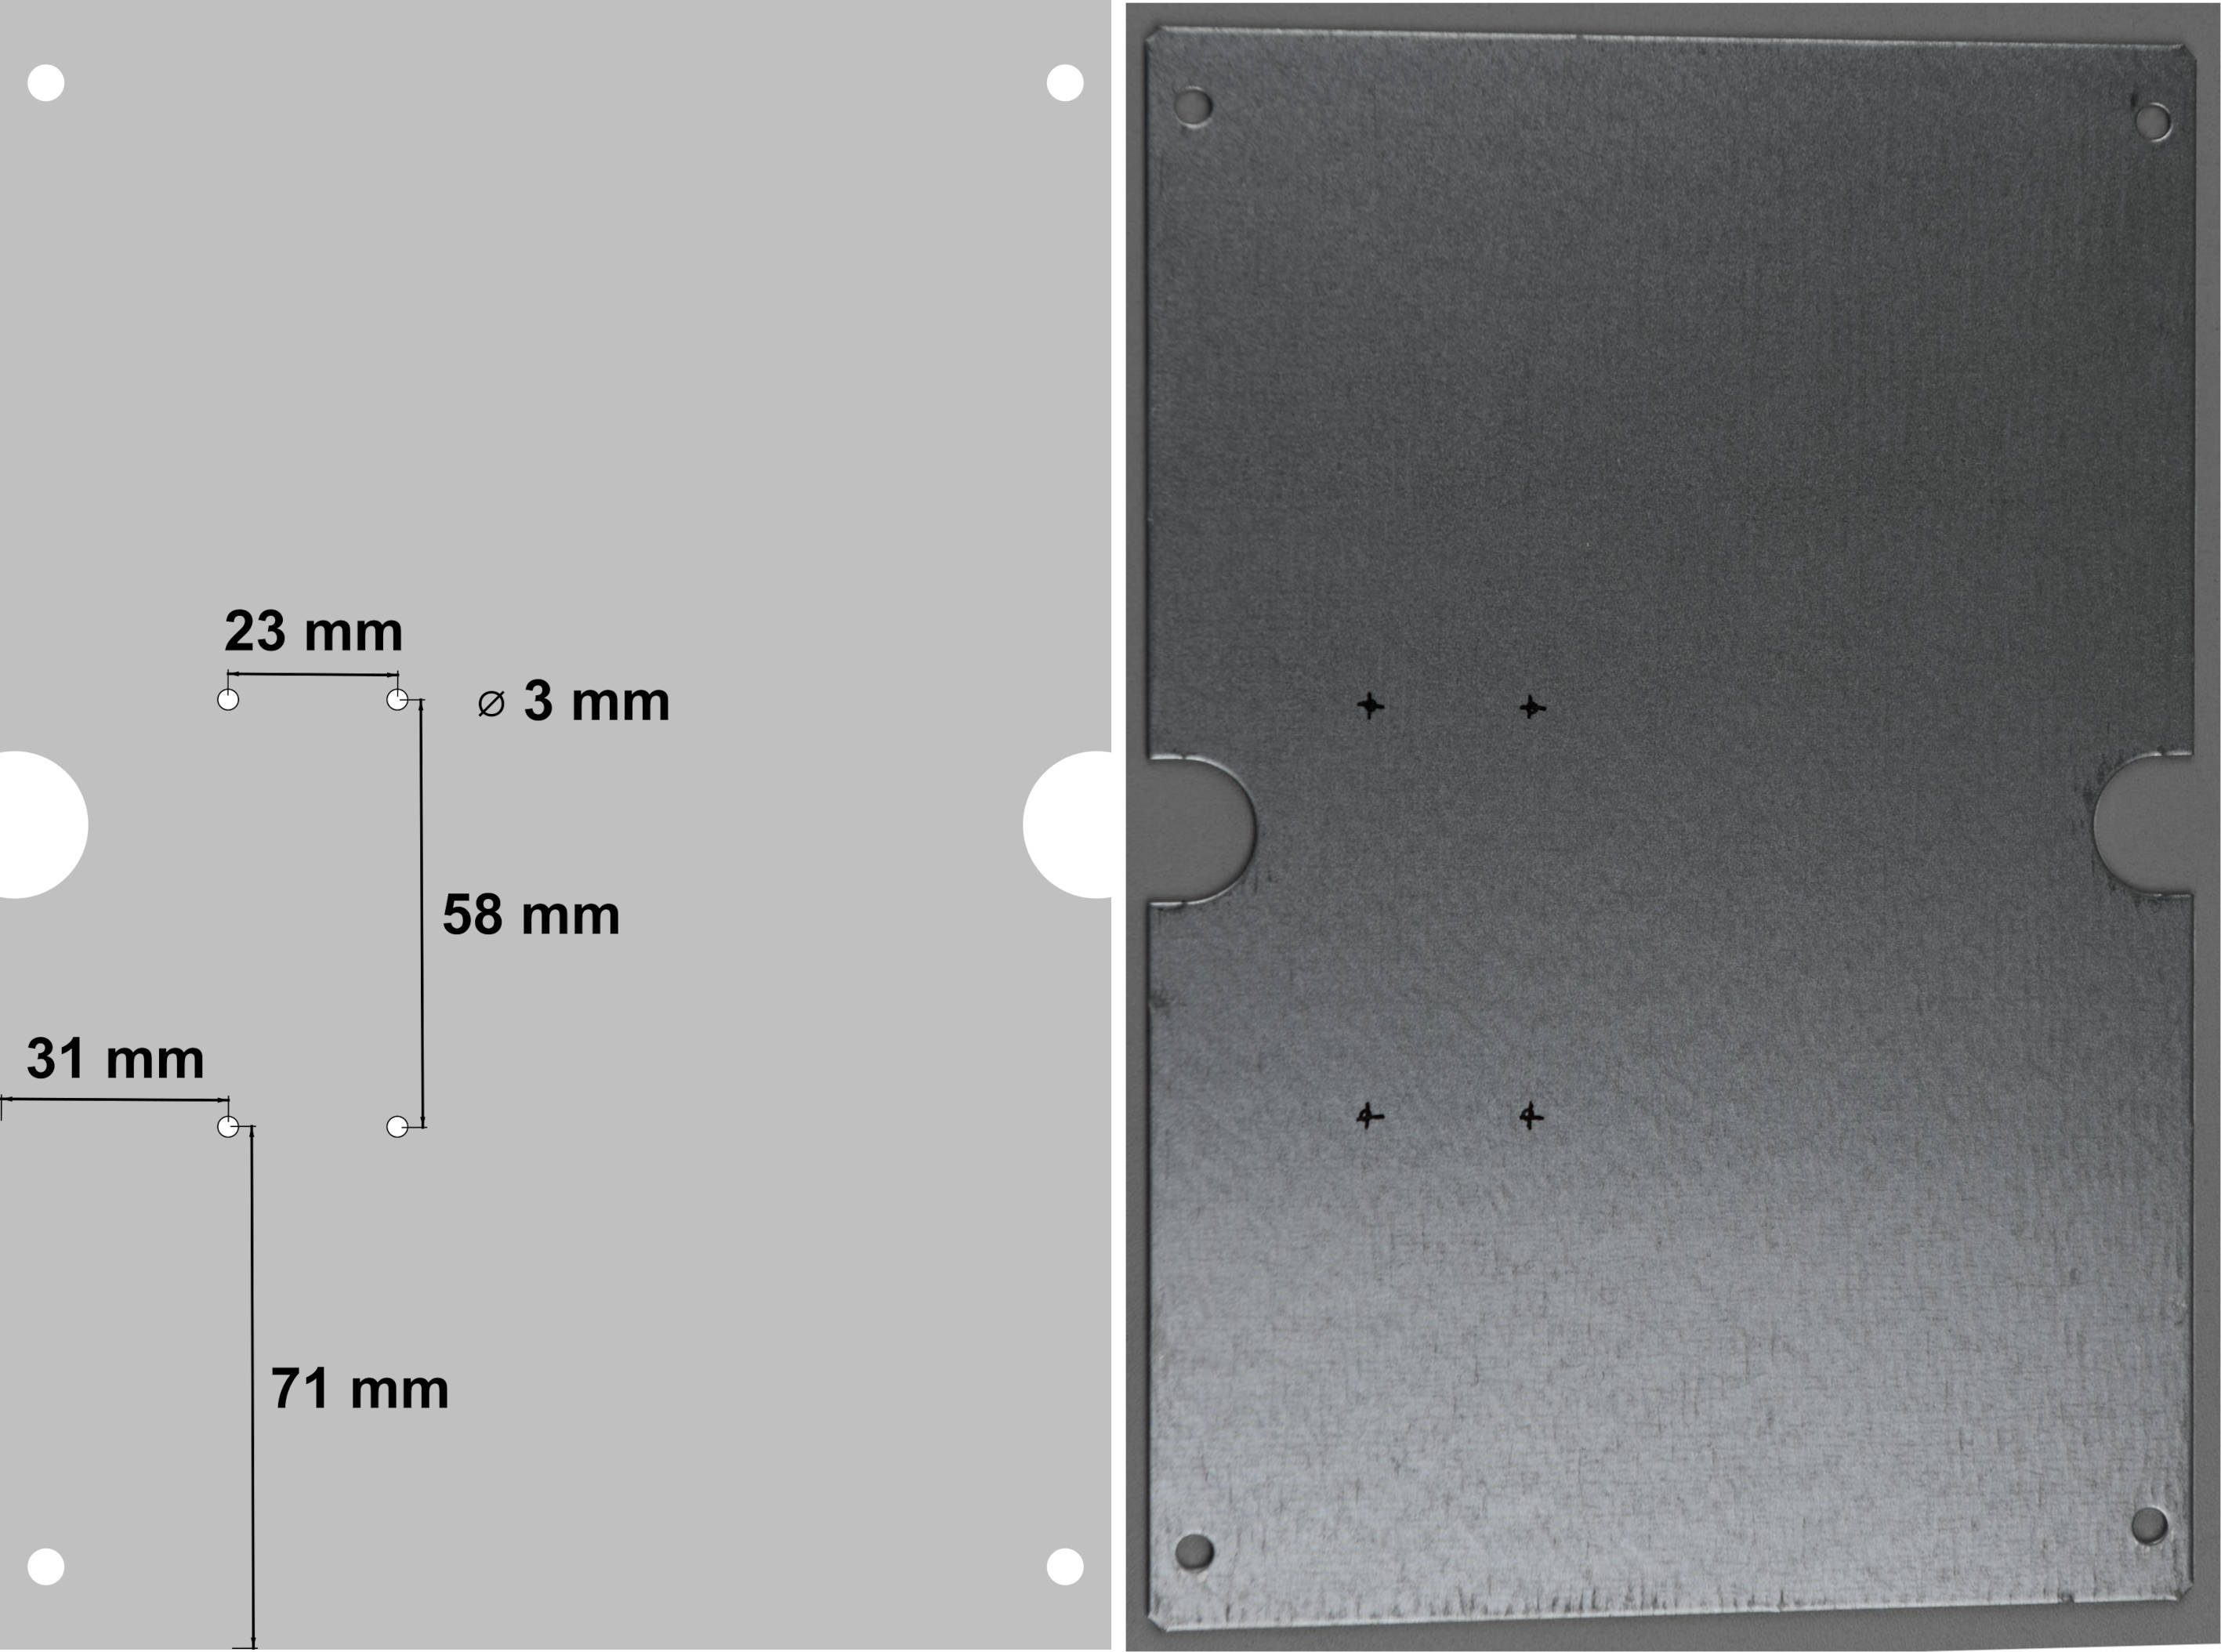
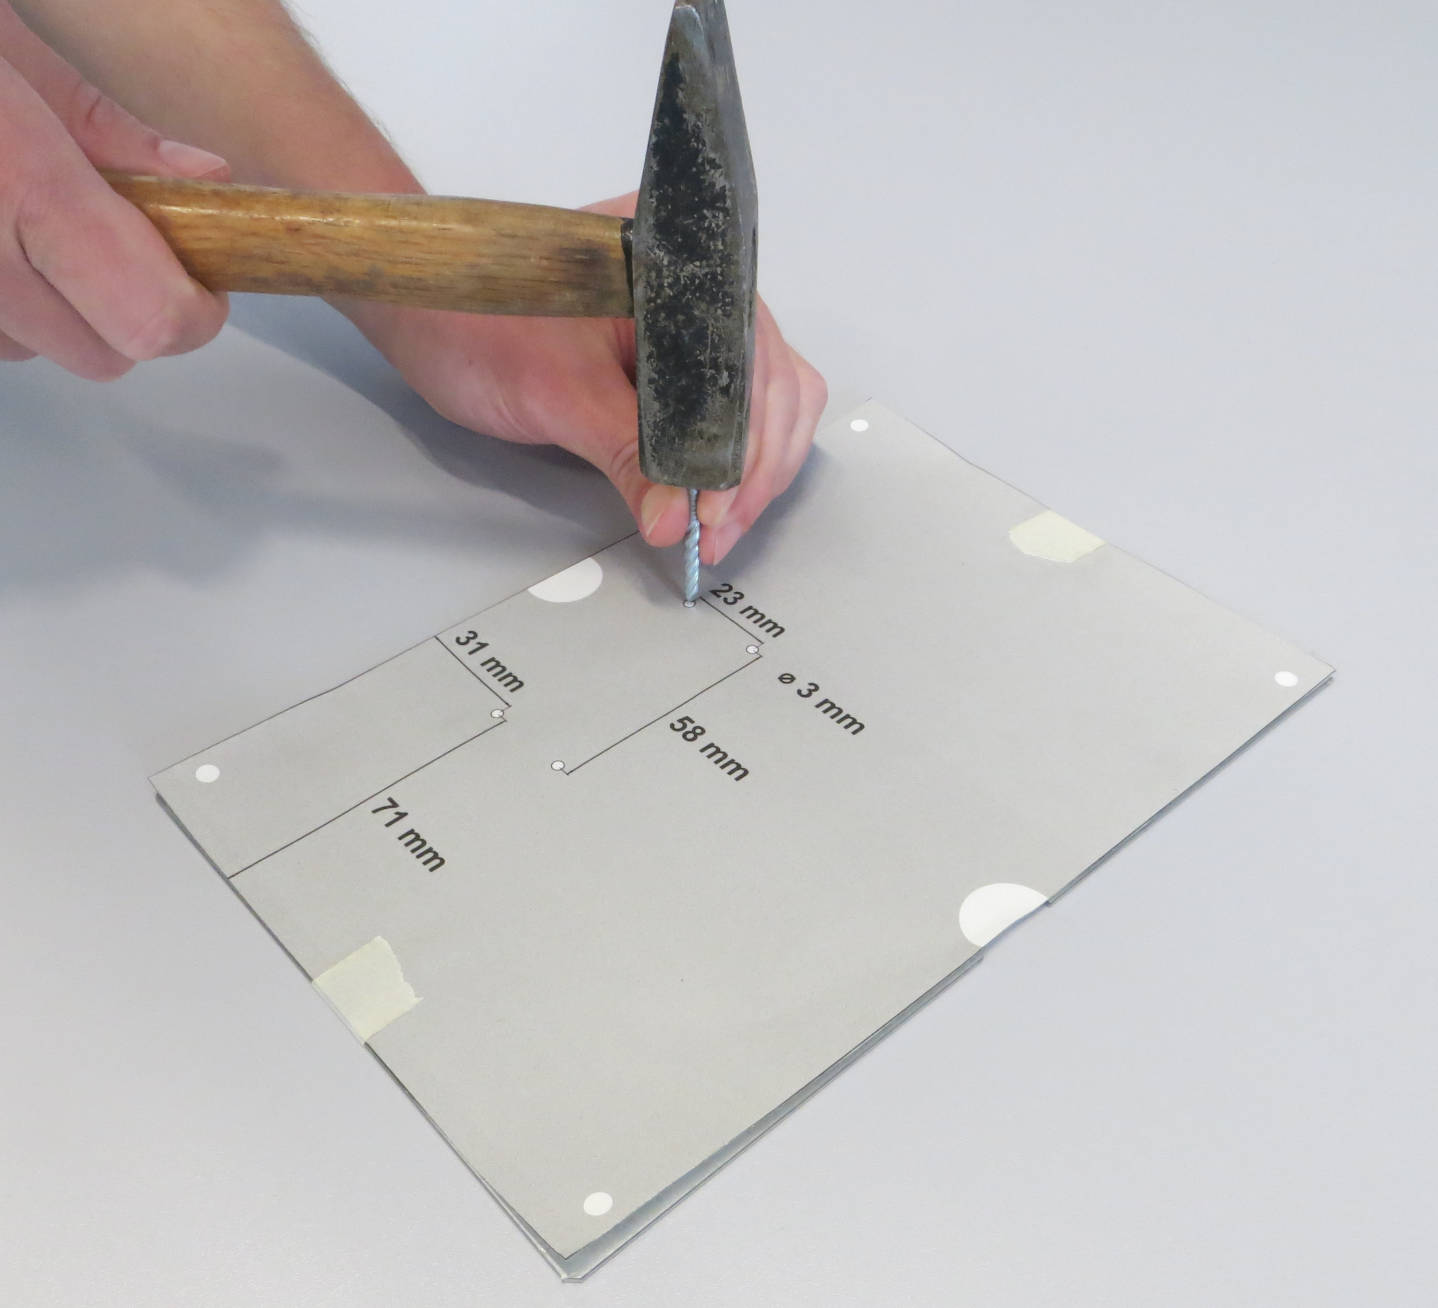
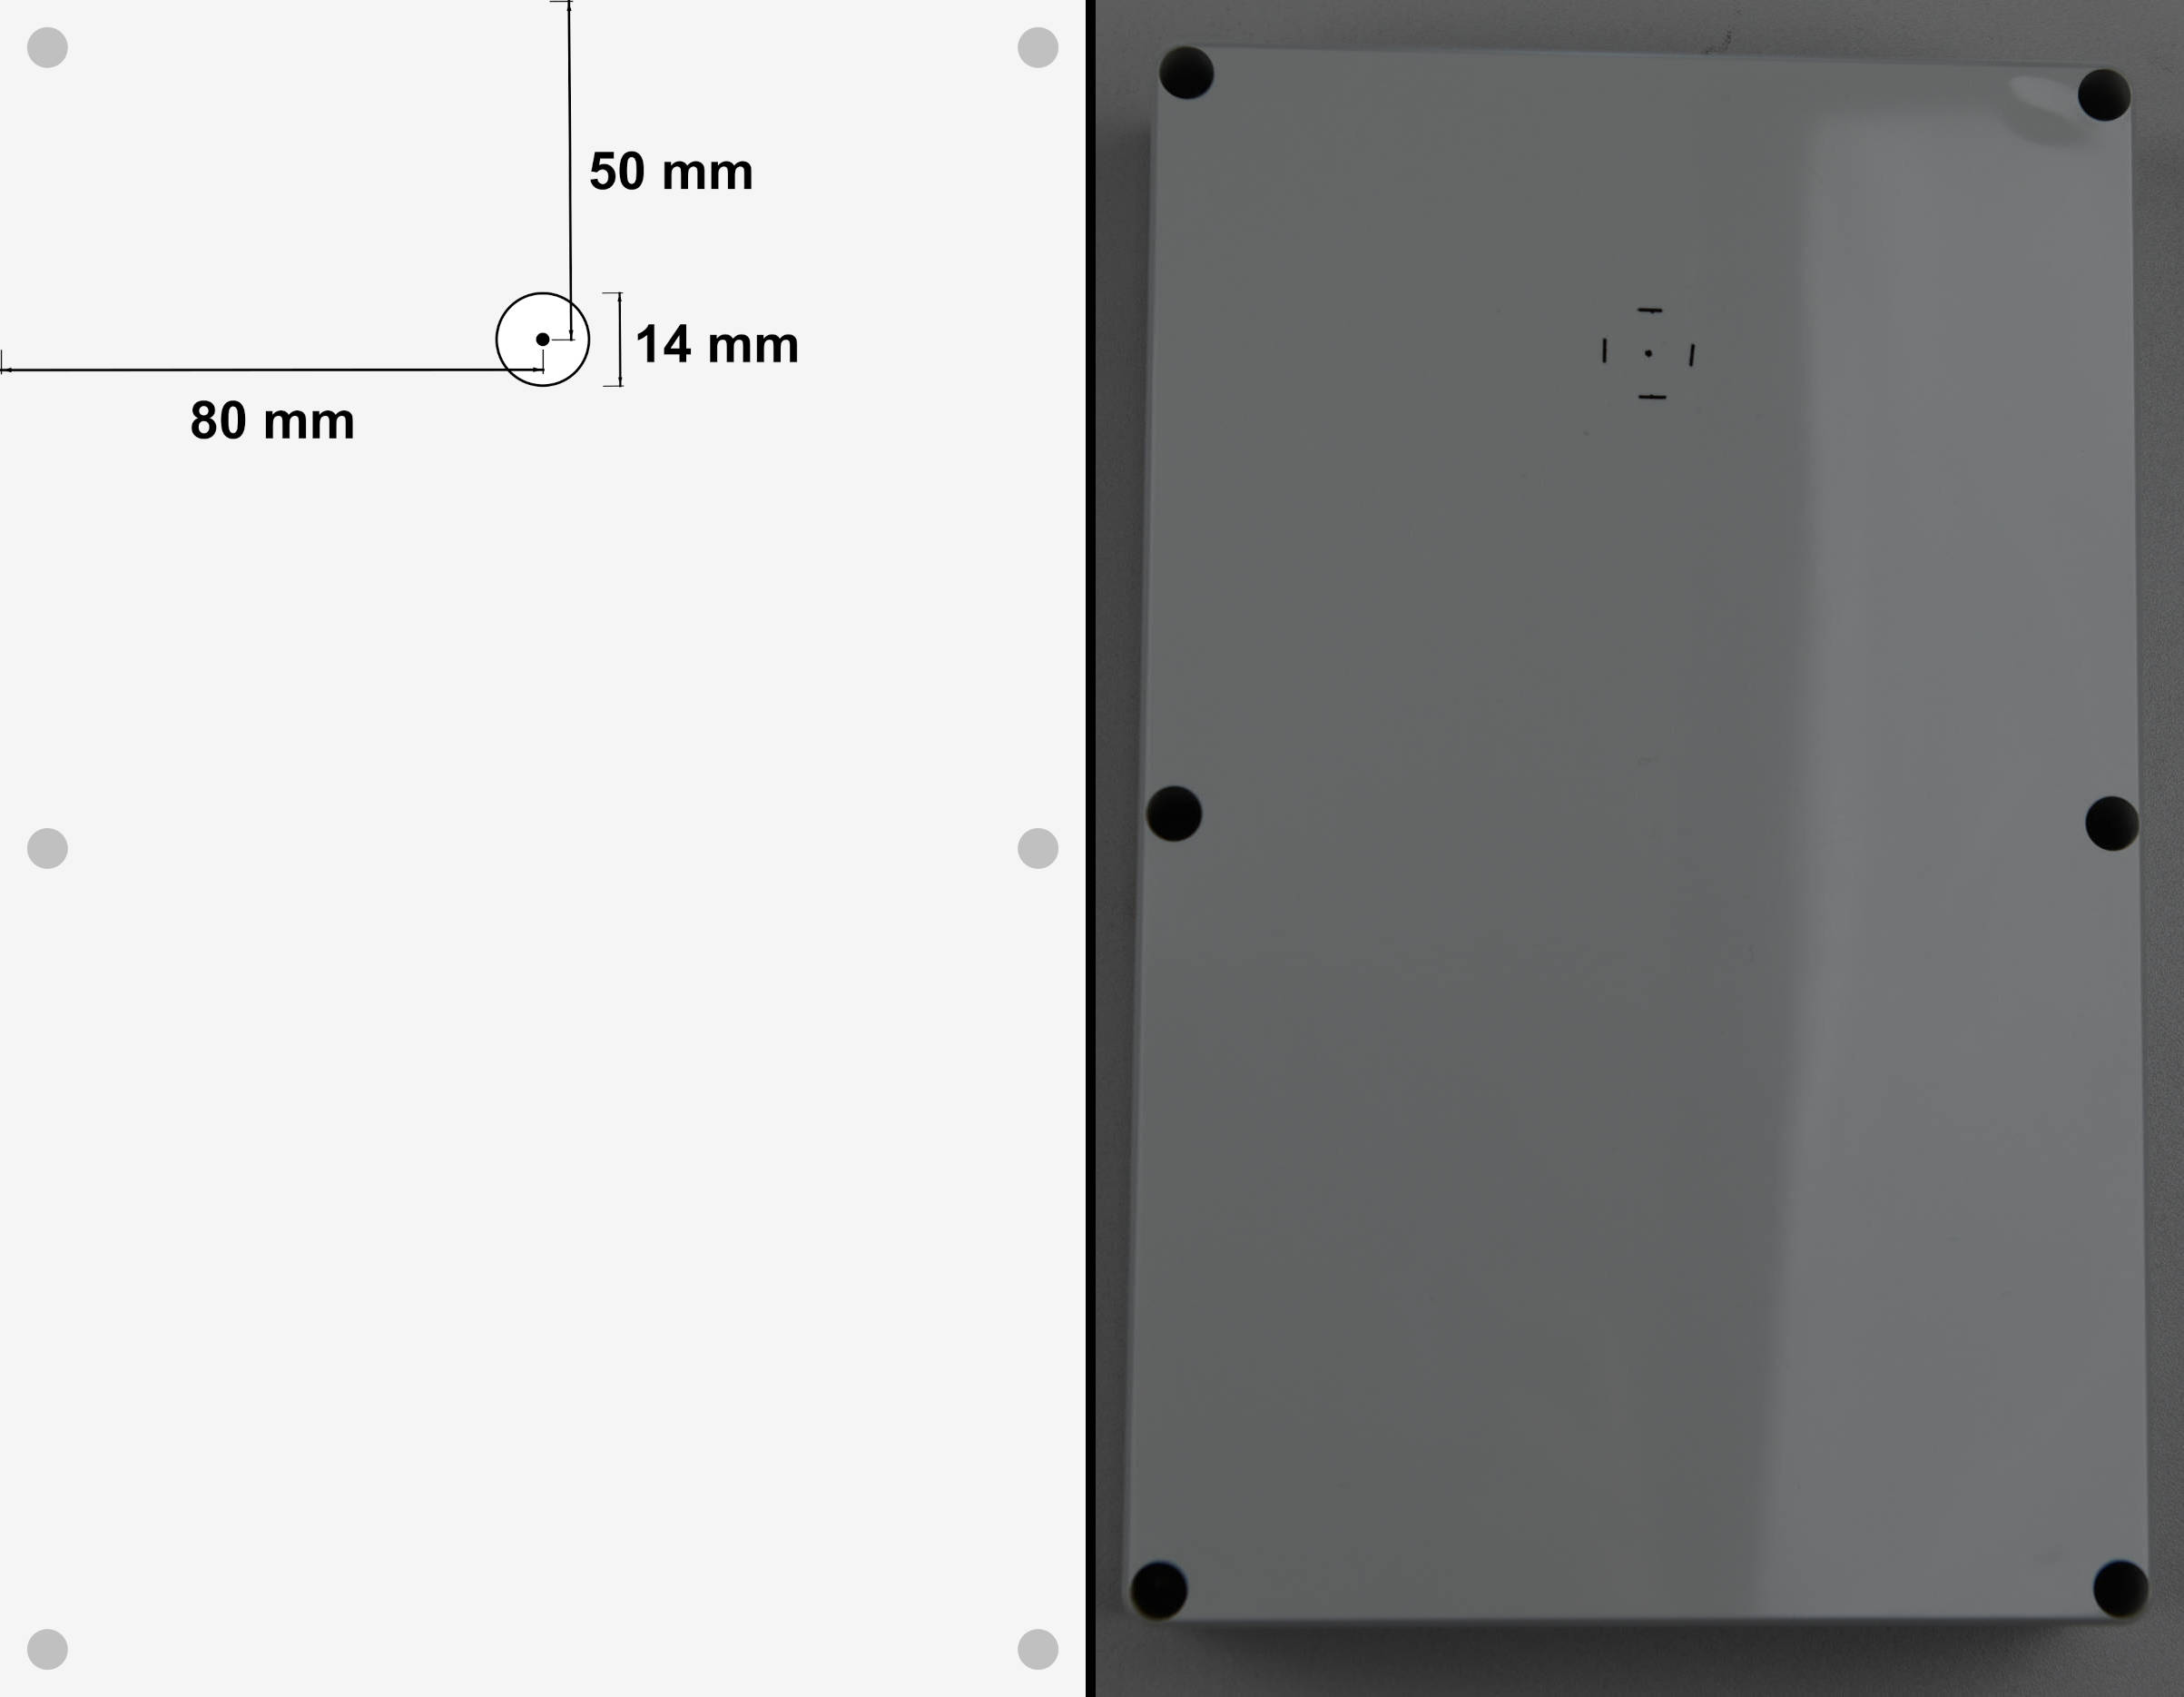
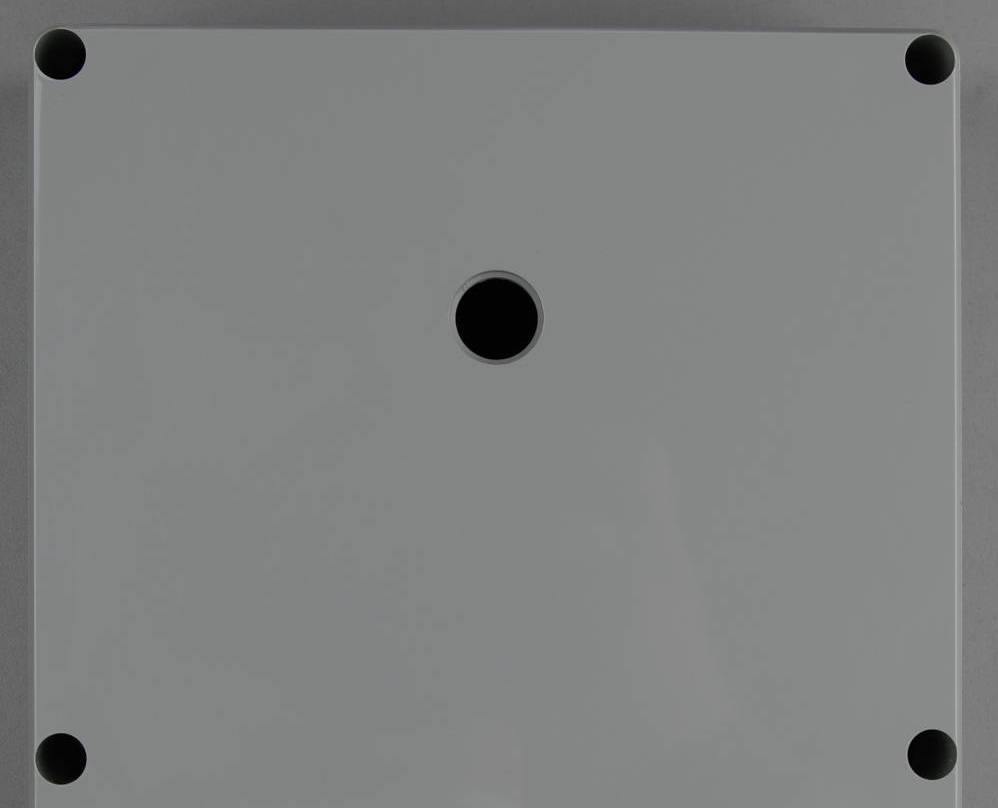
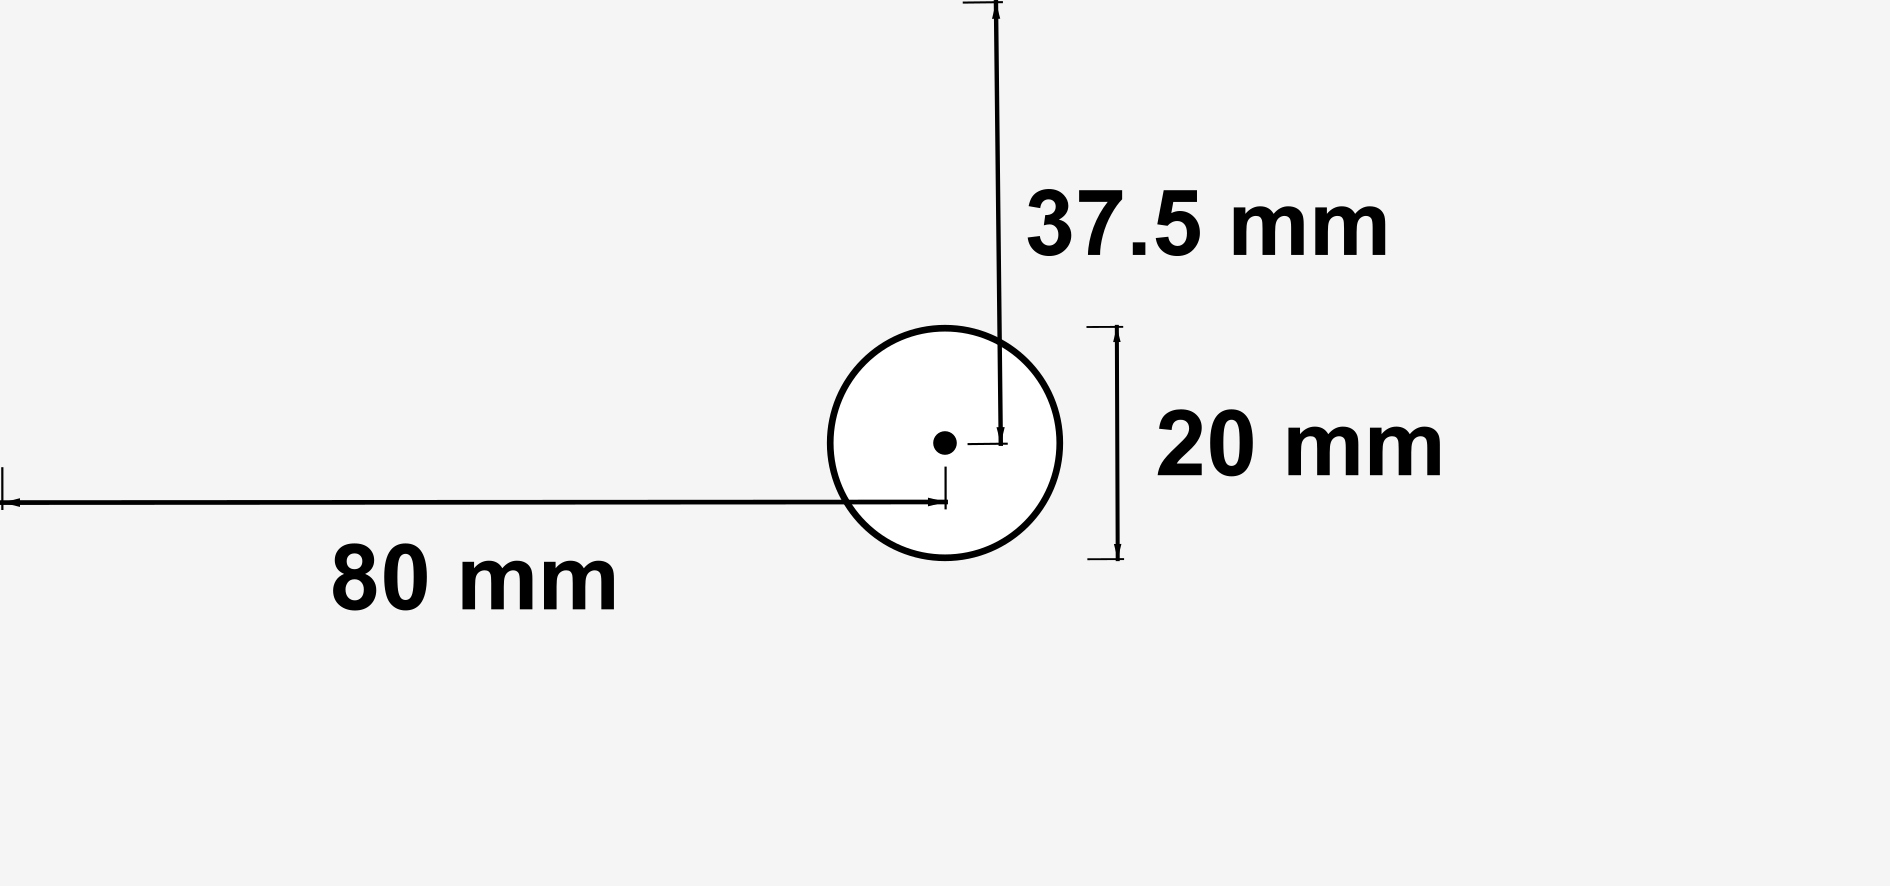
You could start by marking the four holes where the Raspberry Pi Zero 2 W and the PiJuice Zero will be fixed with the spacer bolts. Instead of measuring and marking the drilling holes, you can print the provided drill template (original size) and attach it to the mounting plate. Use a strong nail and hammer to mark the drilling positions. This will also help to align the drill bit when placing it on the otherwise smooth surface of the plate.
One hard hit with the hammer will slightly puncture the mounting plate at the correct positions for drilling the holes.
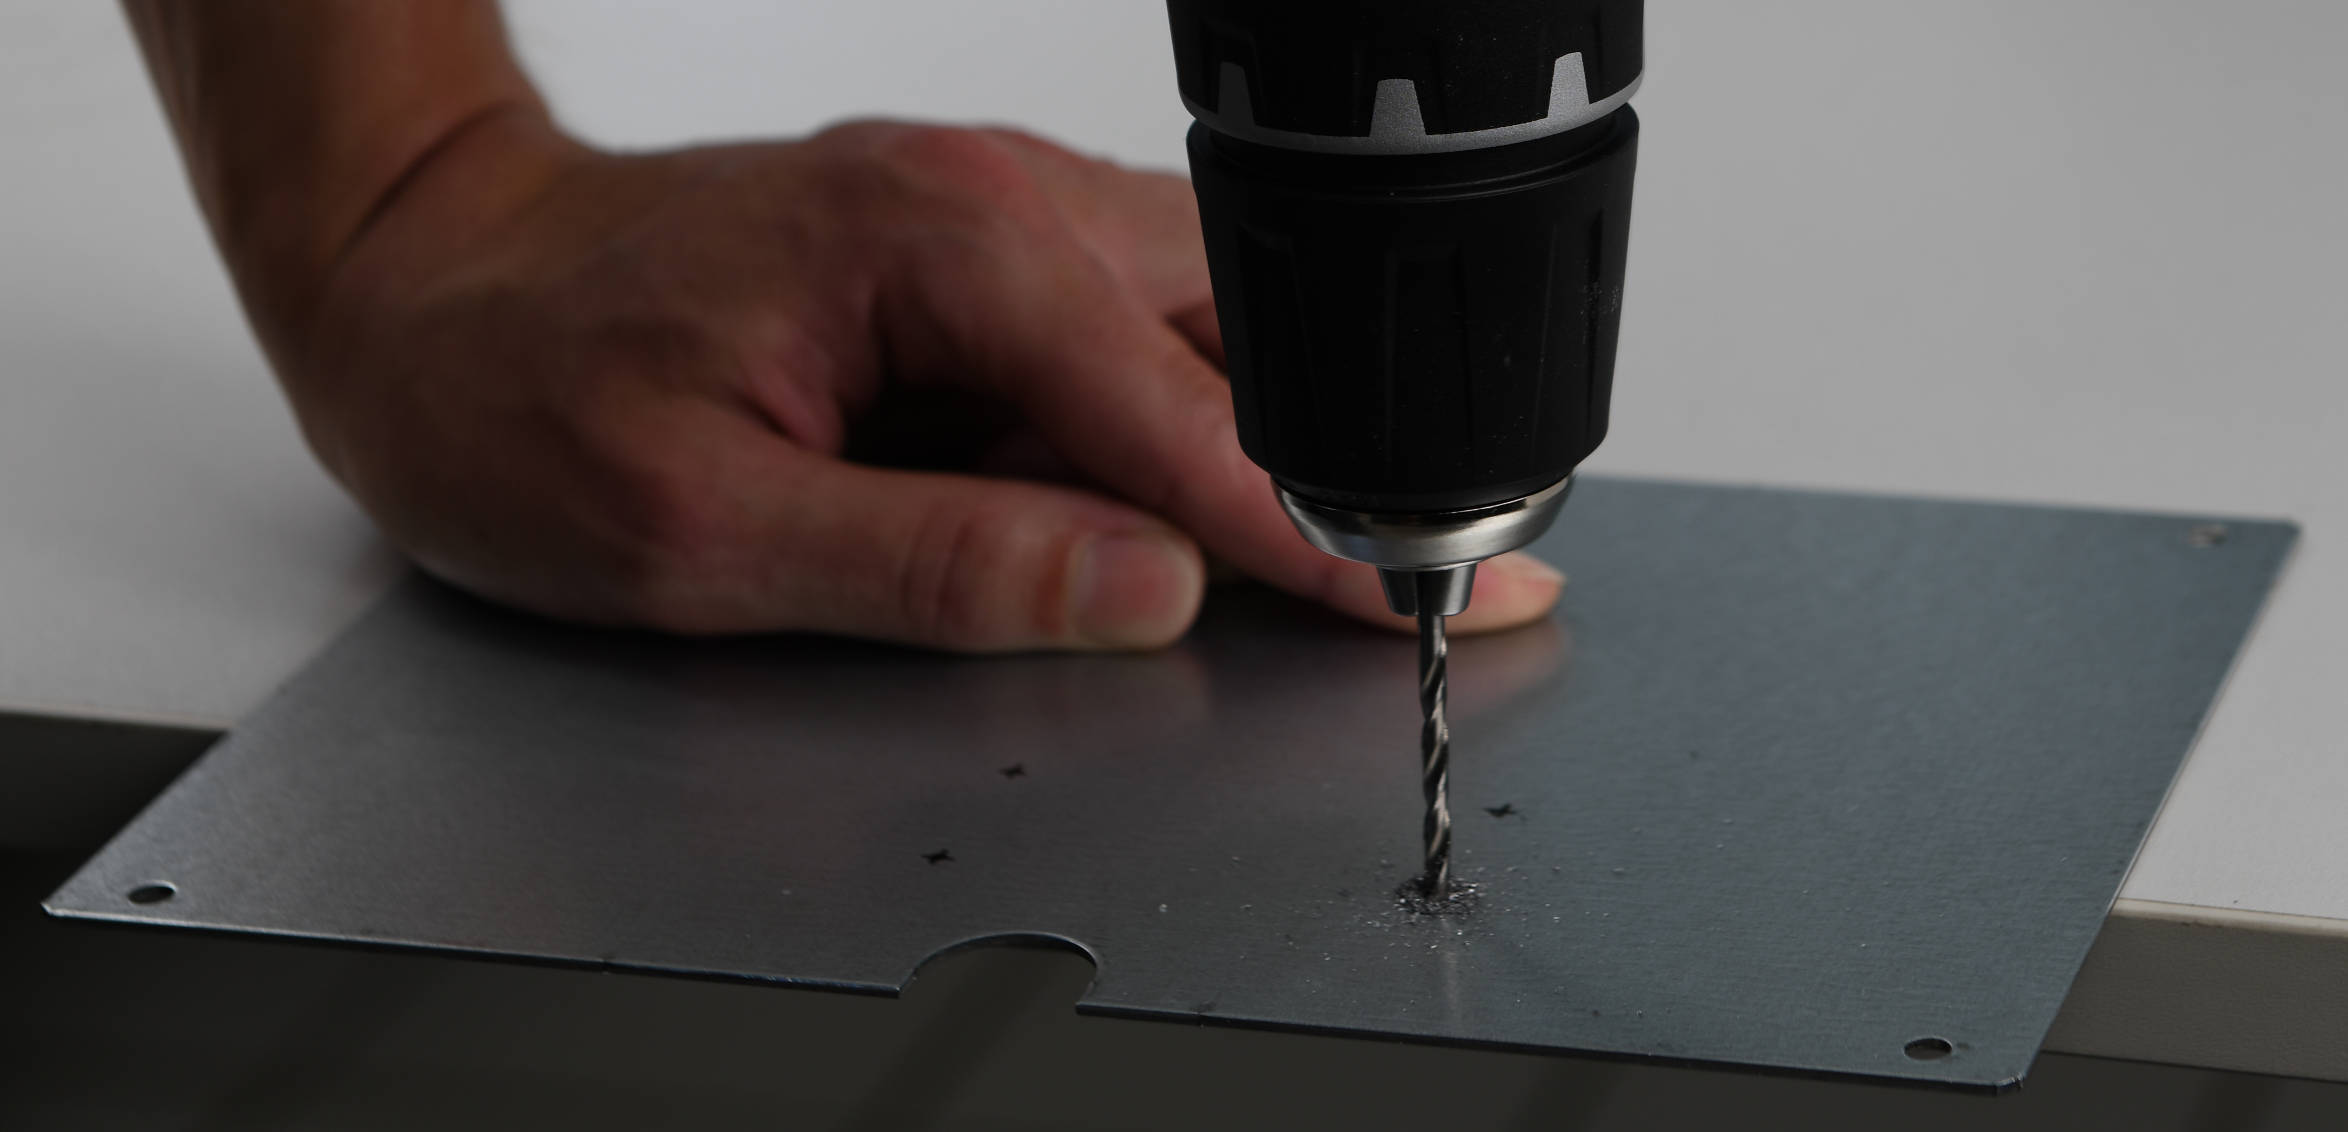
In the next step we will drill the holes with a 3 mm metal drill bit. It is recommended to drill rather slow to avoid overheating of the drill bit.
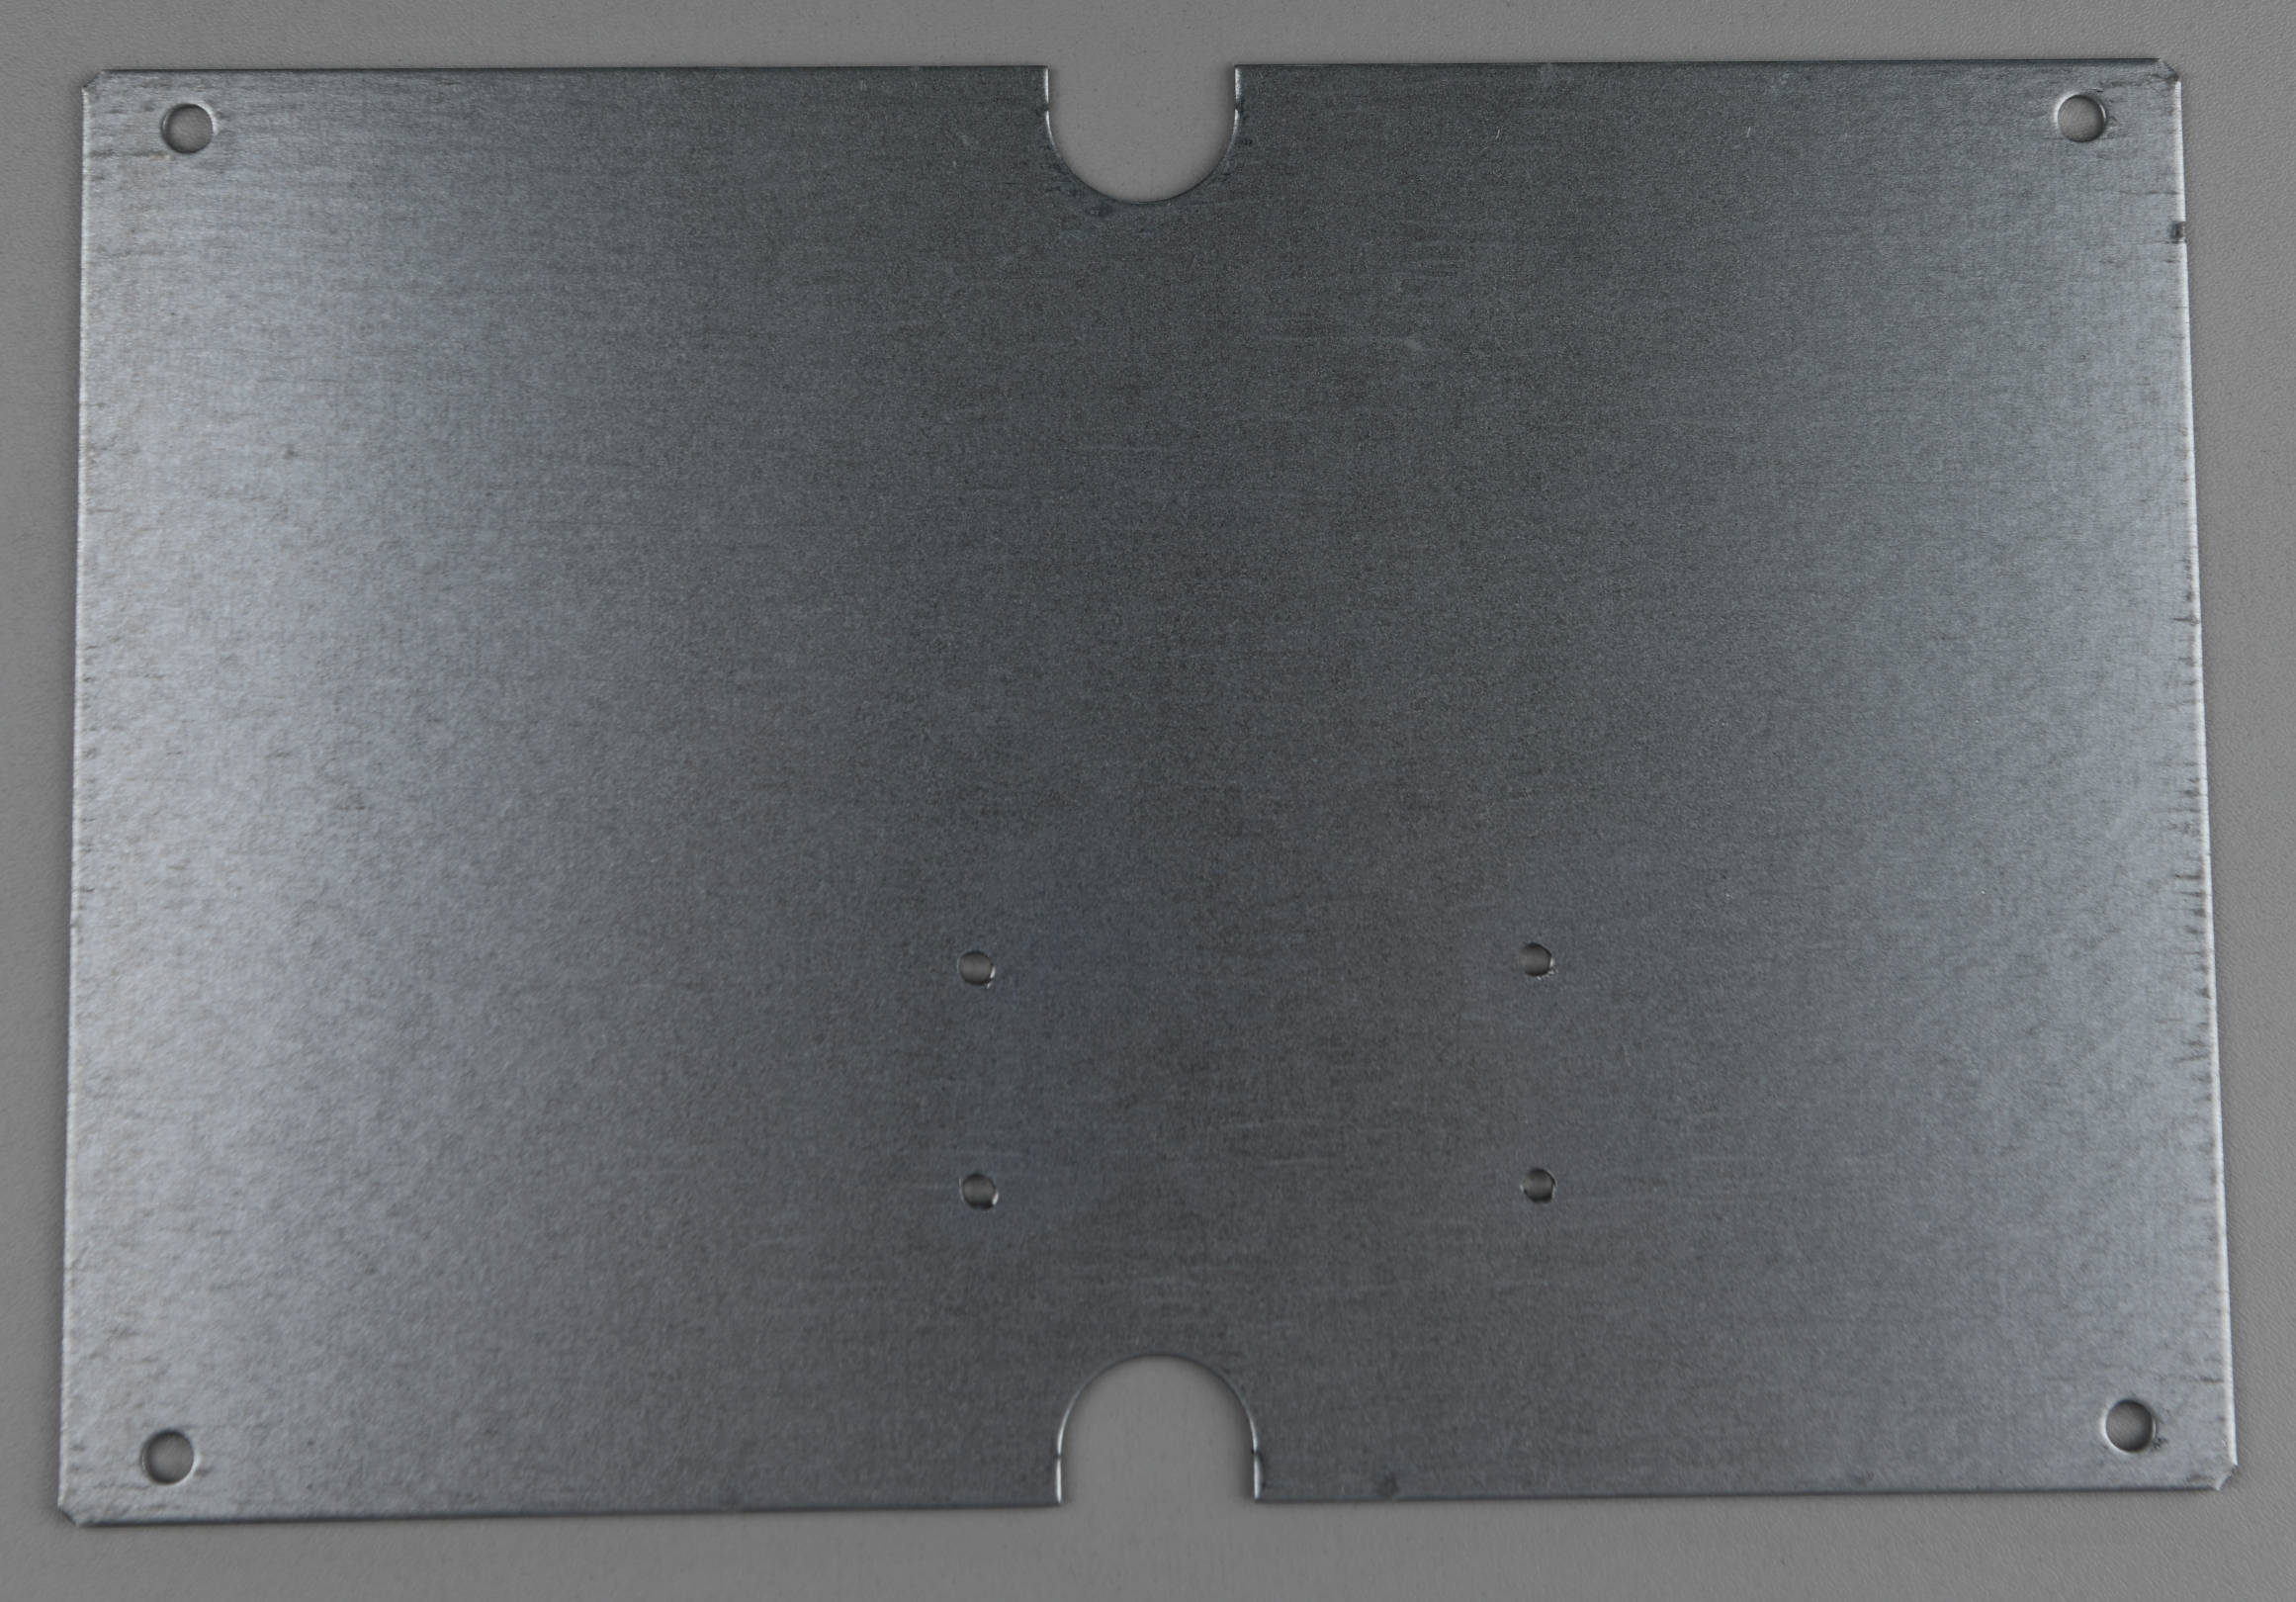
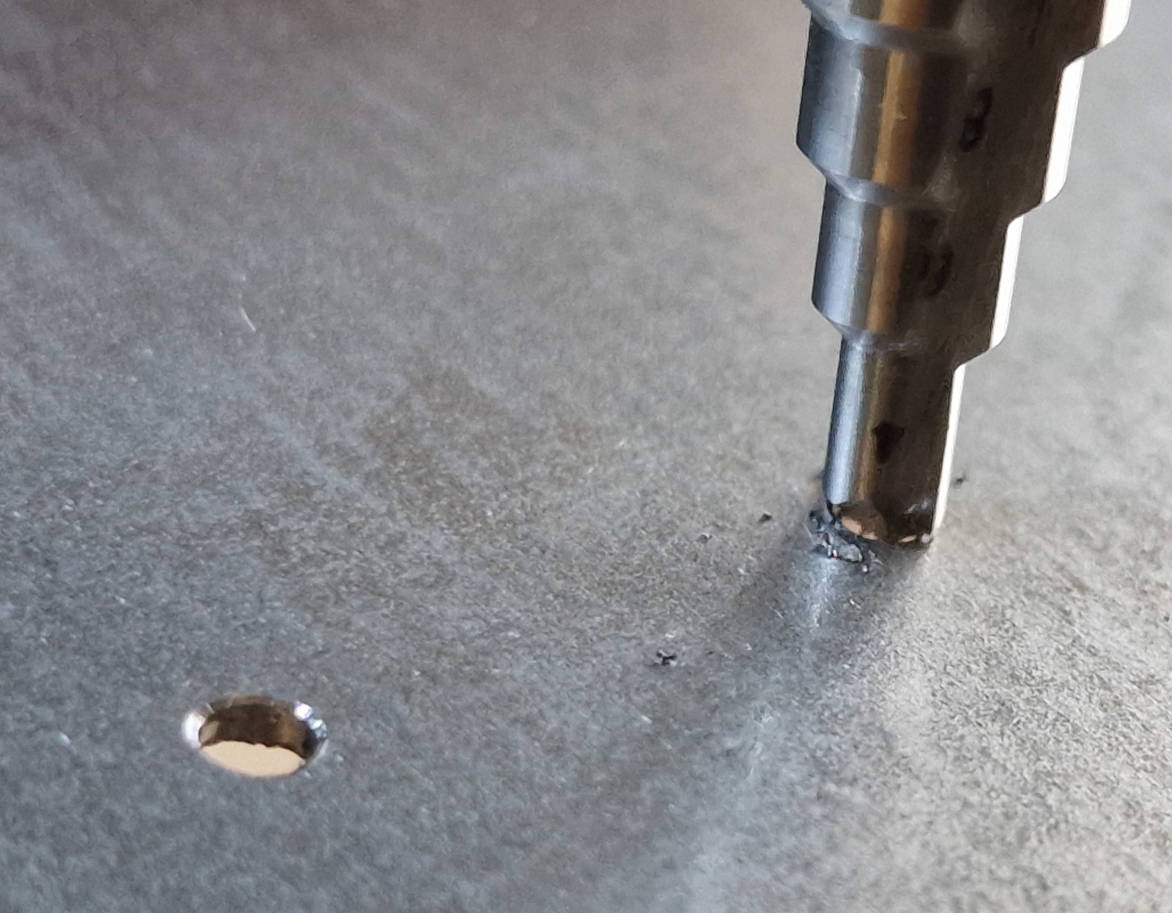
After the holes are drilled, you might notice sharp edges (burrs) around them. We are going to deburr the holes with the step drill bit on both sides of the mounting plate. Be careful to not apply too much pressure!
Drilling the enclosure holes
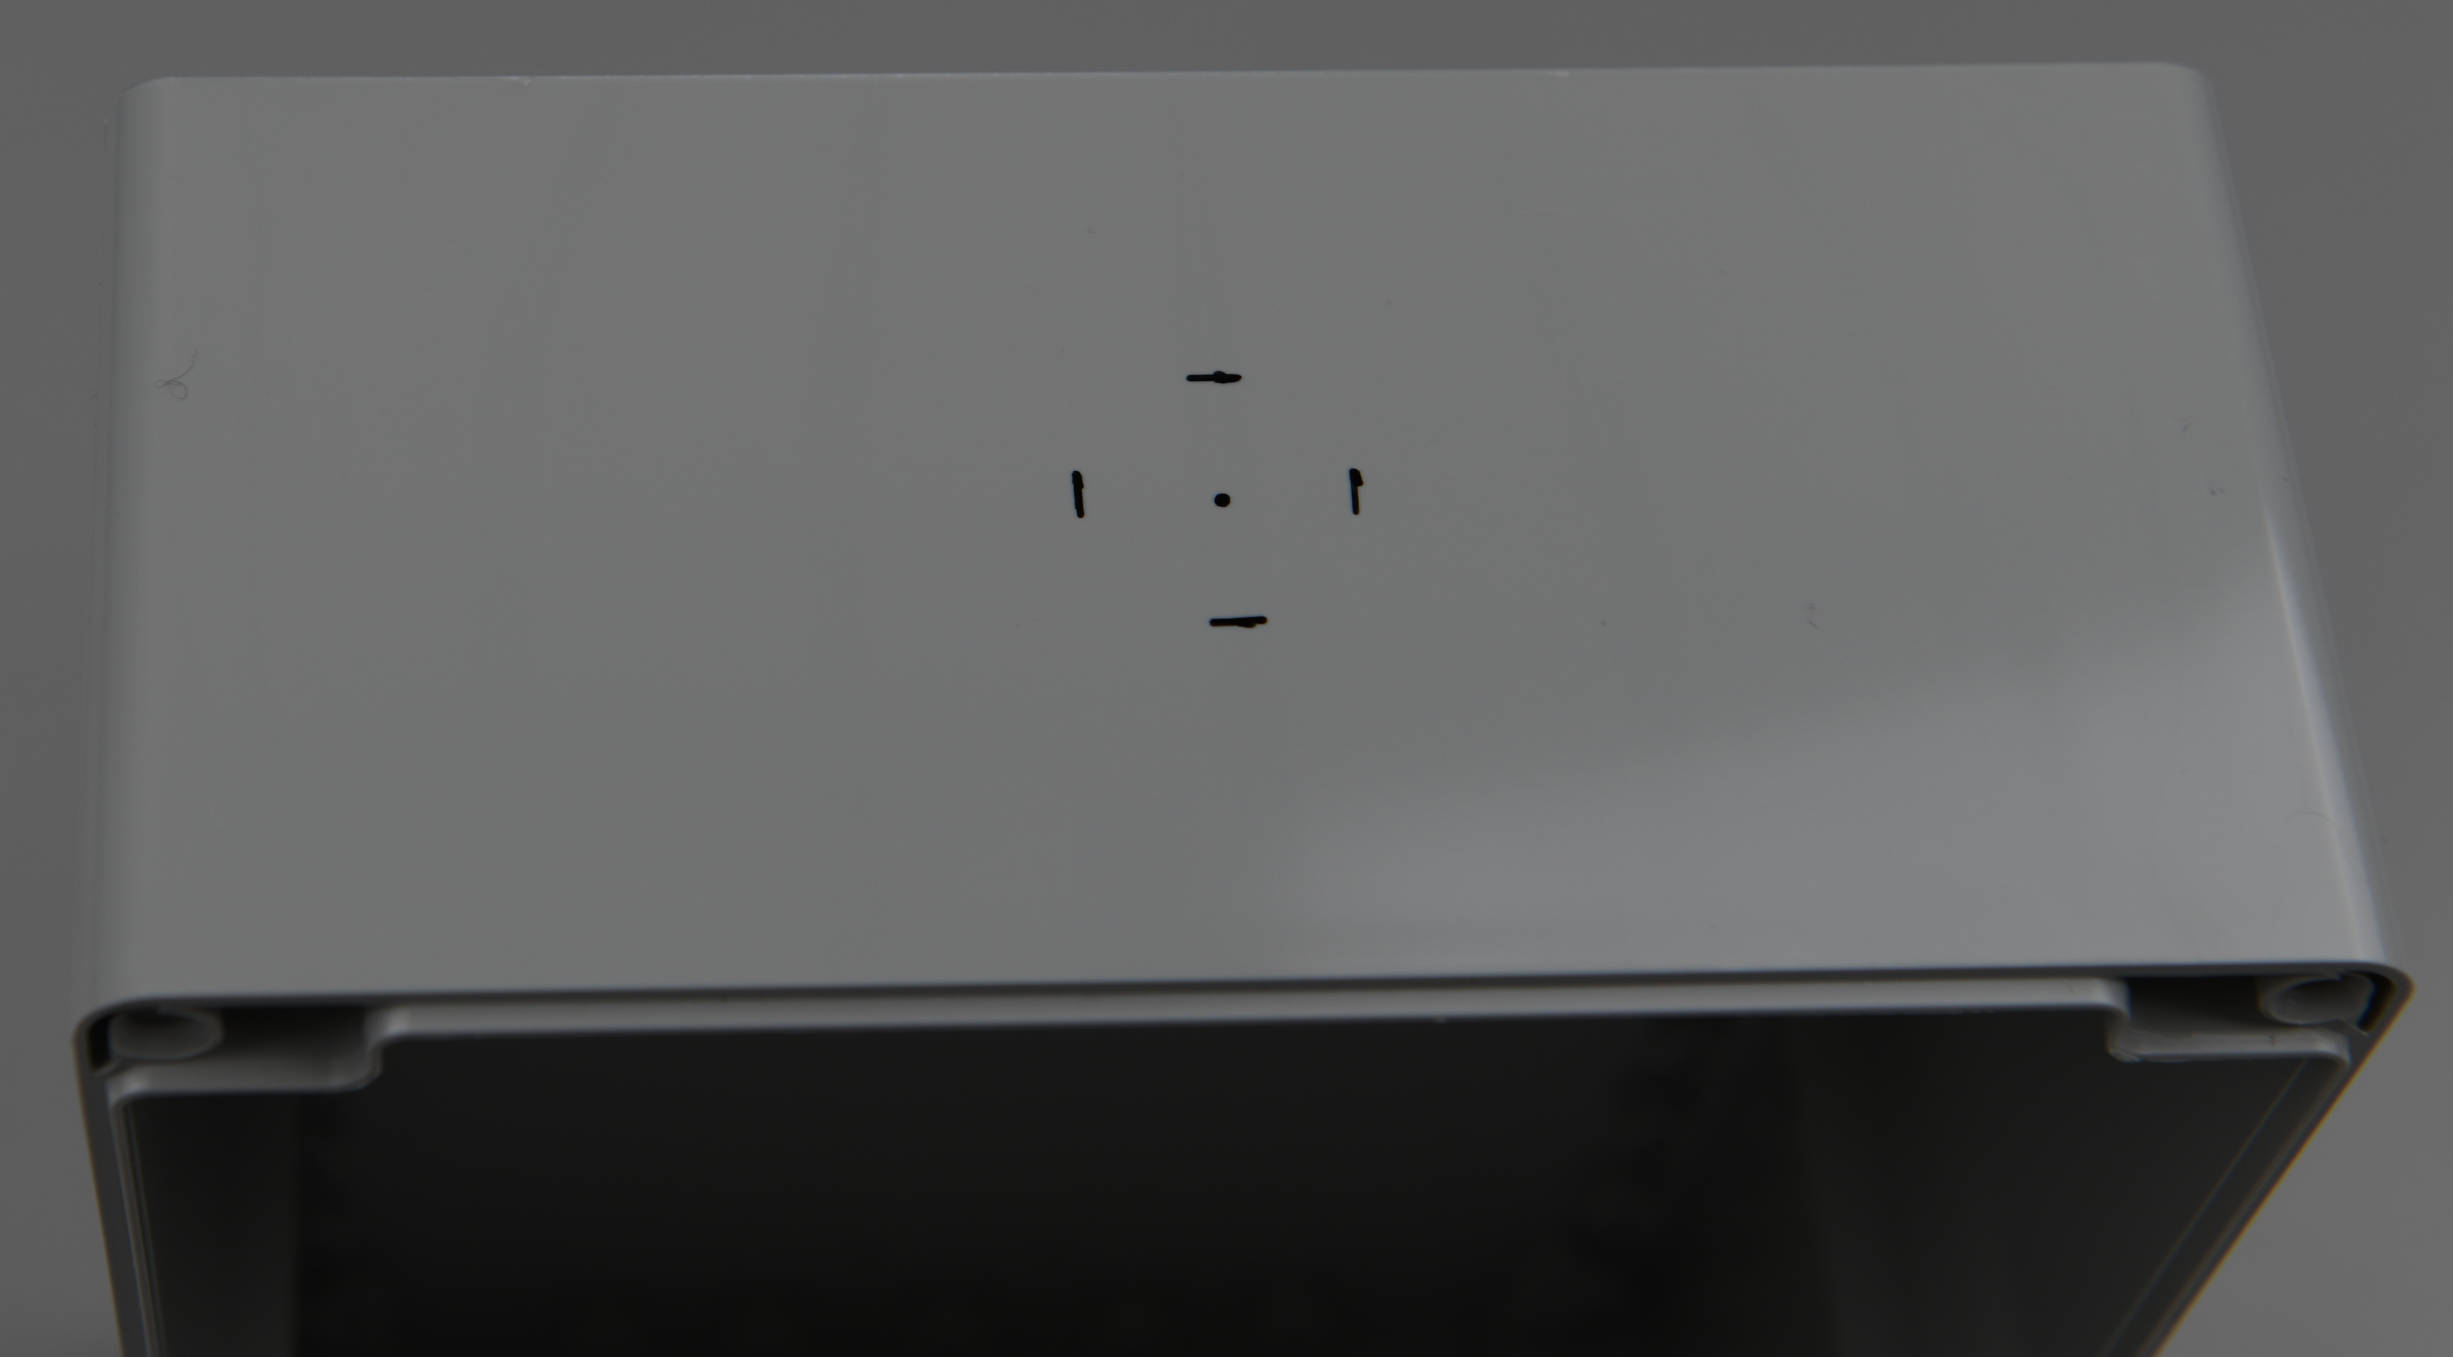
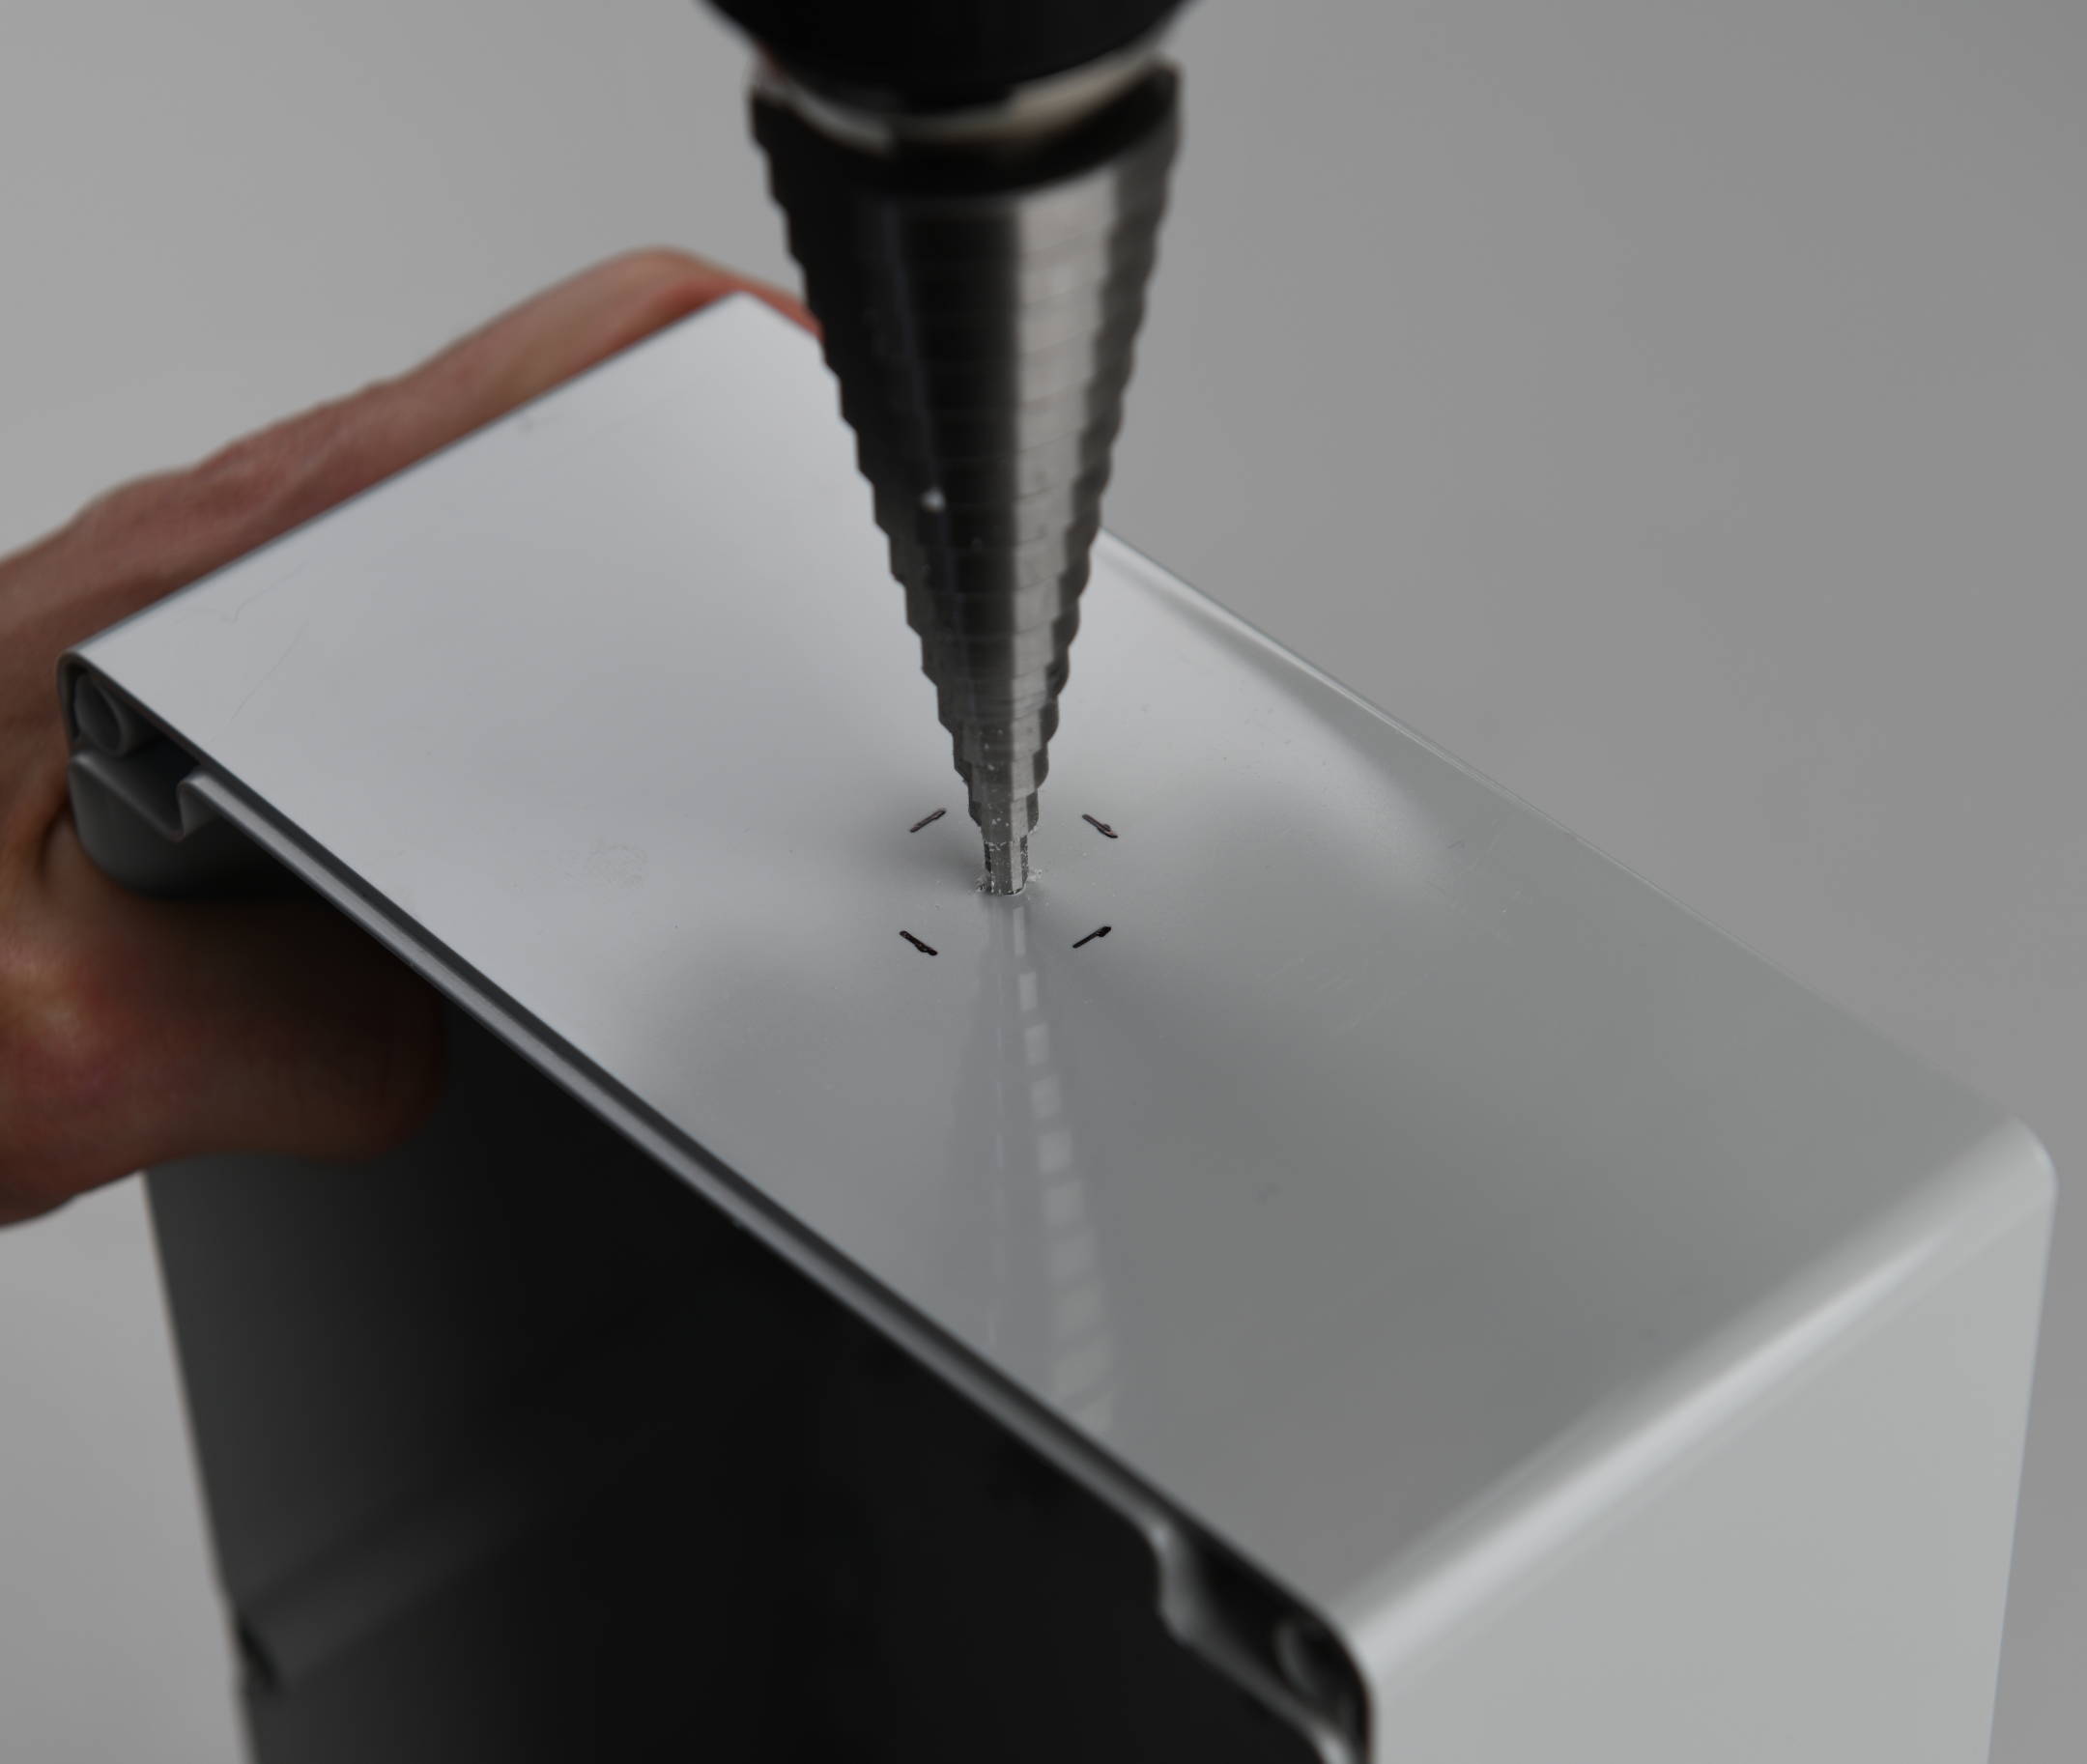
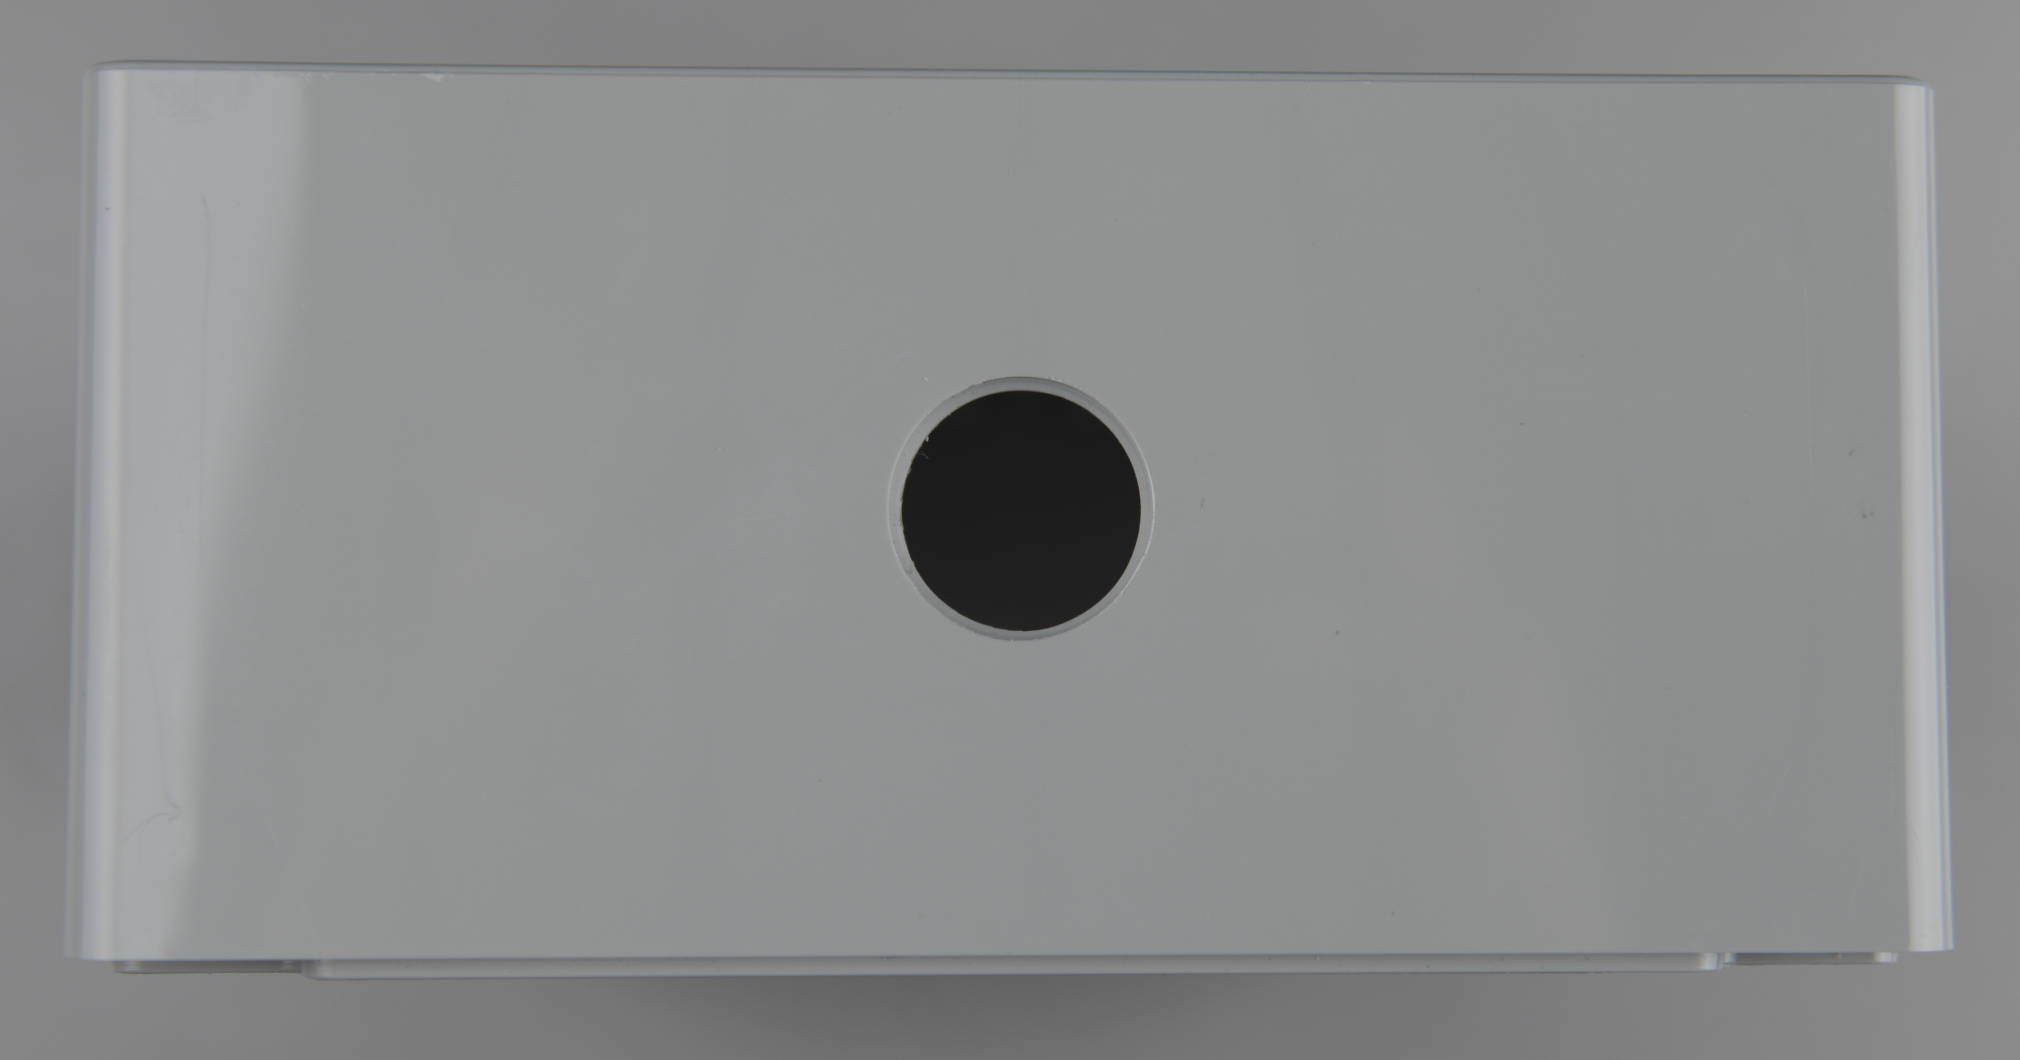
First, we are going to mark the 14 mm hole in the lid of the enclosure, where the camera will record through.
While drilling with the step drill bit, be cautious to stop at the 14 mm mark. An assistant will come in helpful here!
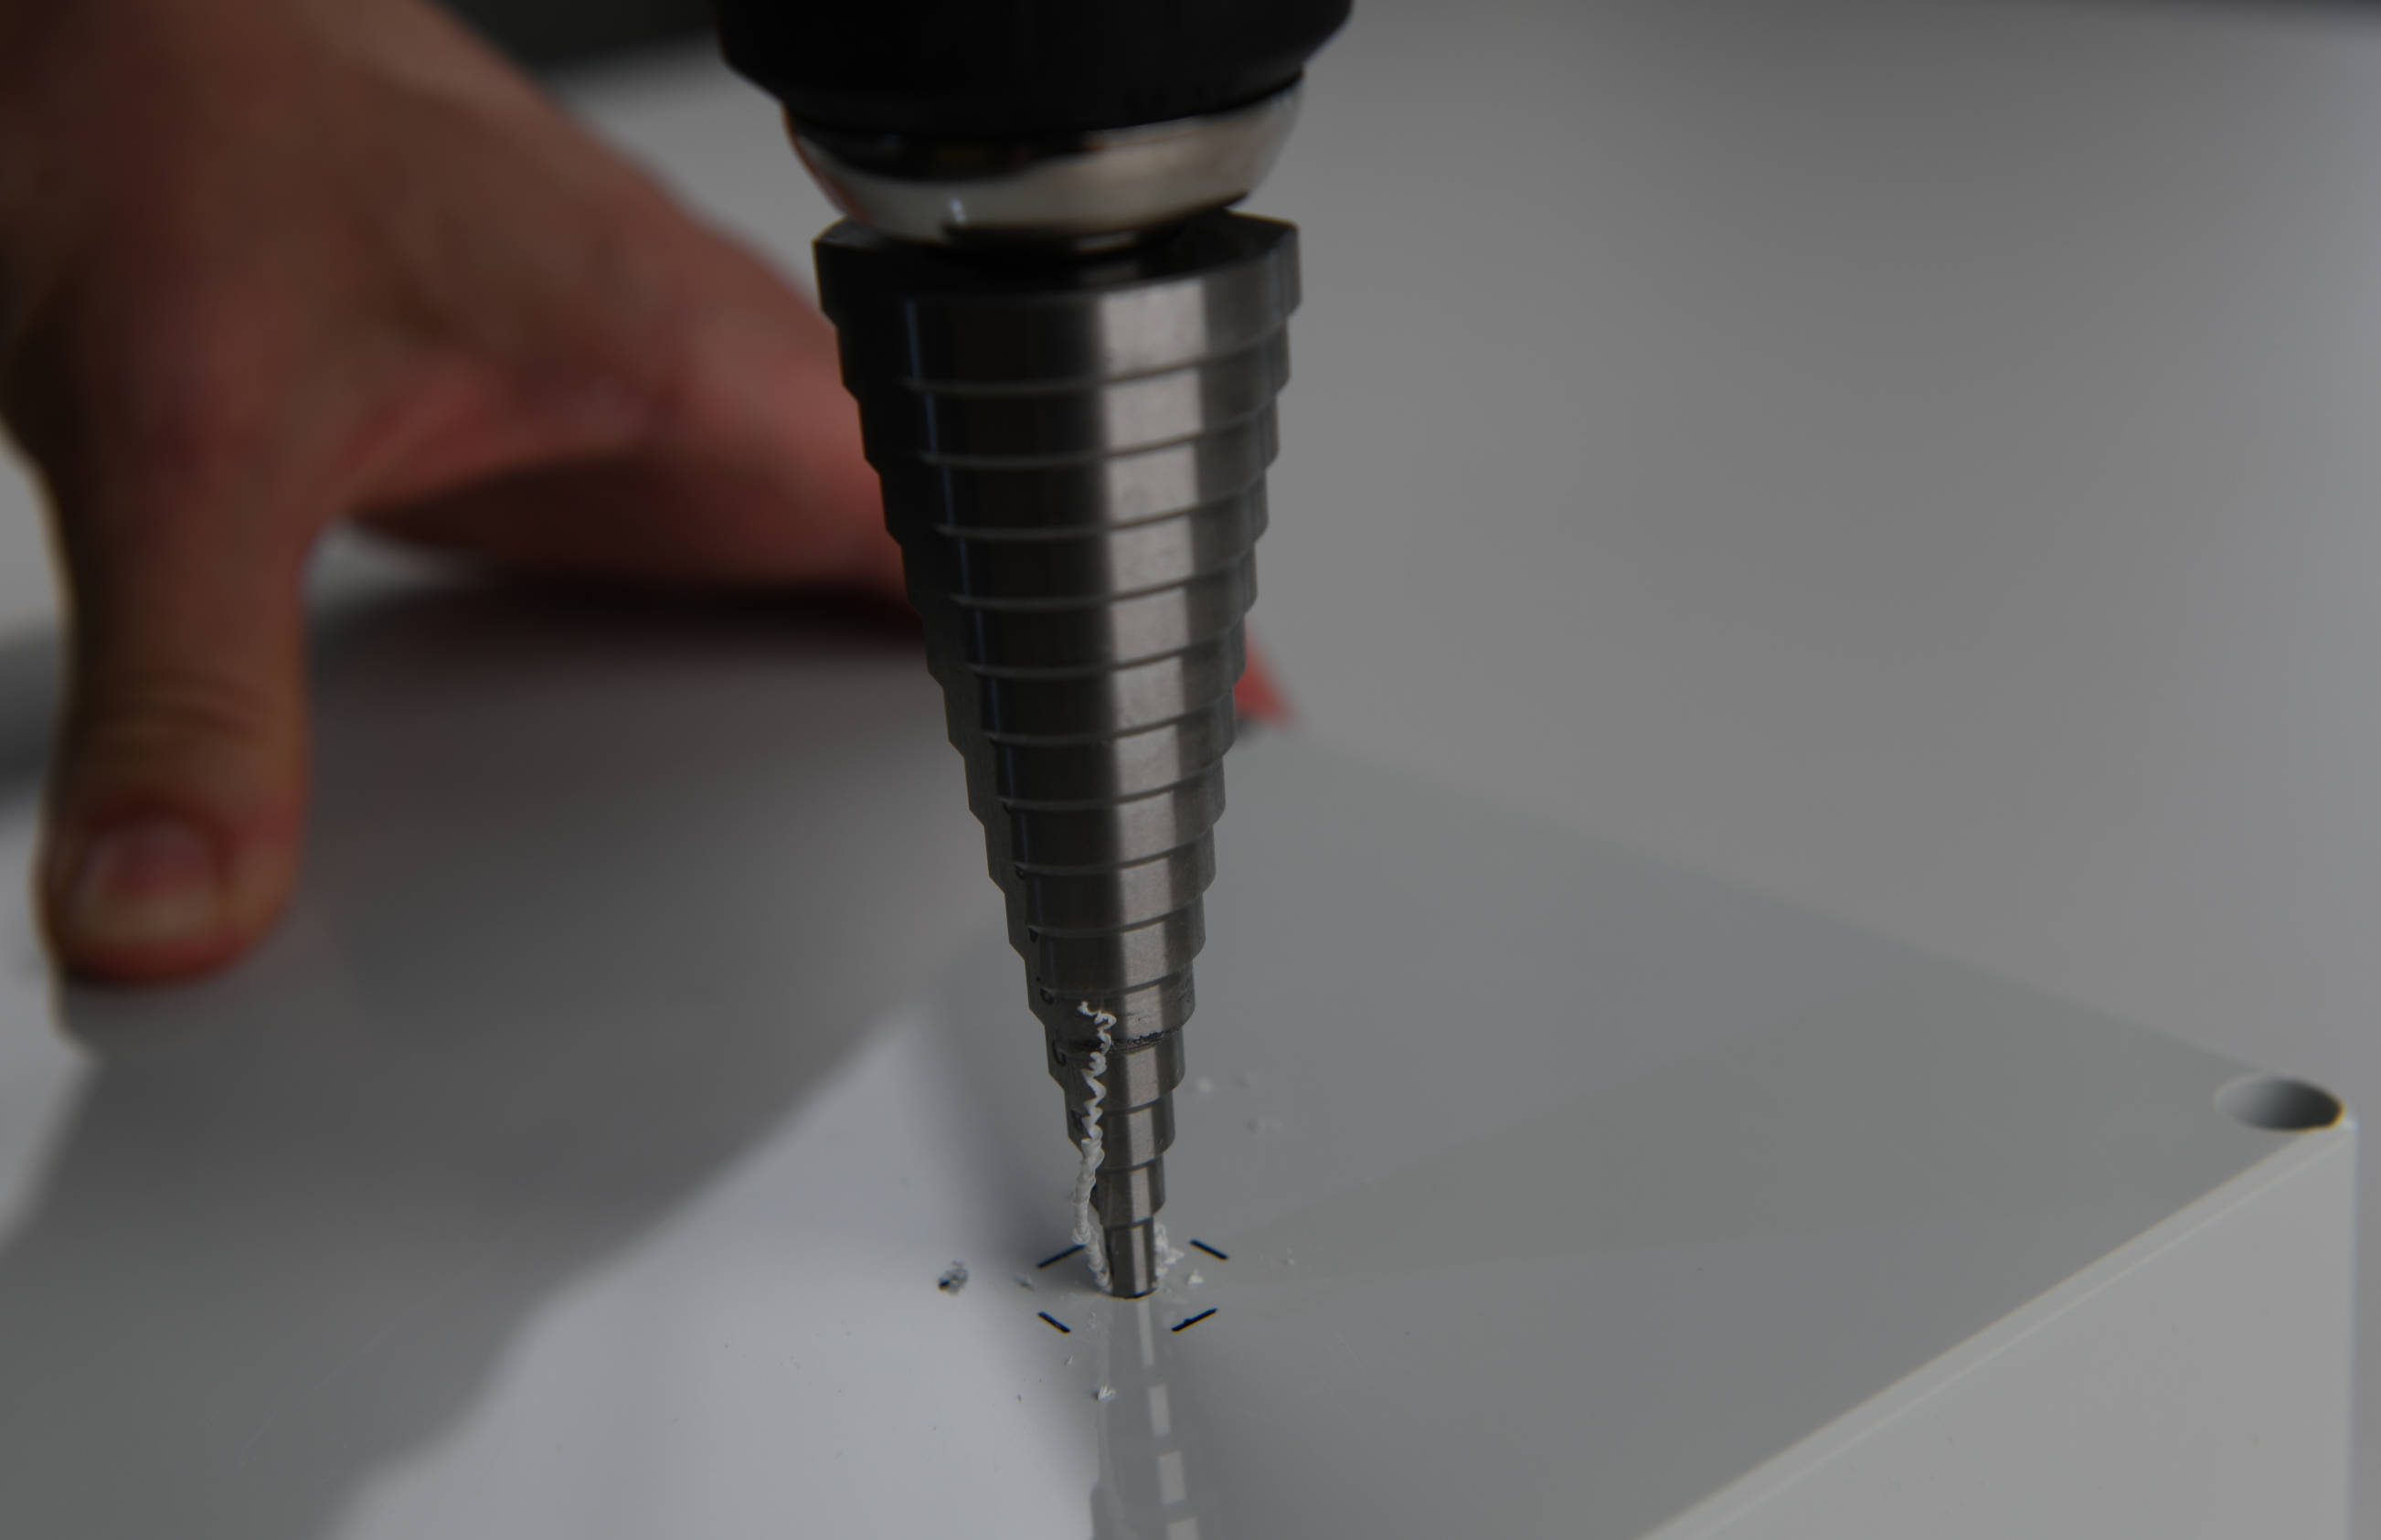
You can carefully go a little bit deeper to the next drill bit step to deburr the camera hole.
The preparation of the enclosure lid is finished now and you can put it aside. We will continue with the main part of the enclosure. The cable gland will be attached at the shorter side of the enclosure, for which we will have to drill a 20 mm hole in the next step.
While drilling, you will have to go a little bit deeper this time, to the 20 mm step. Again, you can go a little bit deeper to the next drill bit step to deburr the hole.
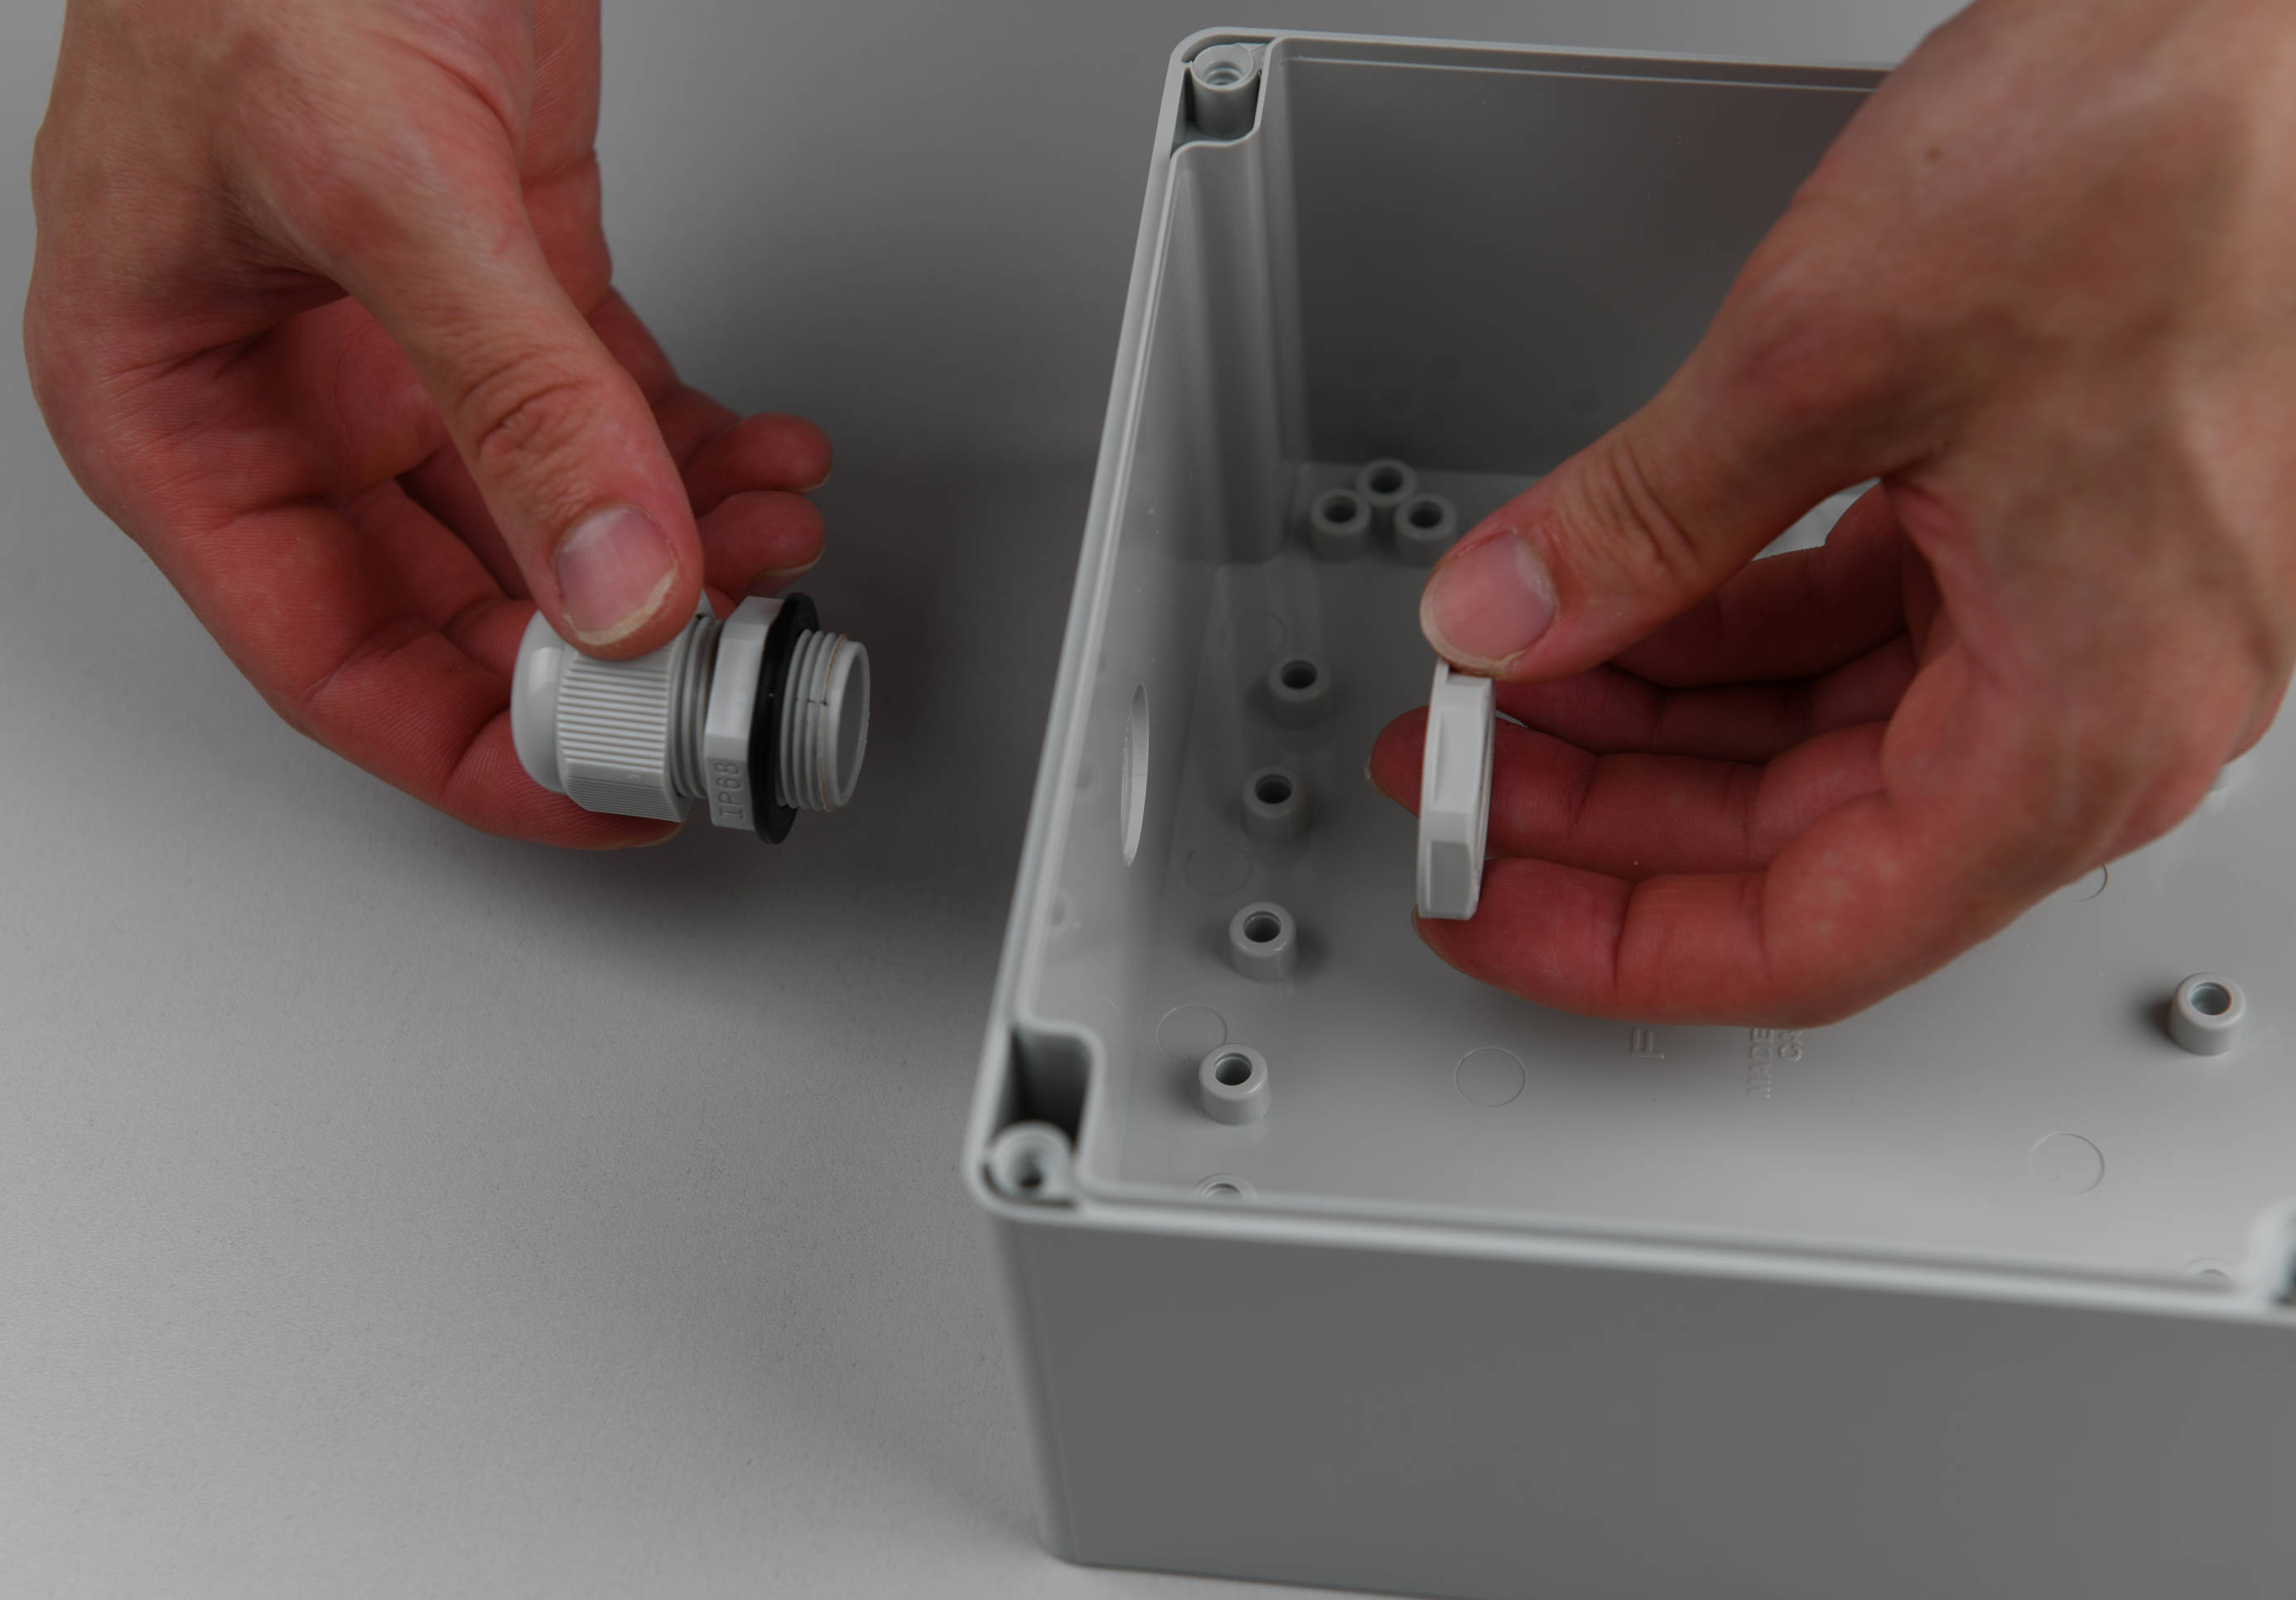
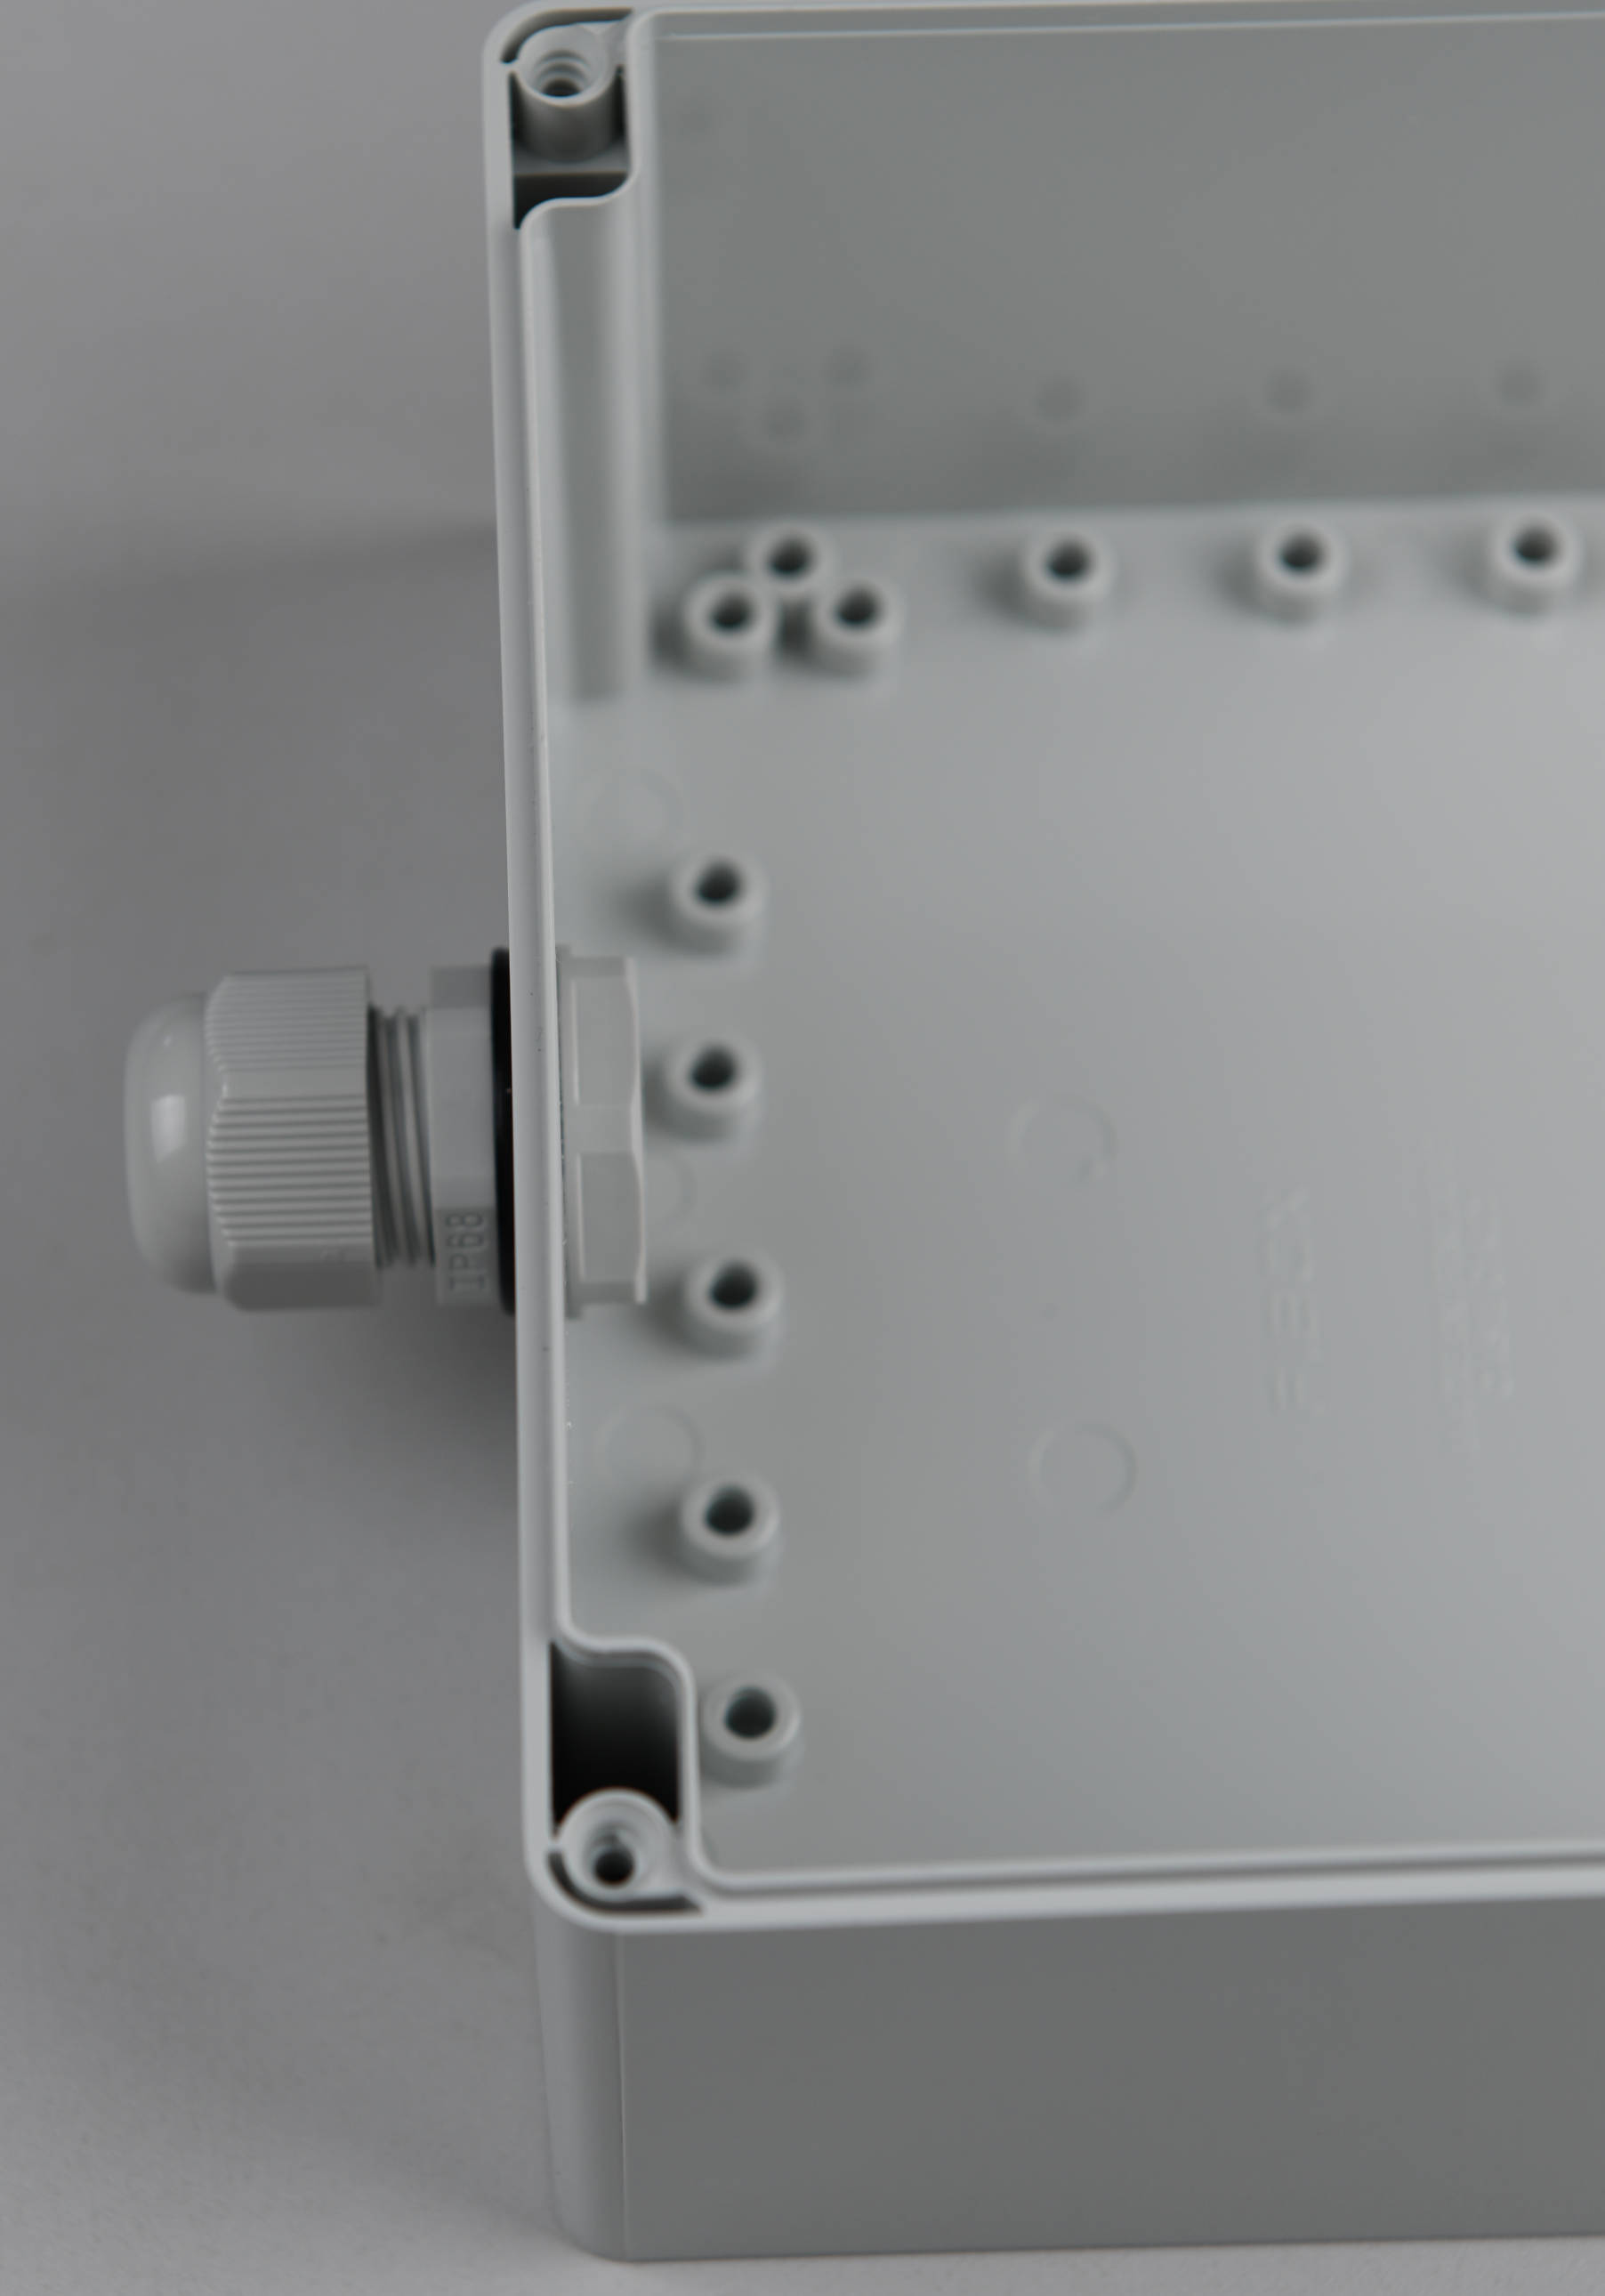
Attaching the cable gland
You can put aside the drilling machine for now, as we are finished with preparing the holes in the mounting plate and enclosure. In the next step, we will attach the PG 13.5 cable gland with the locknut at the side of the enclosure. It is recommended to use a sealing ring at the outer side of the enclosure. If this did not come with your cable gland, you can use a standard 18x2 mm O-ring for faucets from your local hardware store.
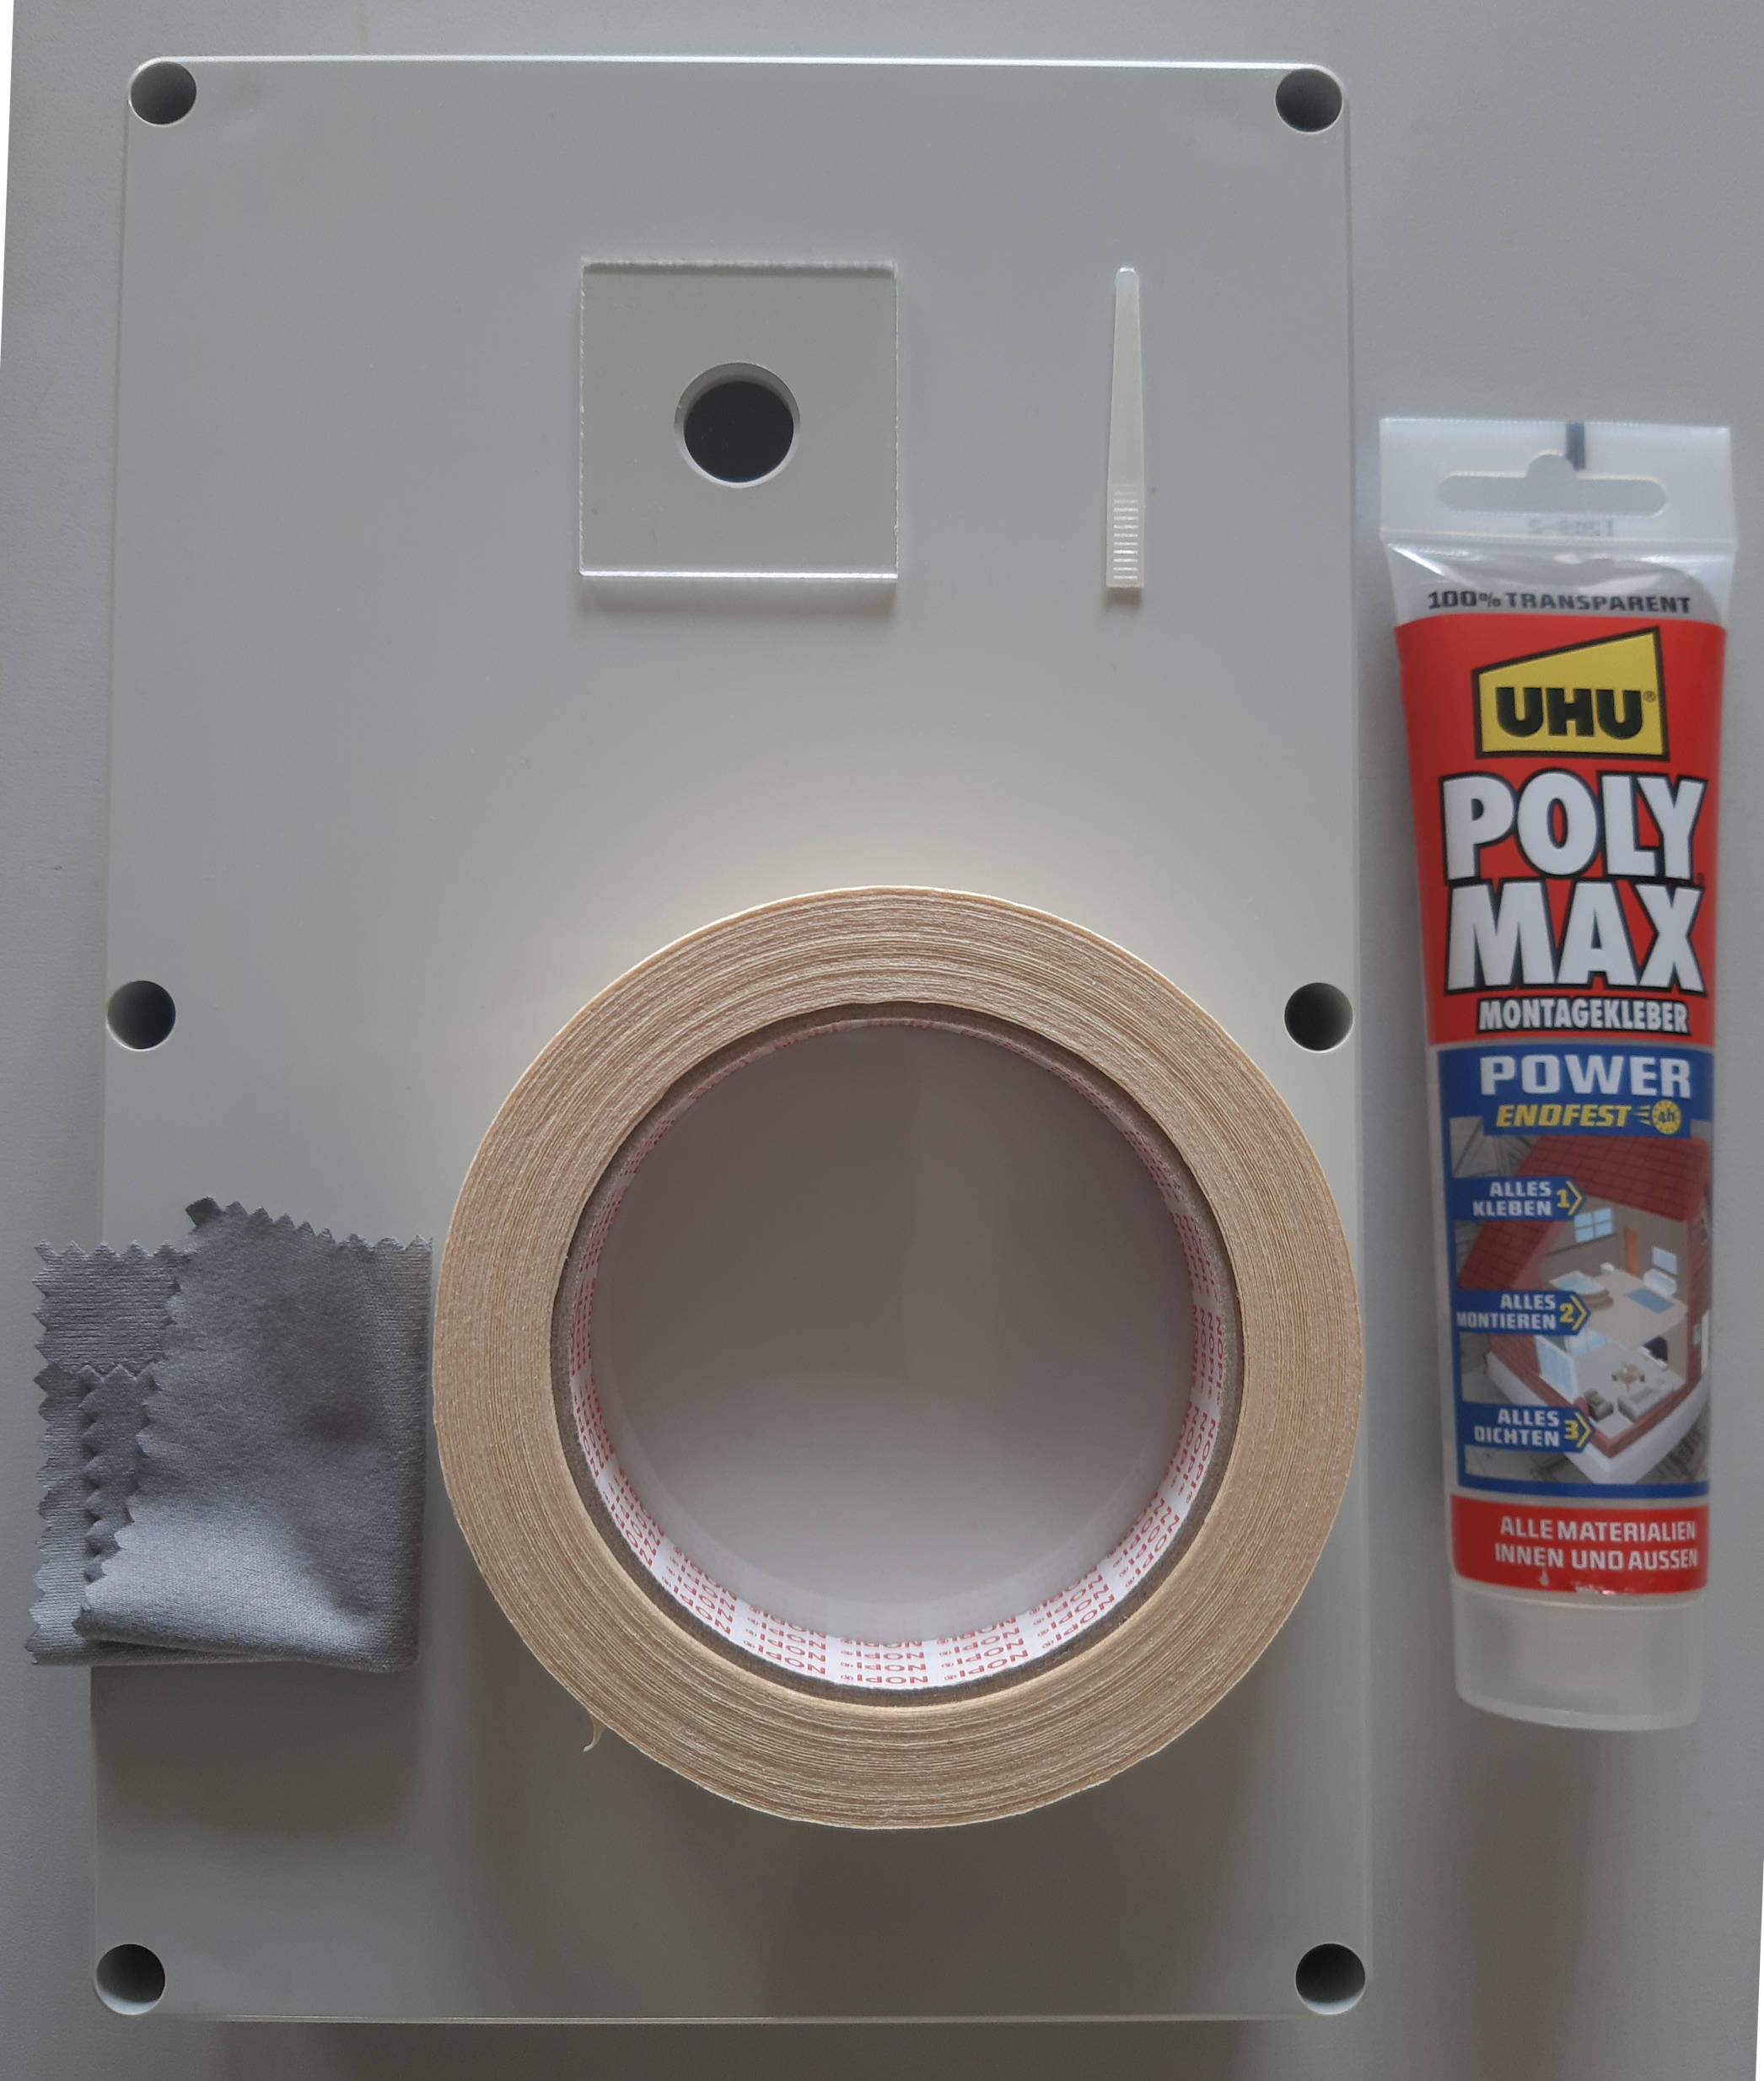
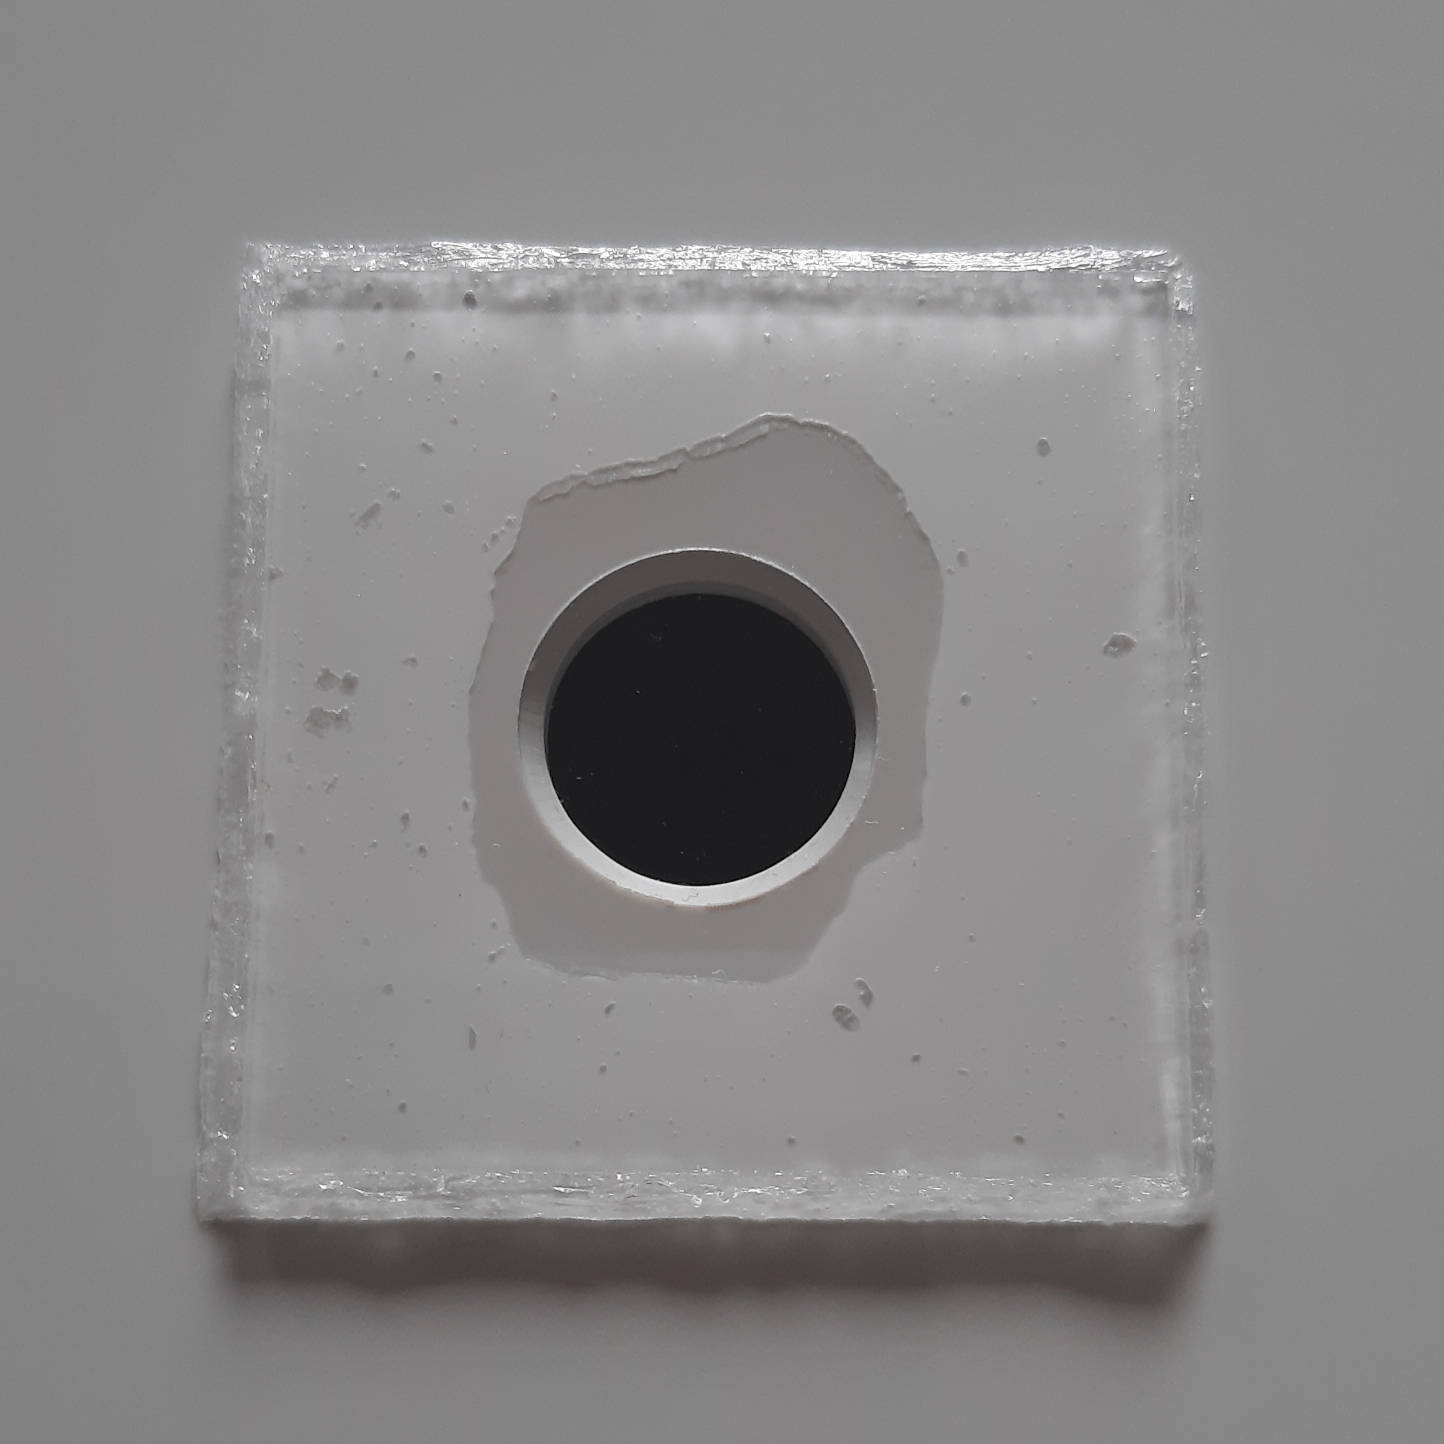
Preparing the camera hole: Protection glass
To completely waterproof the enclosure, we will glue a 40x40 mm piece of 2 mm thick acrylic glass in front of the camera hole. You will need crepe tape, sealing glue, some kind of spatula (e.g. end of a zip tie) and a microfiber cloth for cleaning the acrylic glass piece.
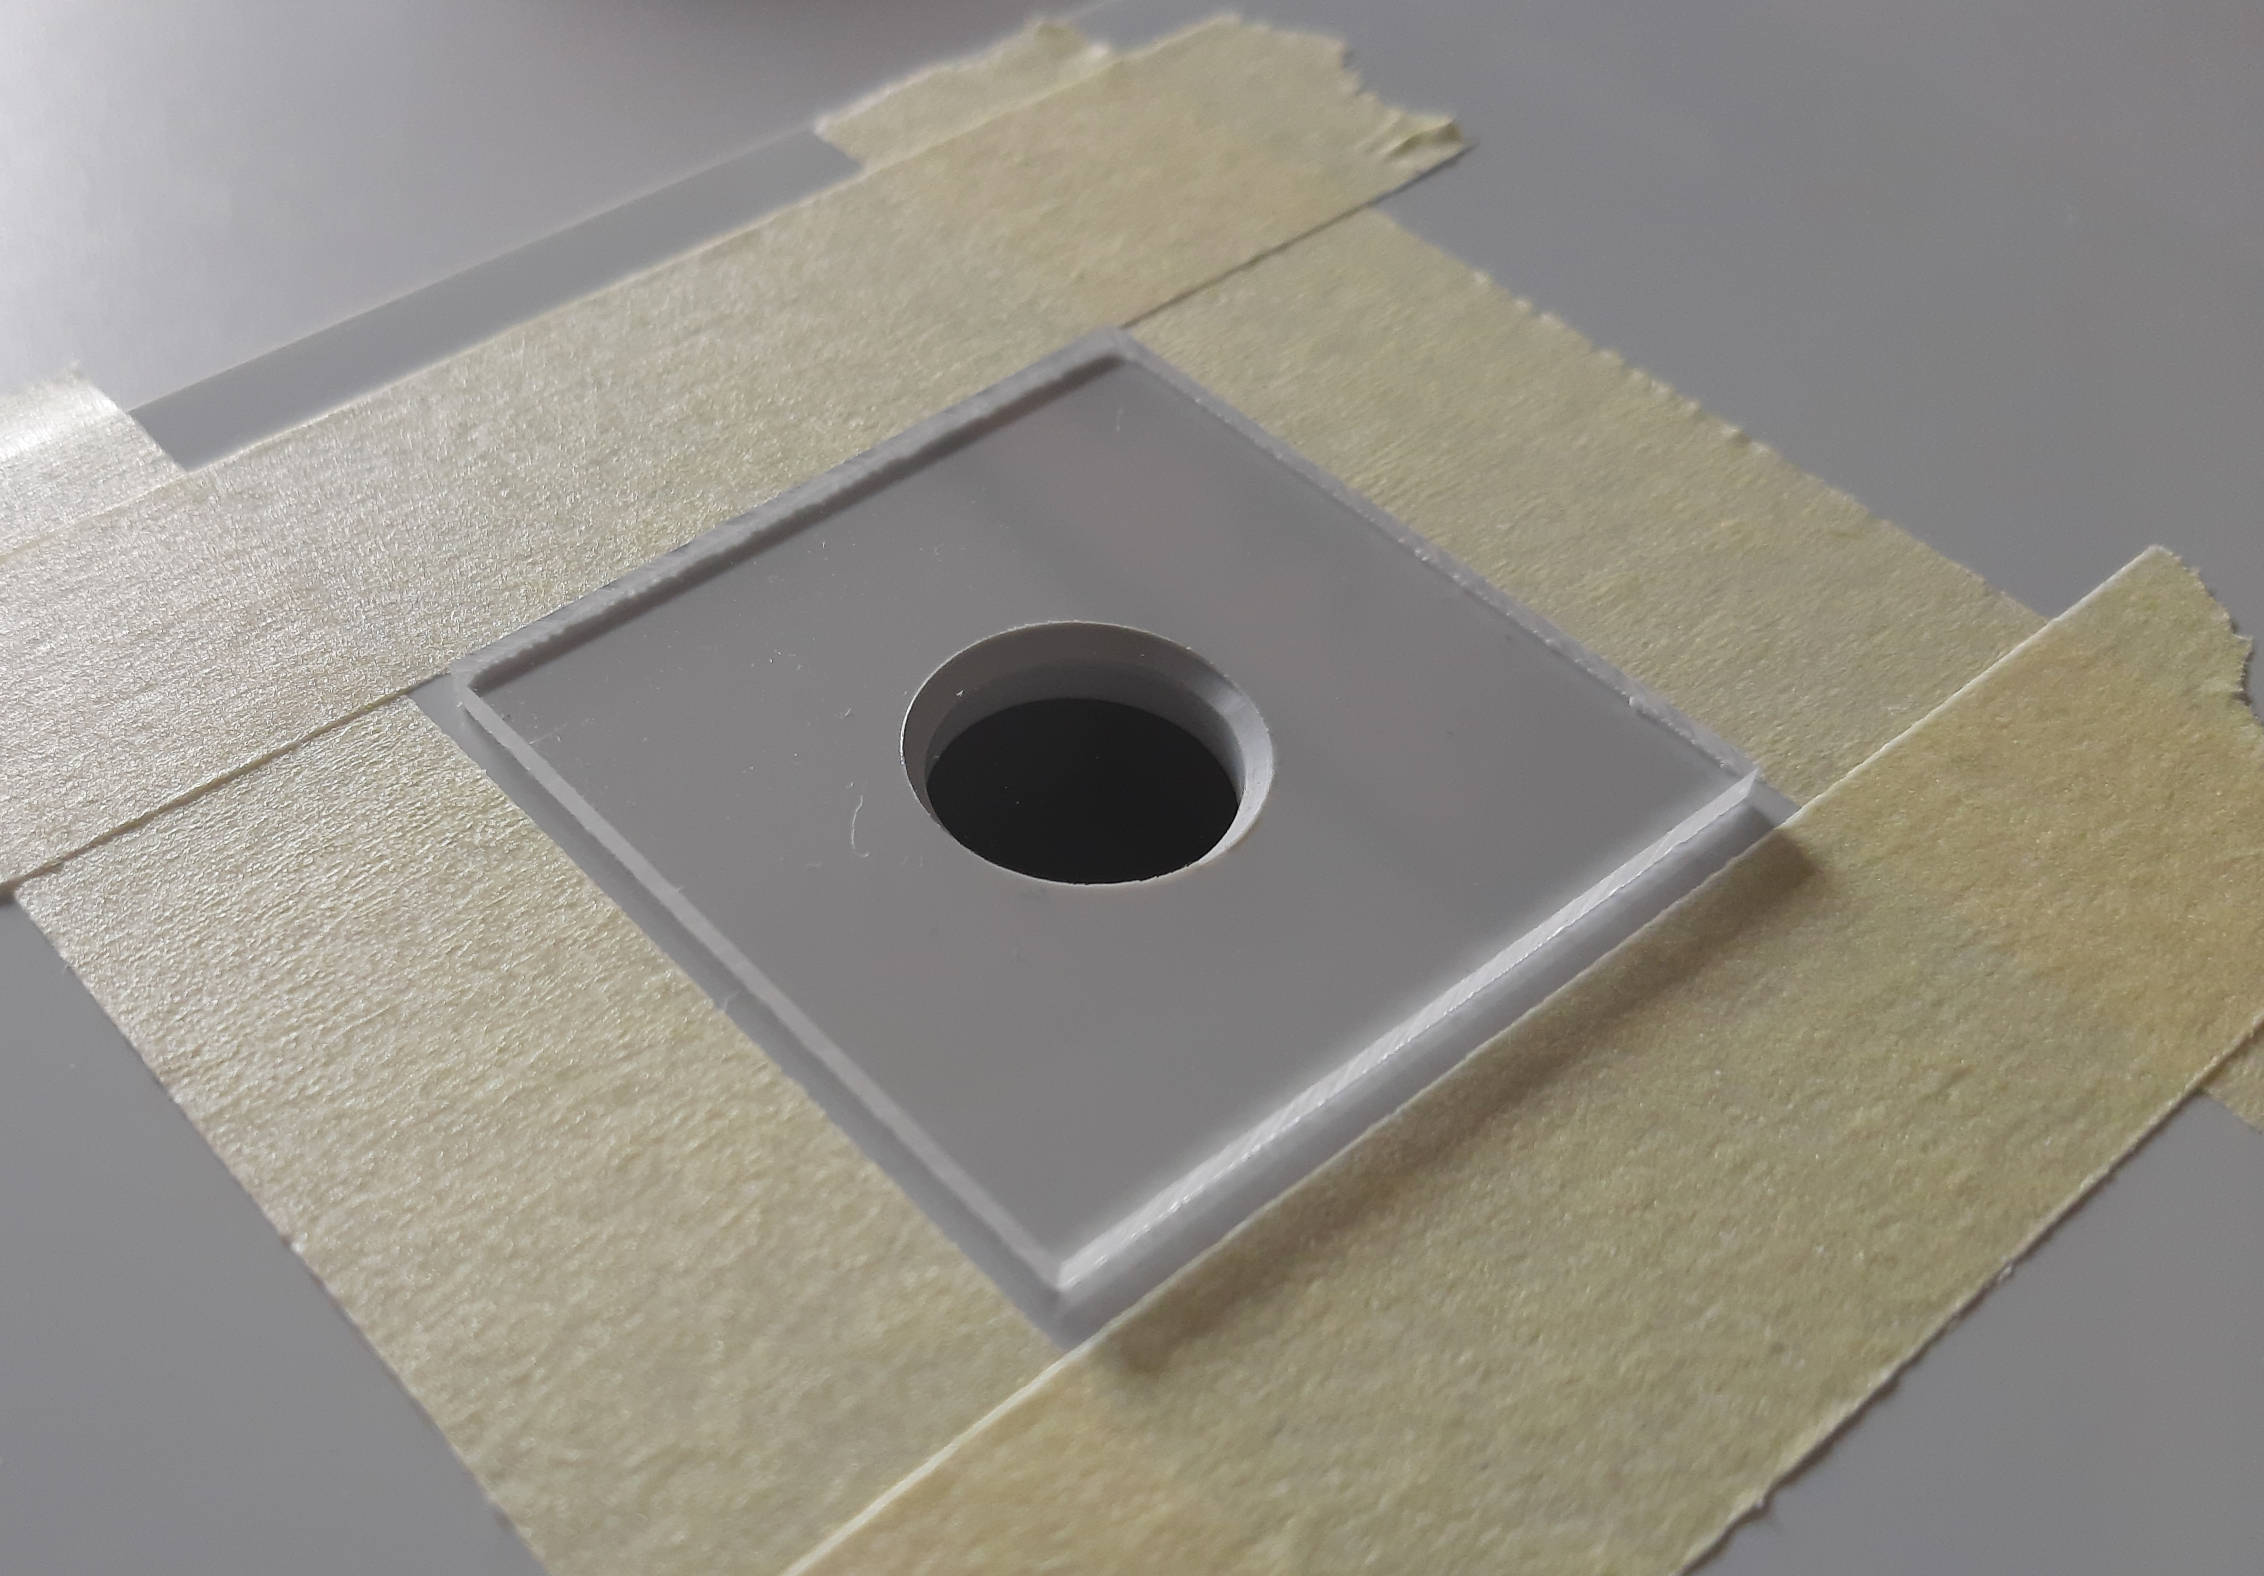
First, put the glass piece on top of the enclosure lid so that the camera hole will be in its center. Now you can mark the position with crepe tape. This will also help to prevent spilling of glue around the glass.
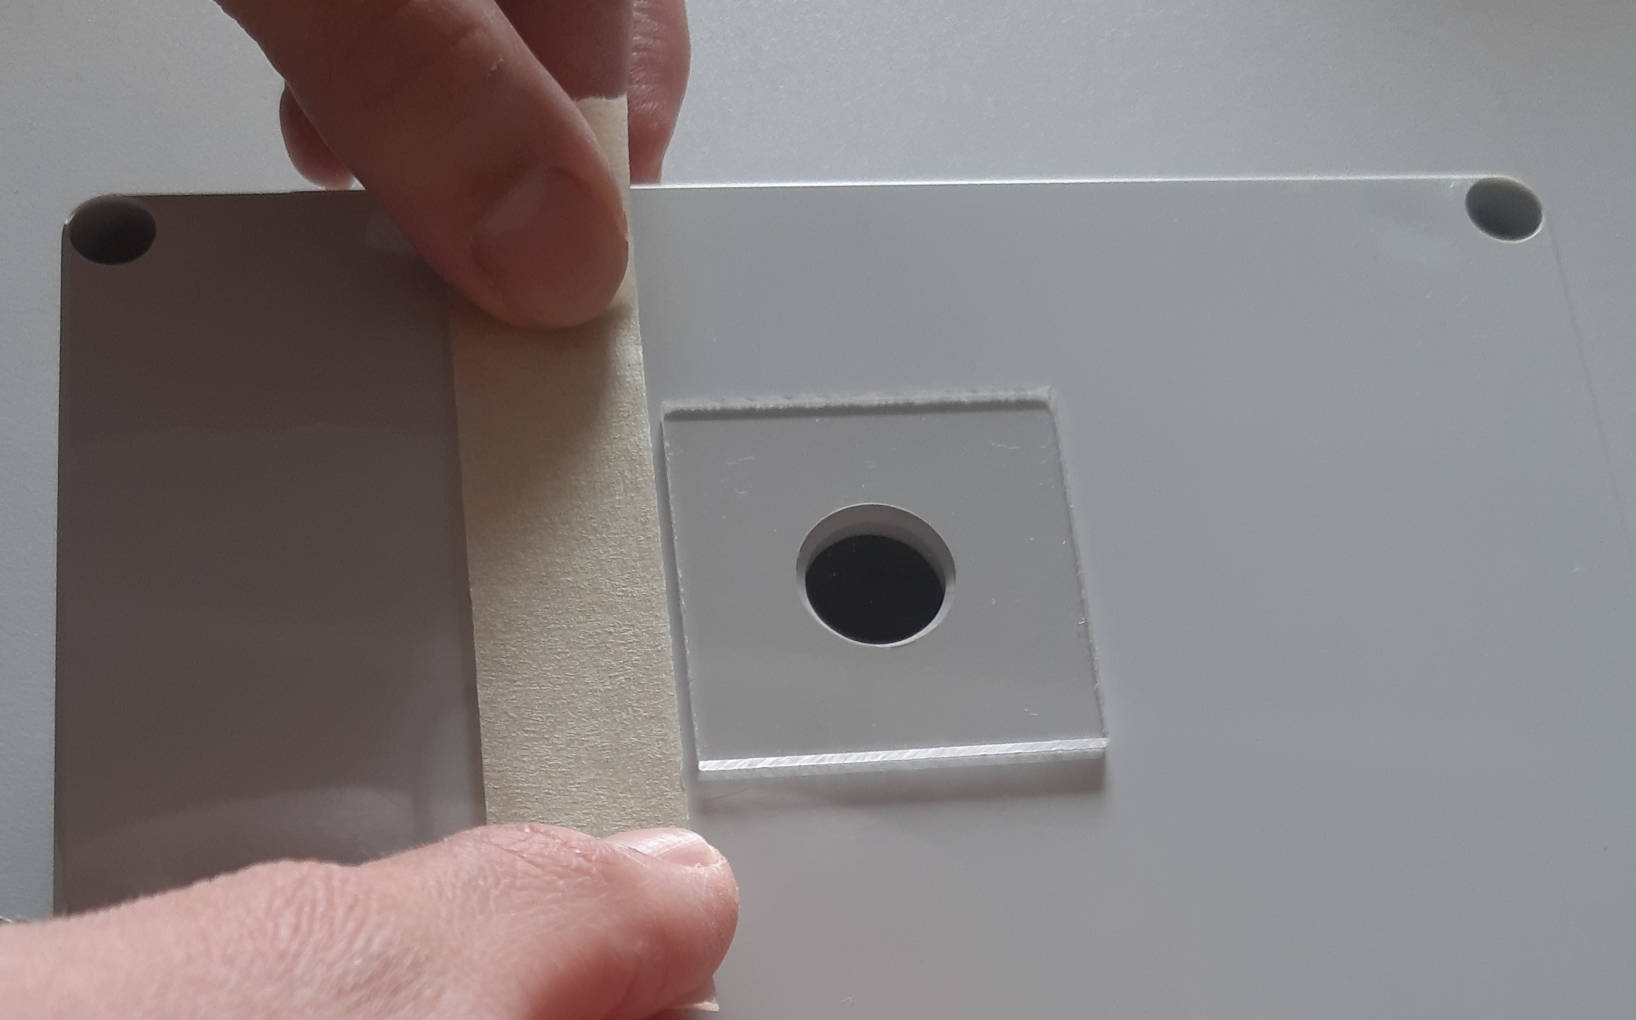
Leave about 1-2 mm of free space between the glass piece and the crepe tape. We will use this area for sealing of the glass later.
Use the DIY-spatula to apply the sealing glue. Be careful not to use too much glue and omit the area near the camera hole.
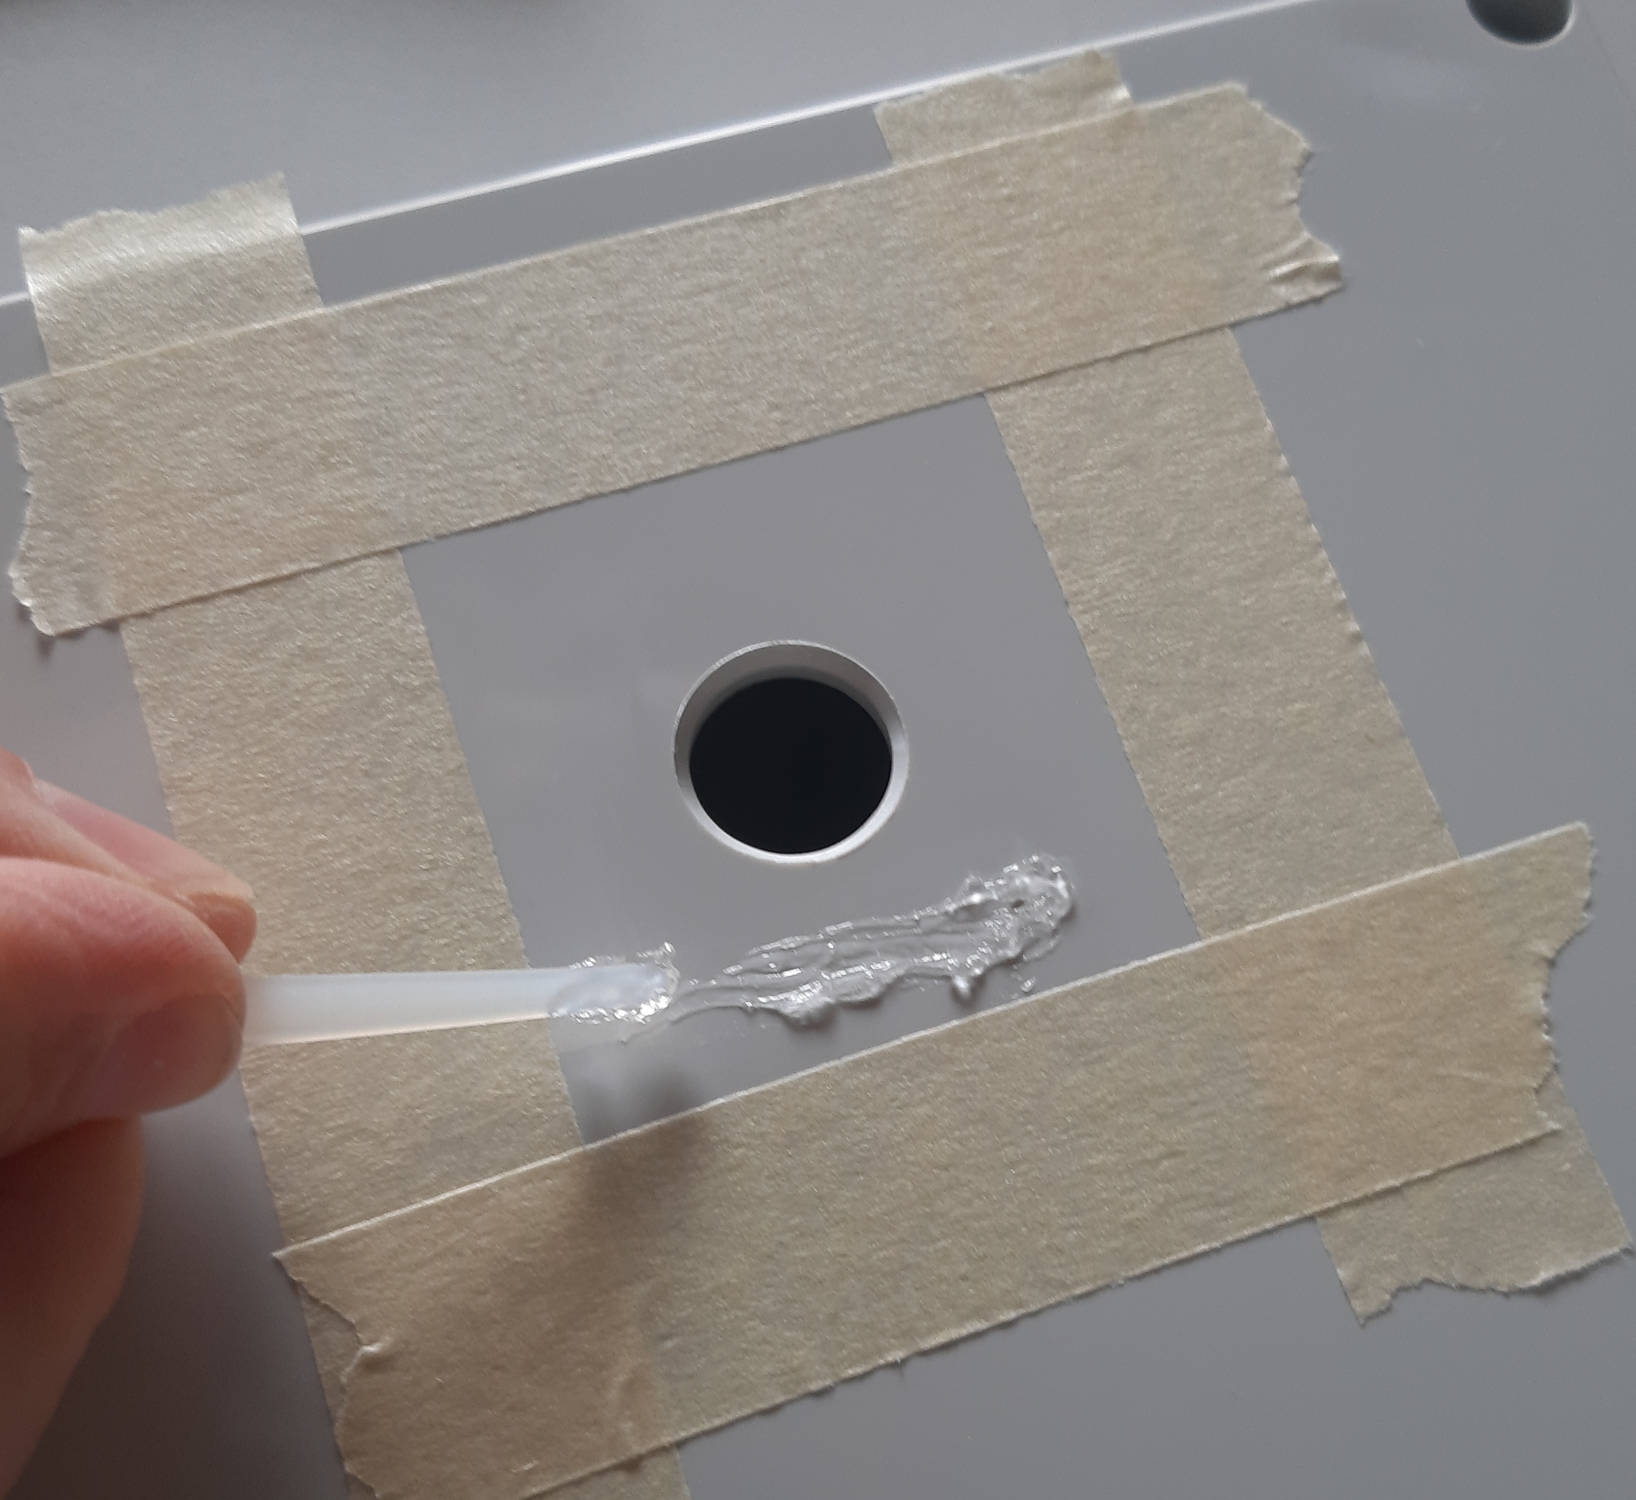
Make sure to clean the glass piece immediately before putting it onto the glued surface.
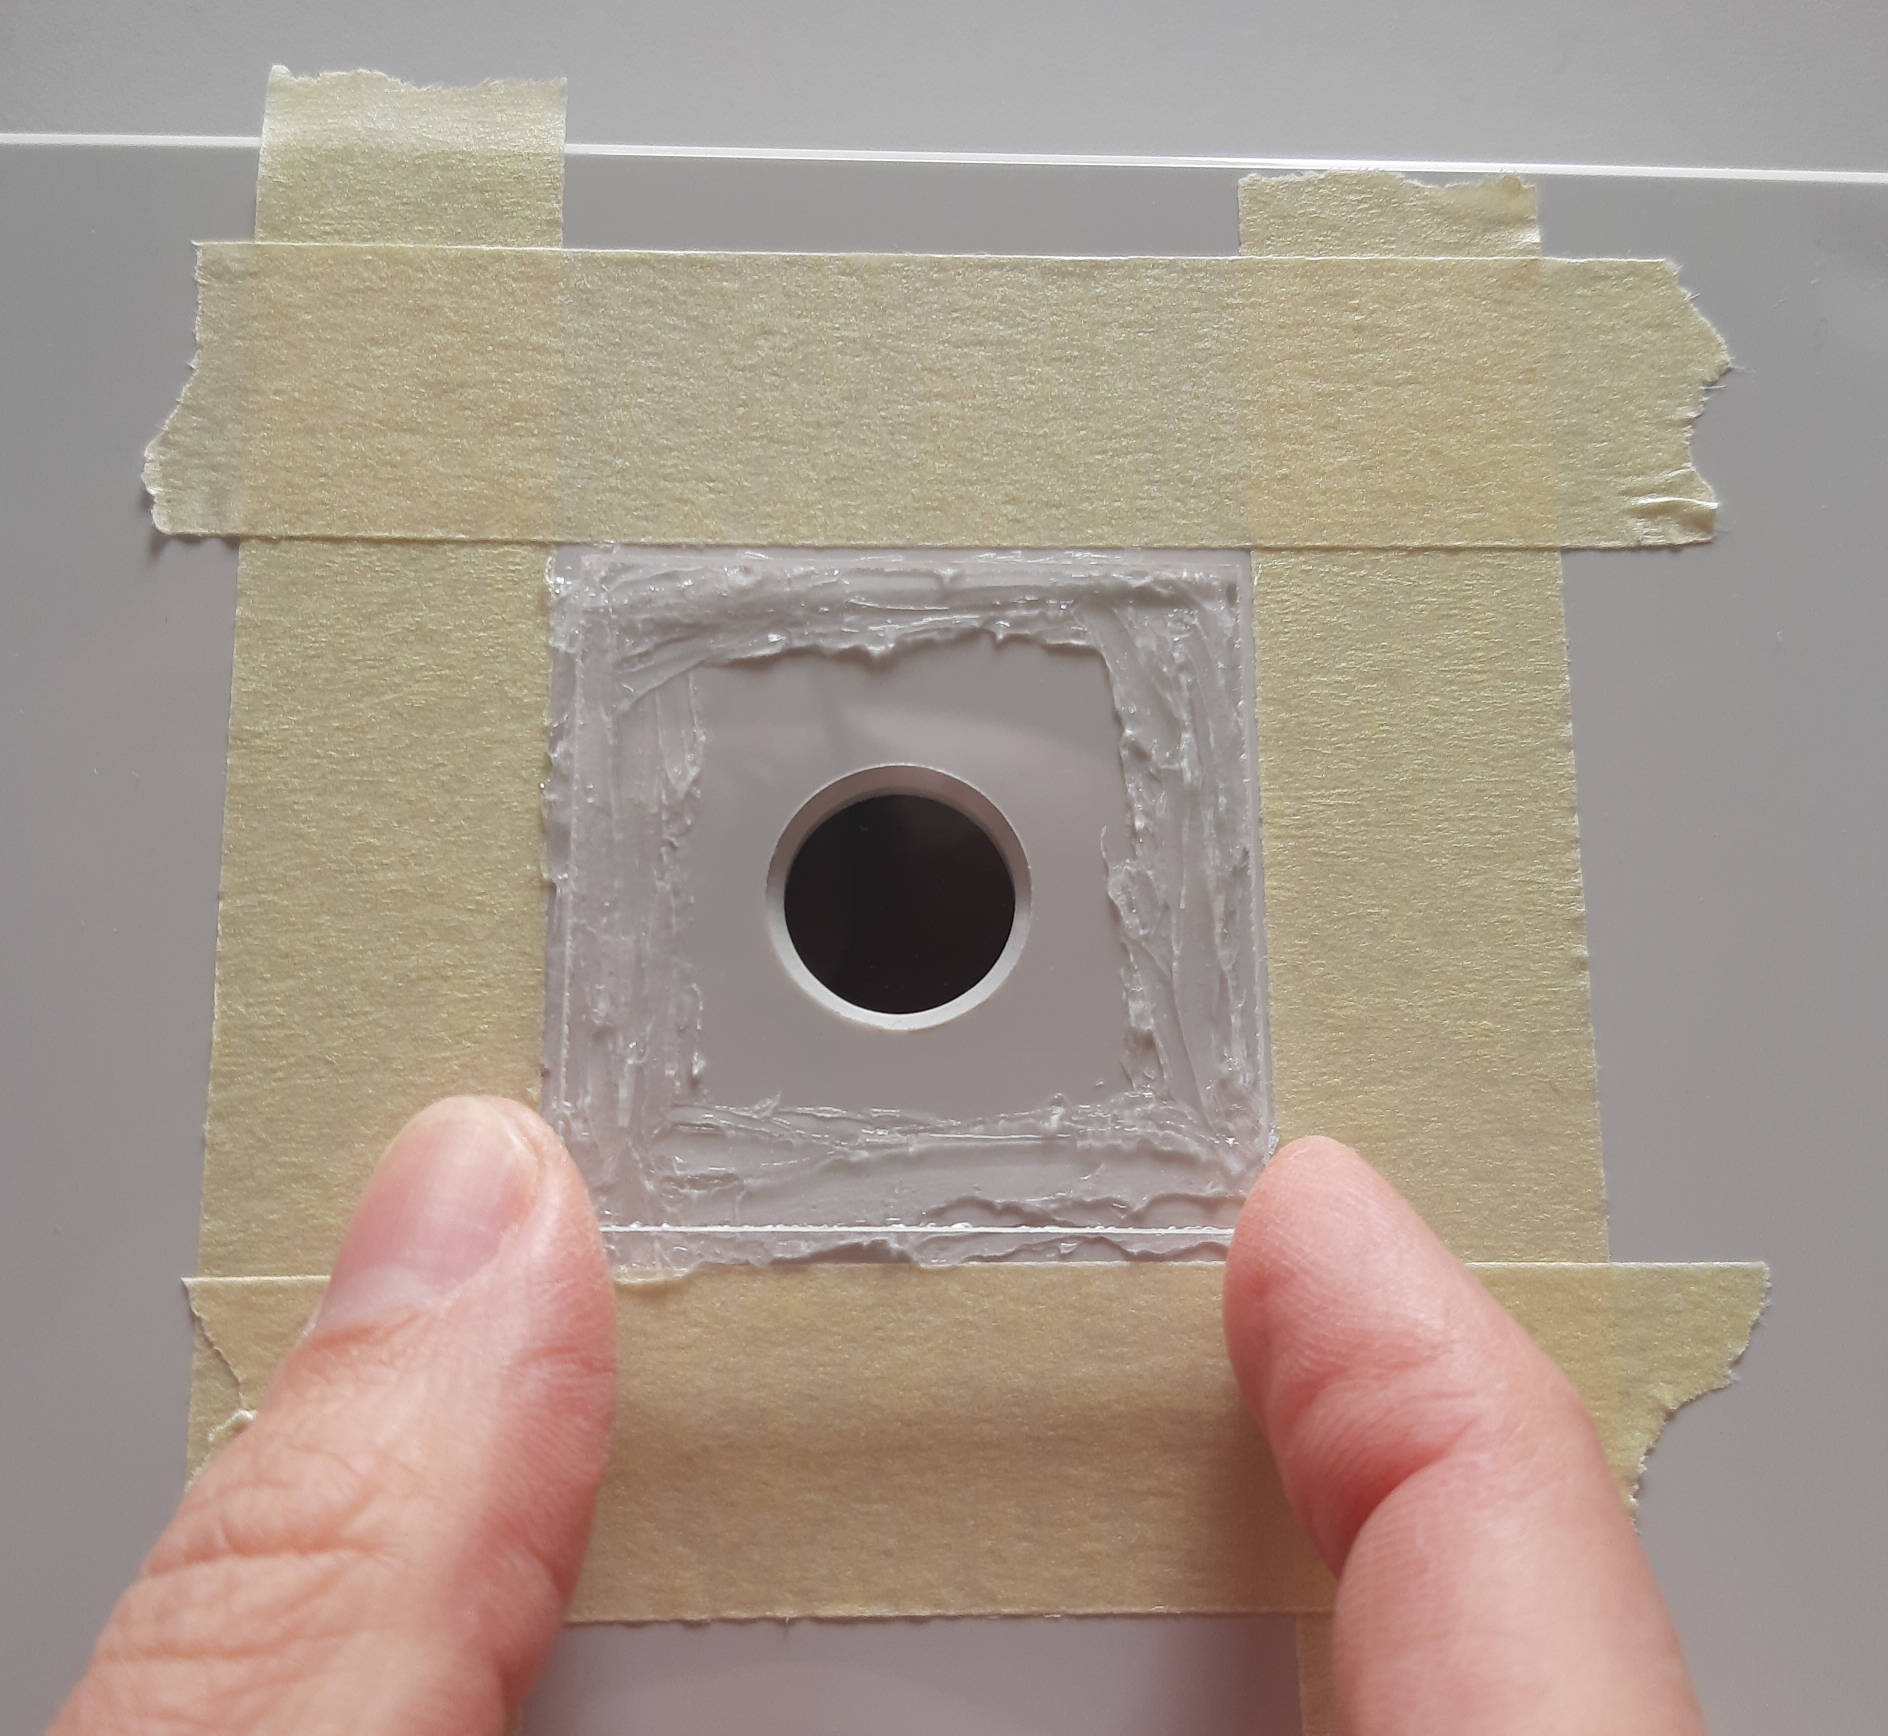
Press down the glass piece and carefully squeeze out as much air as possible, while preventing that glue is reaching the camera hole.

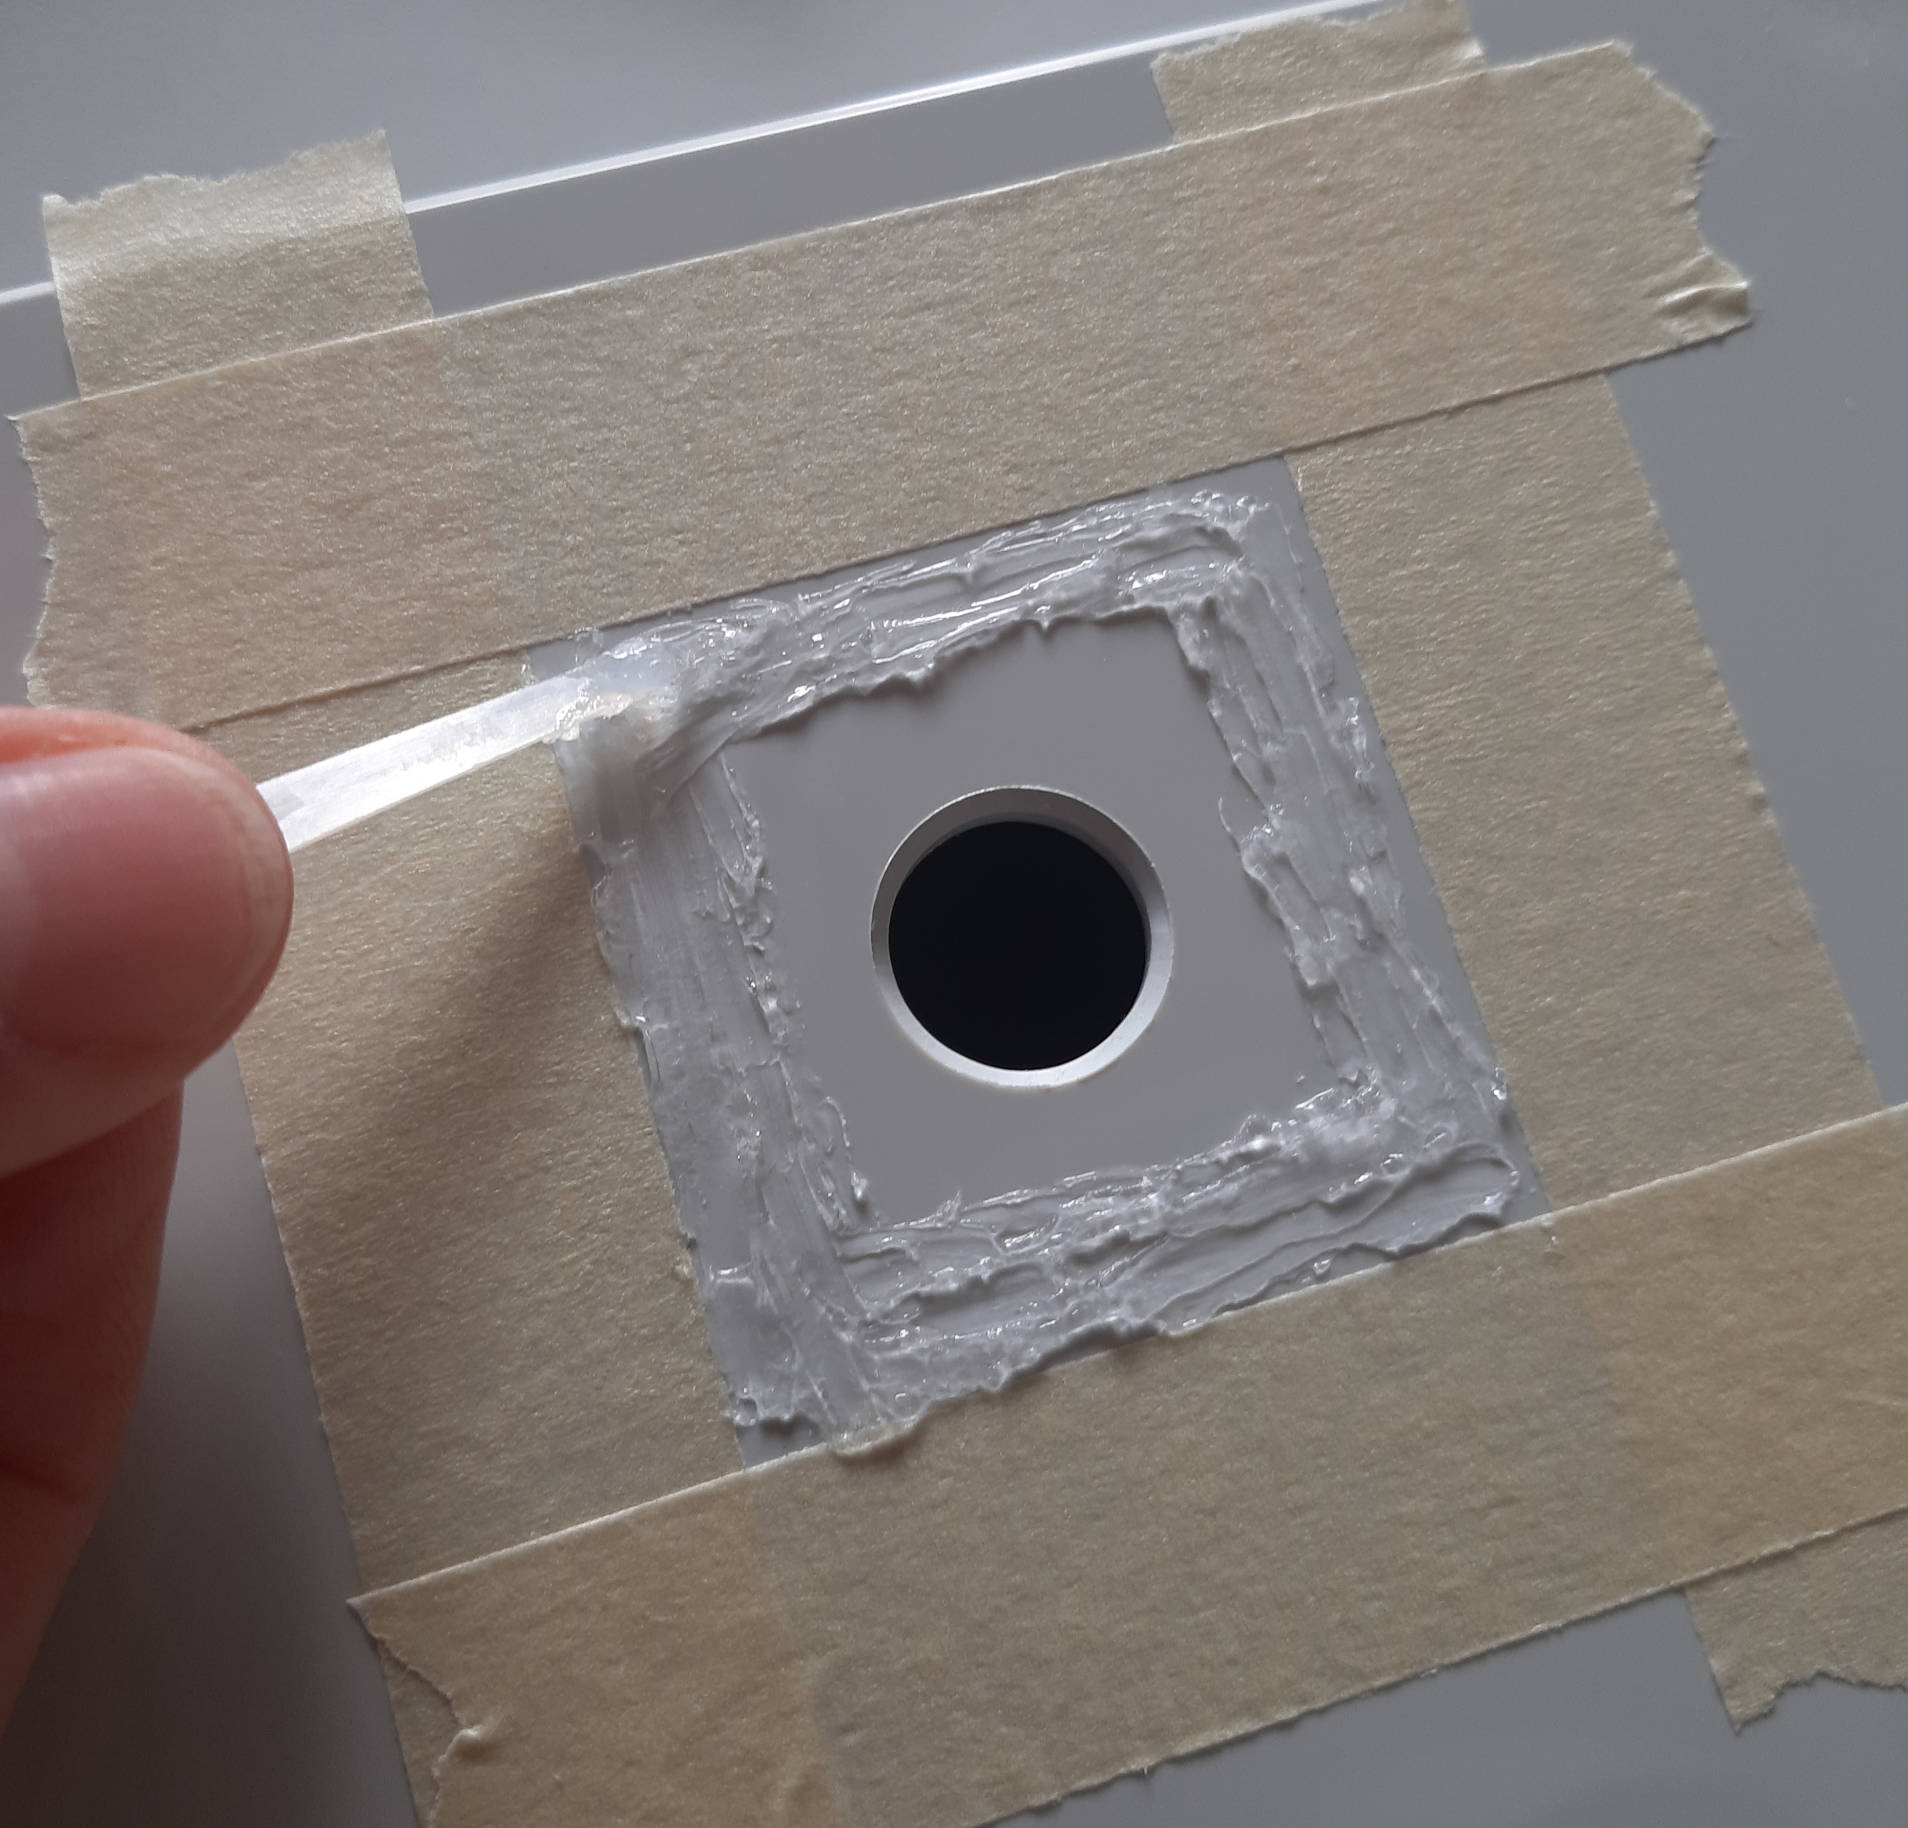
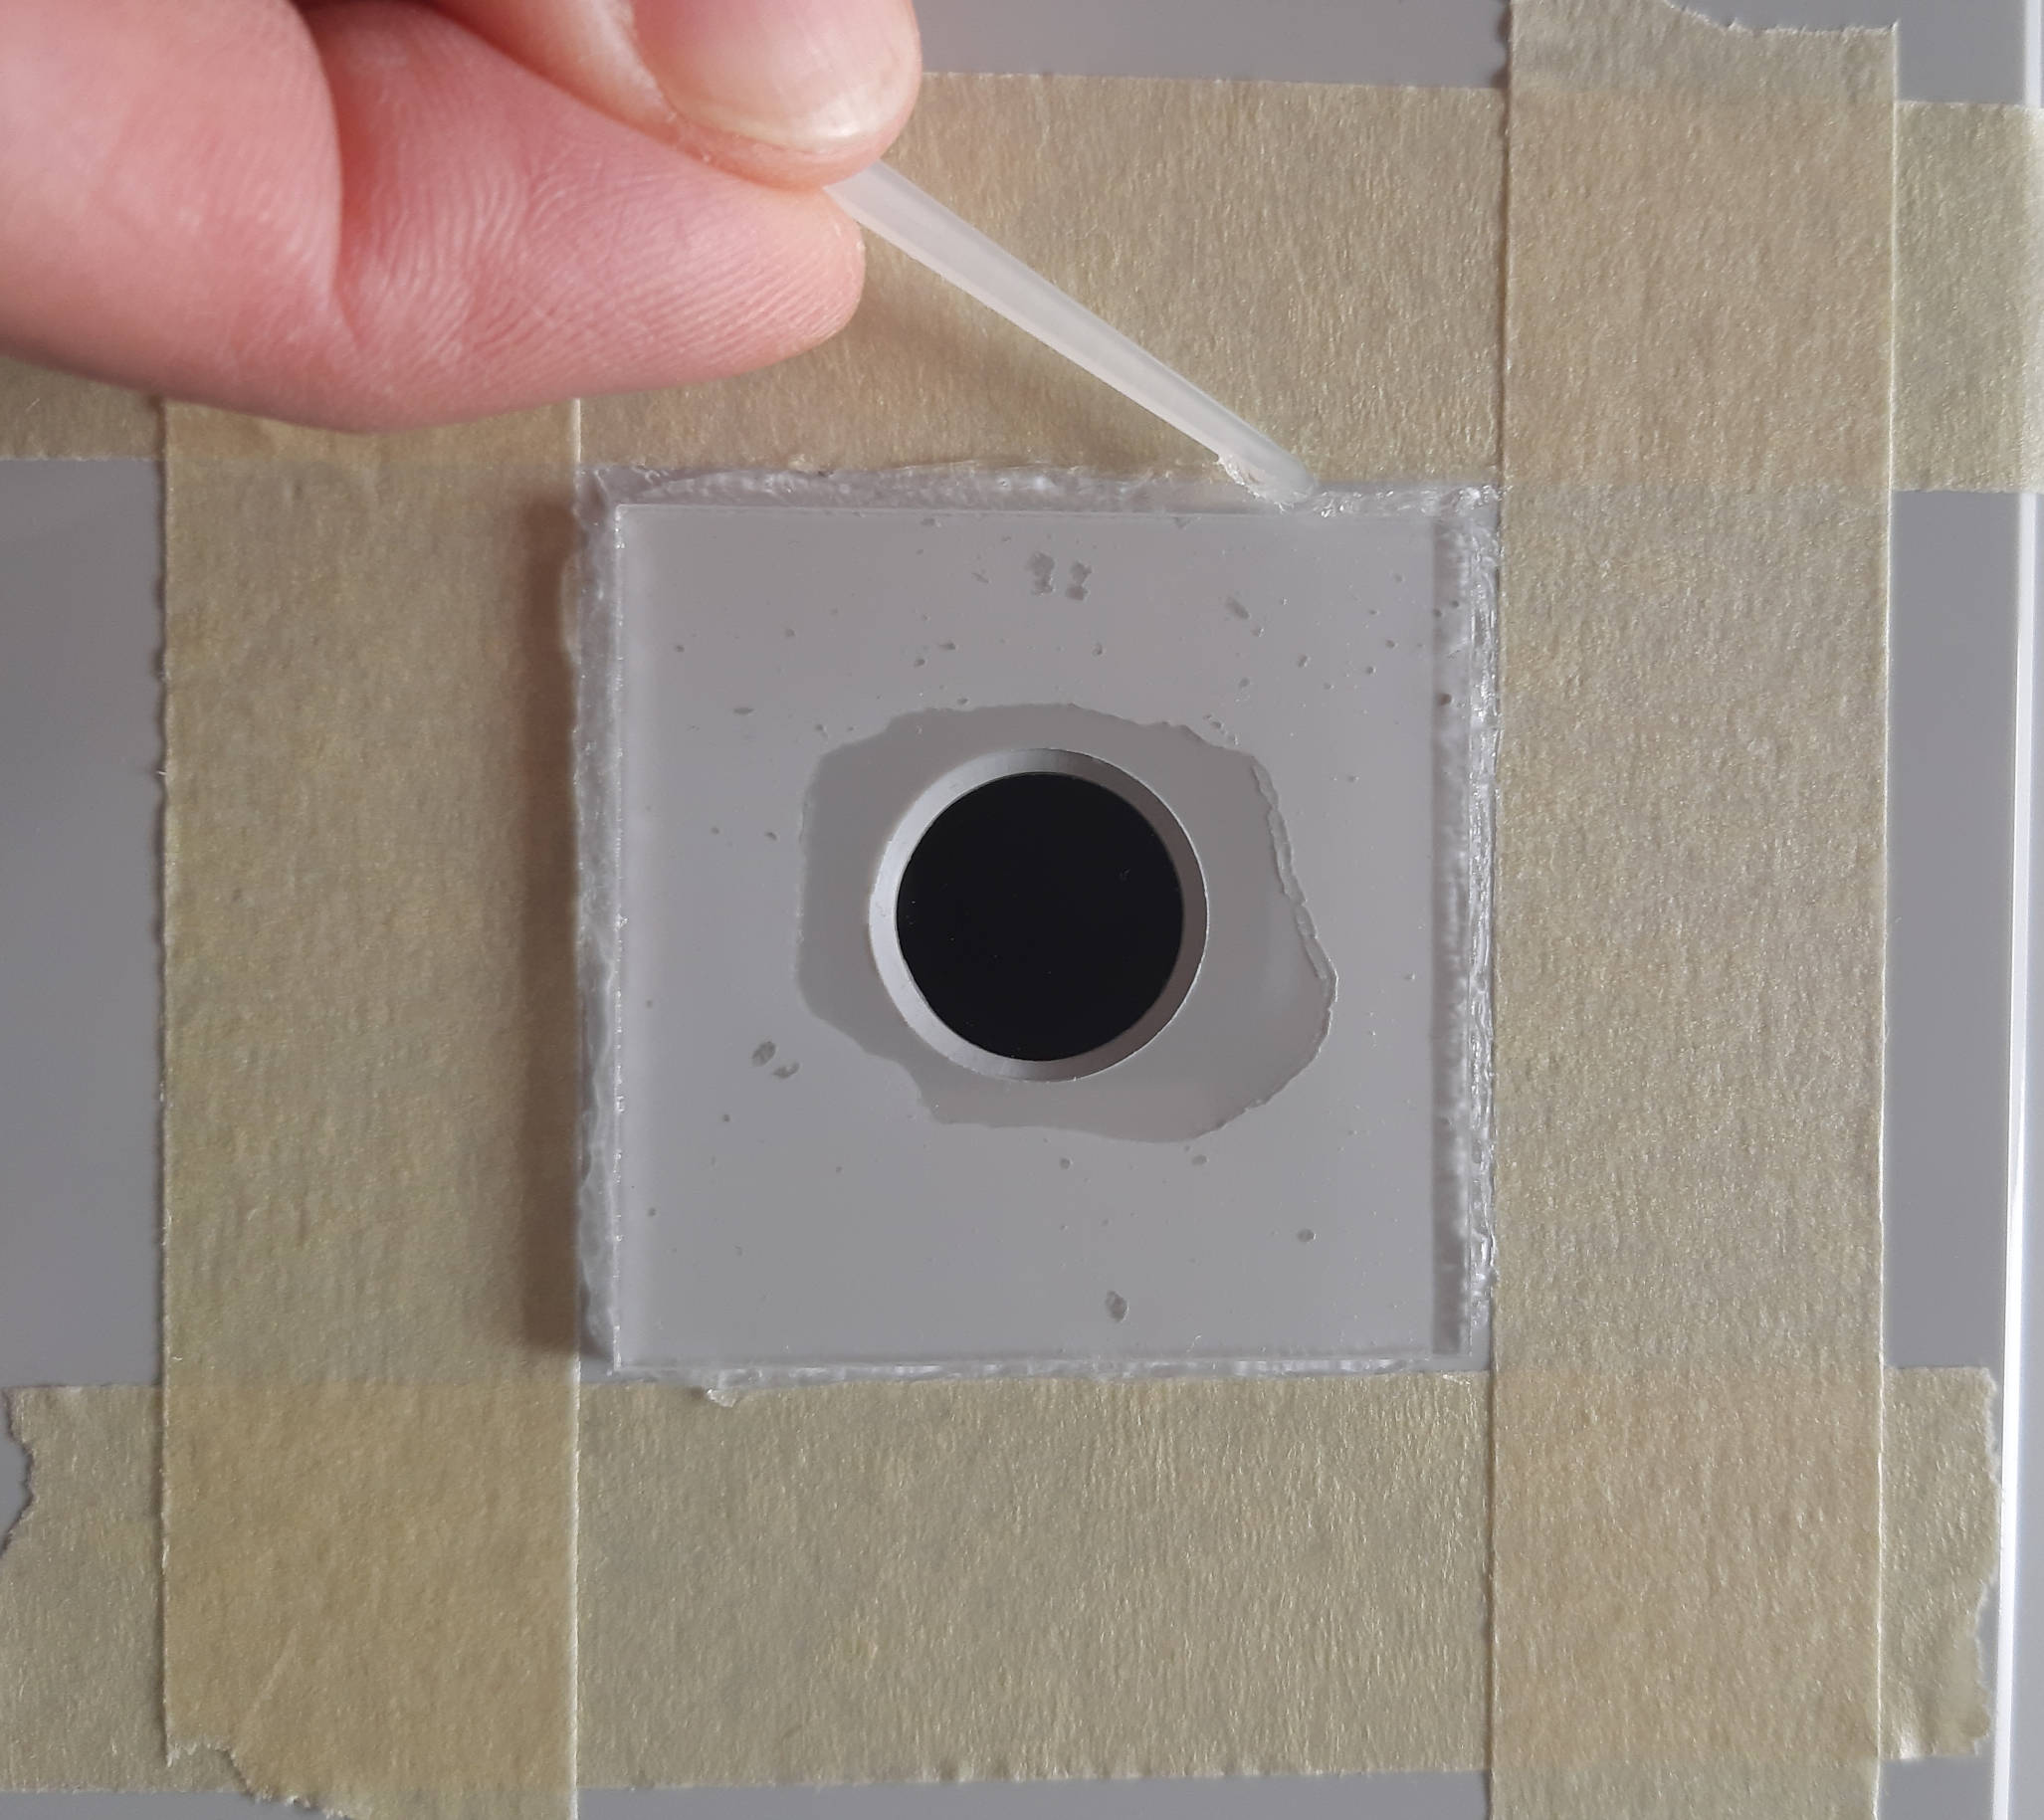
After the glass is attached to the enclosure lid, we can add some sealing glue to the edges and even it out with the spatula. Make sure to put a little bit more glue at the corners of the glass piece.
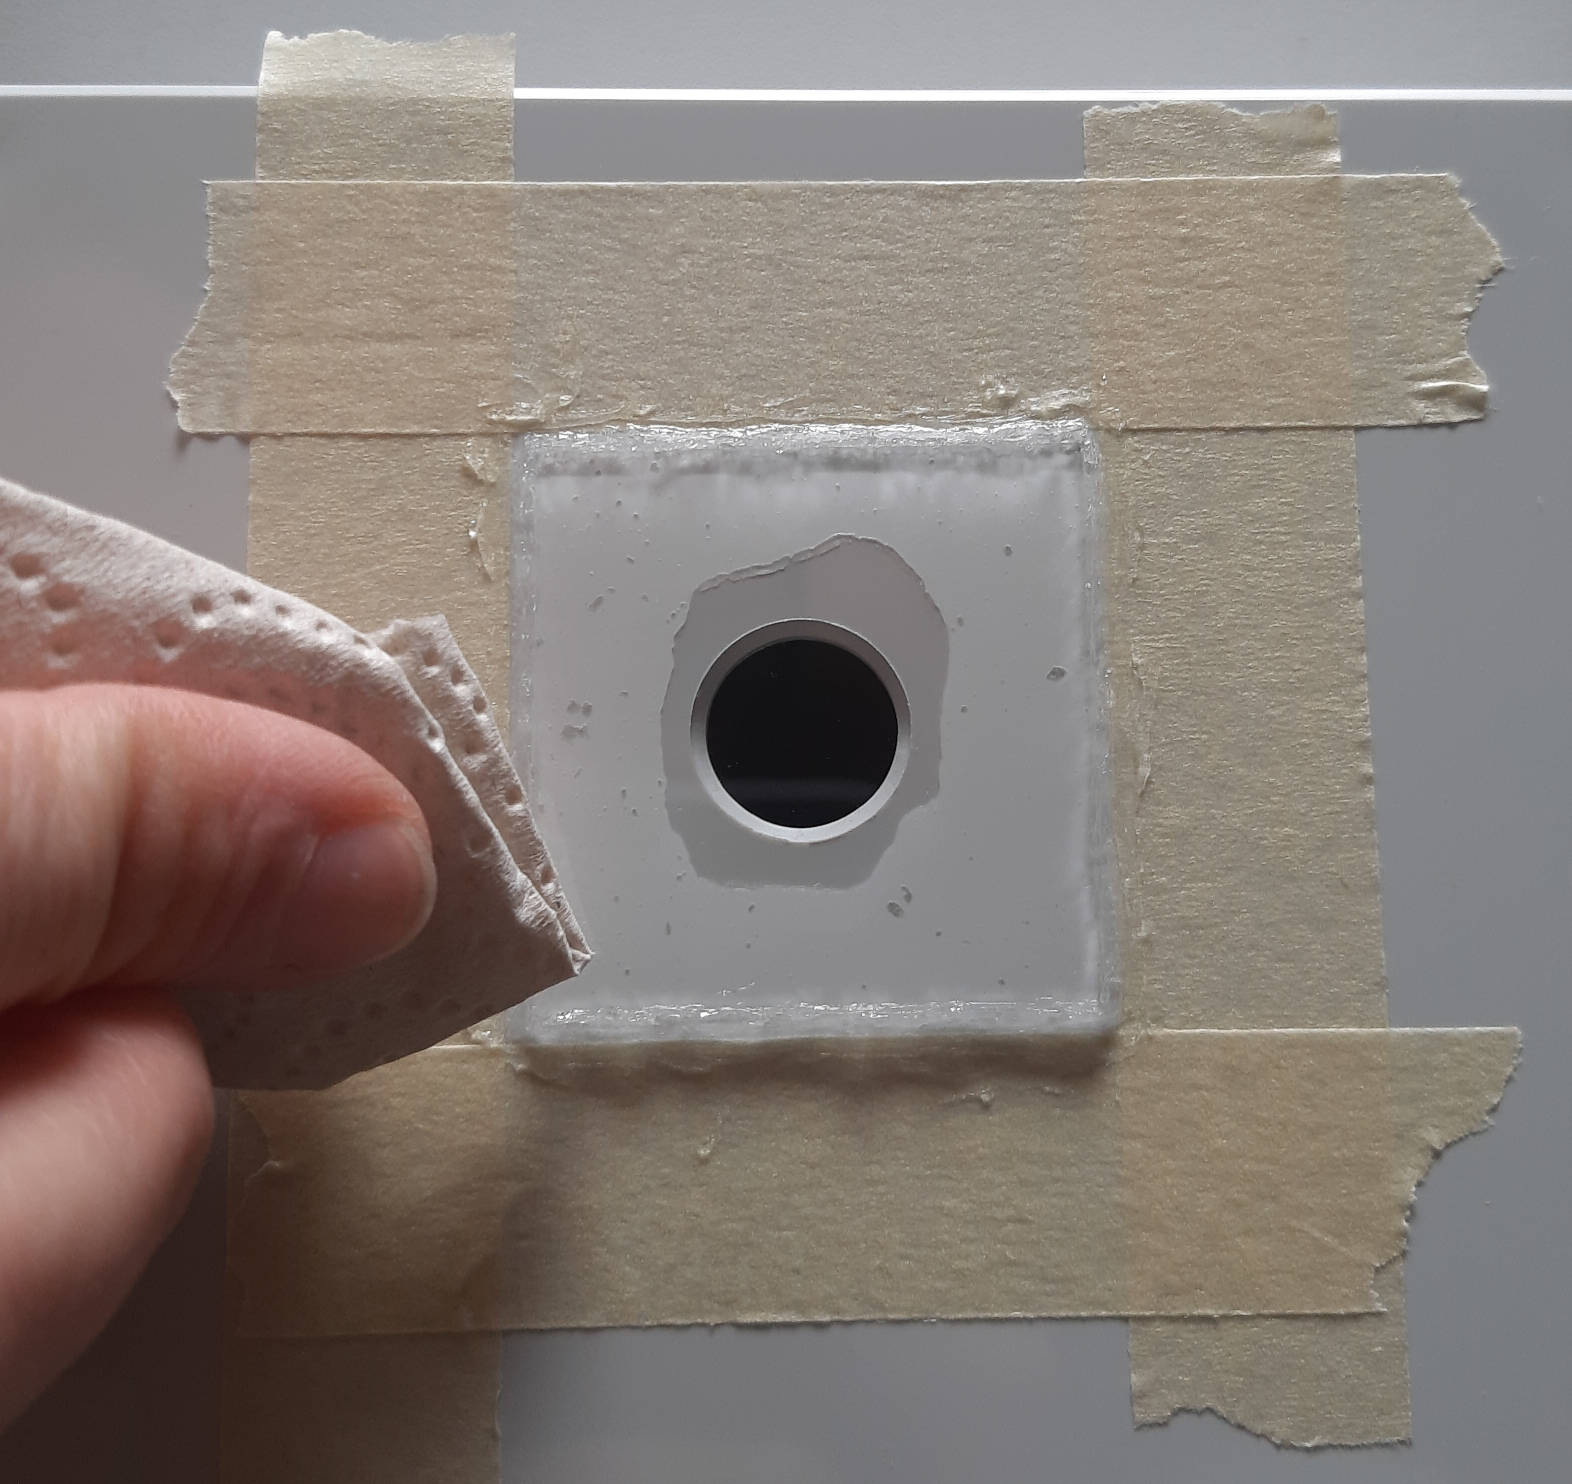
Wipe down excess glue that might have gathered on top of the glass piece.
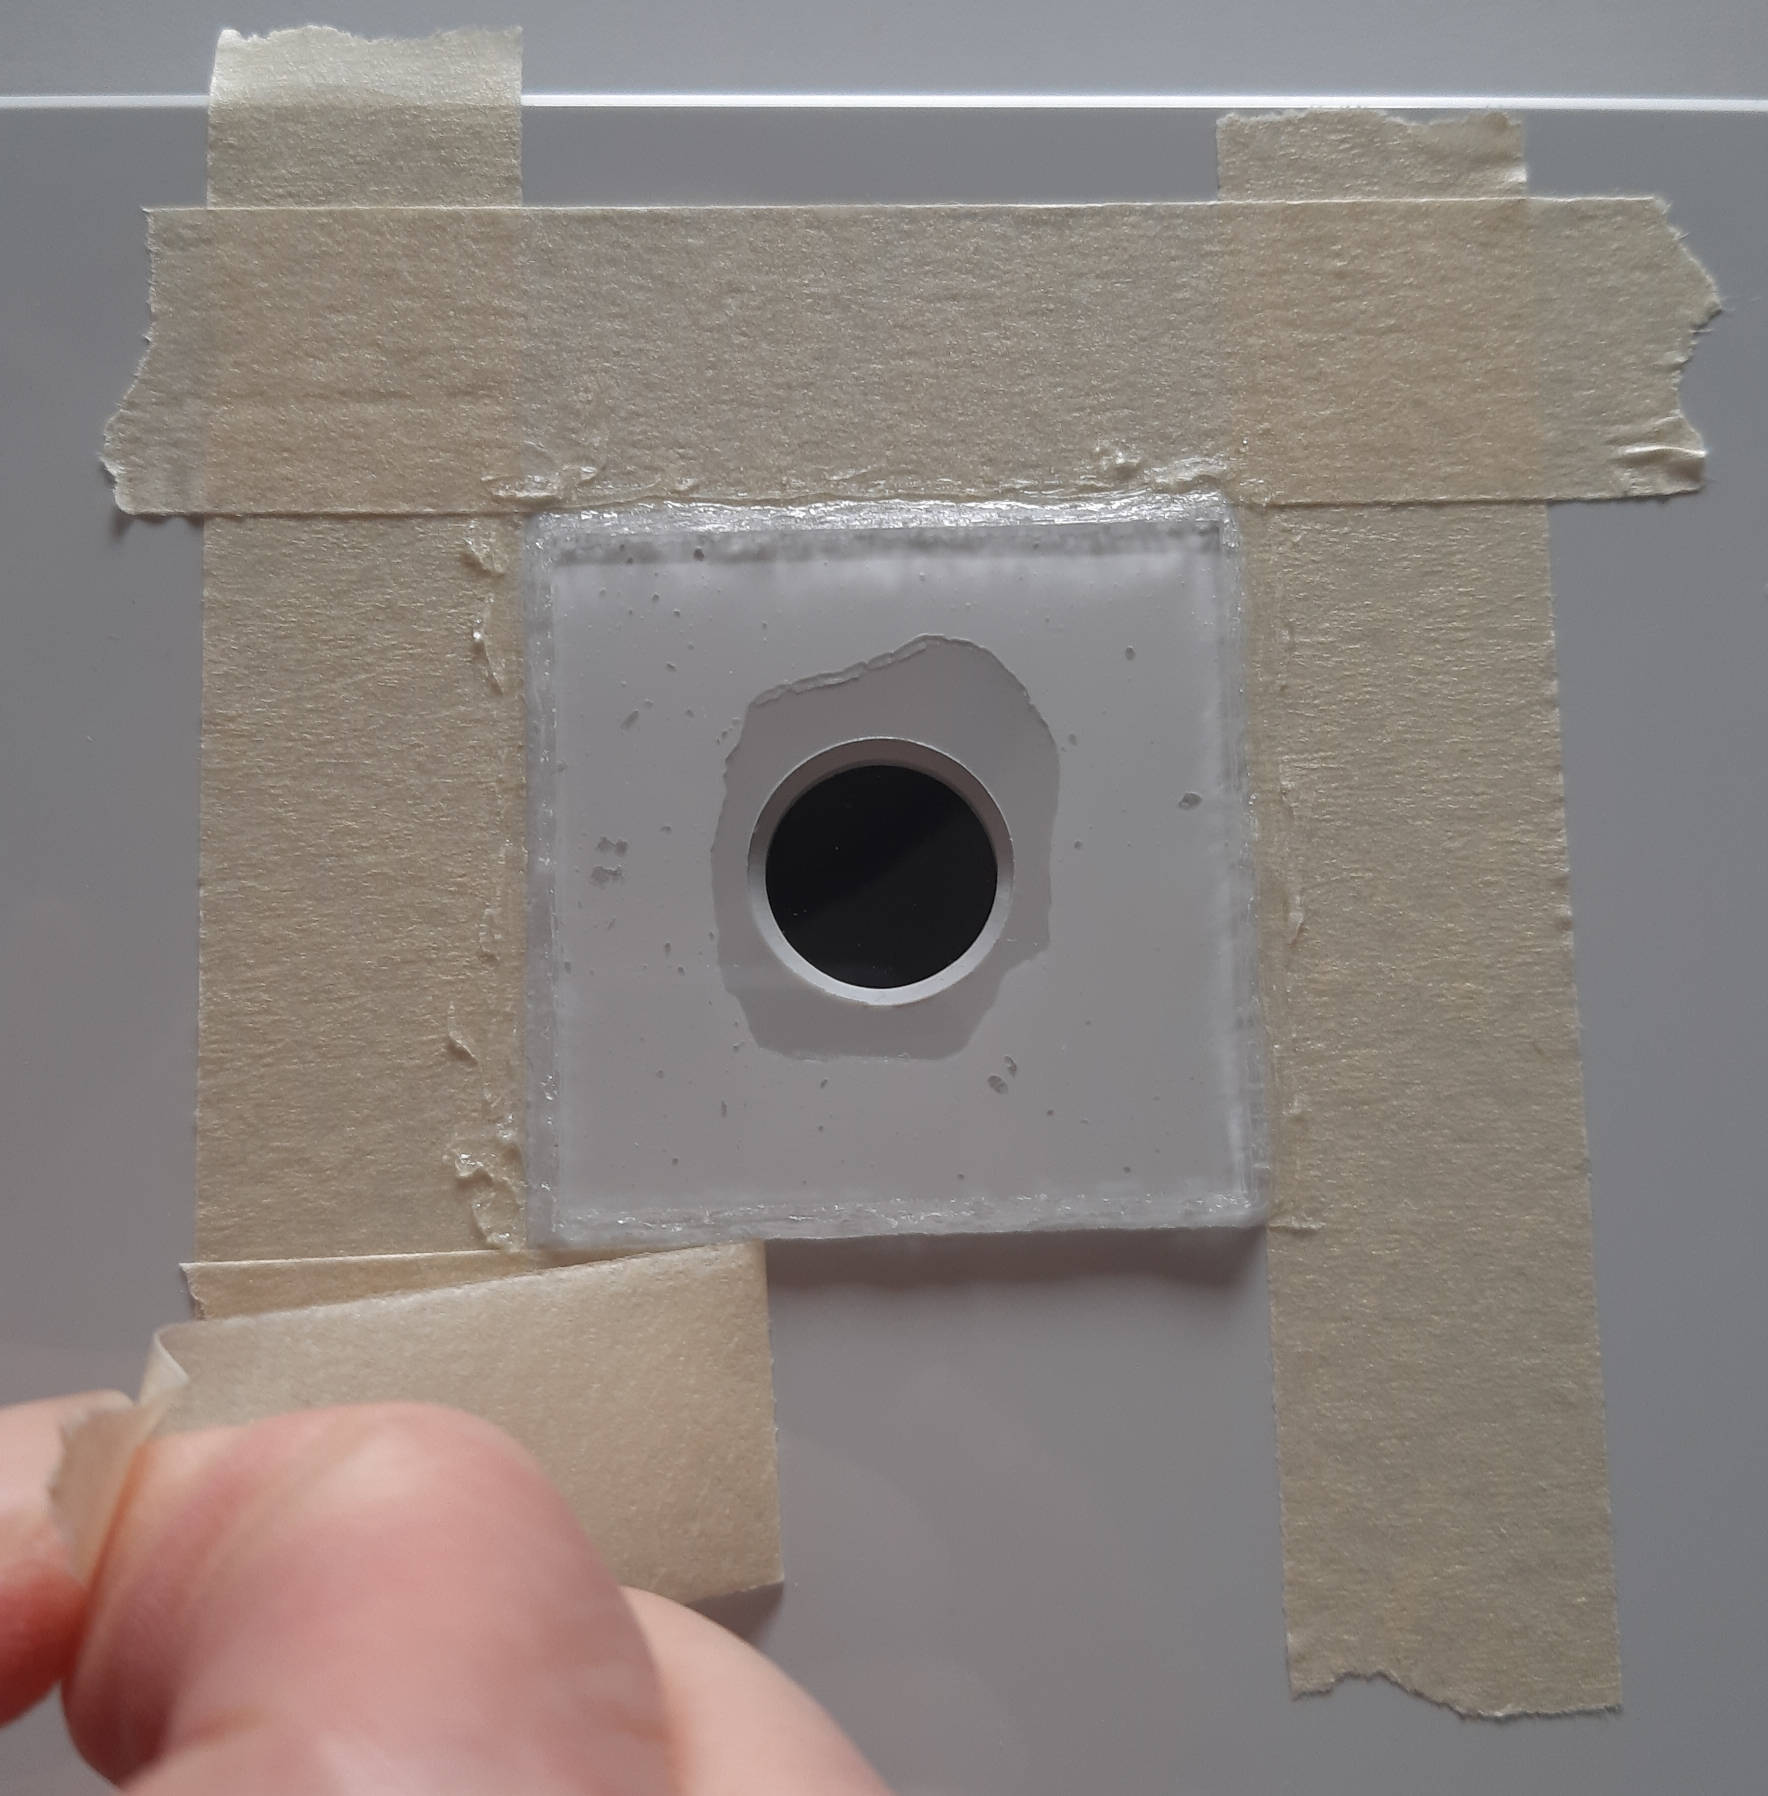
After the acrylic glass piece is properly sealed, slowly remove the crepe tape. Do not wait too long or the glue will harden and will make removing the tape more difficult. Be very careful to not smear the glue while removing the tape.
After you fixed the acrylic glass piece to the top of the lid, let it sit for some time to make sure the glue is hard enough to proceed. Check the instructions of the glue you used for the minimum amount of time required to harden.
Preparing the camera hole: Inside sealing
In the next step, we are going to cut a 30 mm long piece from the 20x5 mm EPDM sealing strip.
Put the sealing strip on a piece of wood or something similar, place the 14 mm Hole Punch in its the center and hit it with the hammer about two to three times.
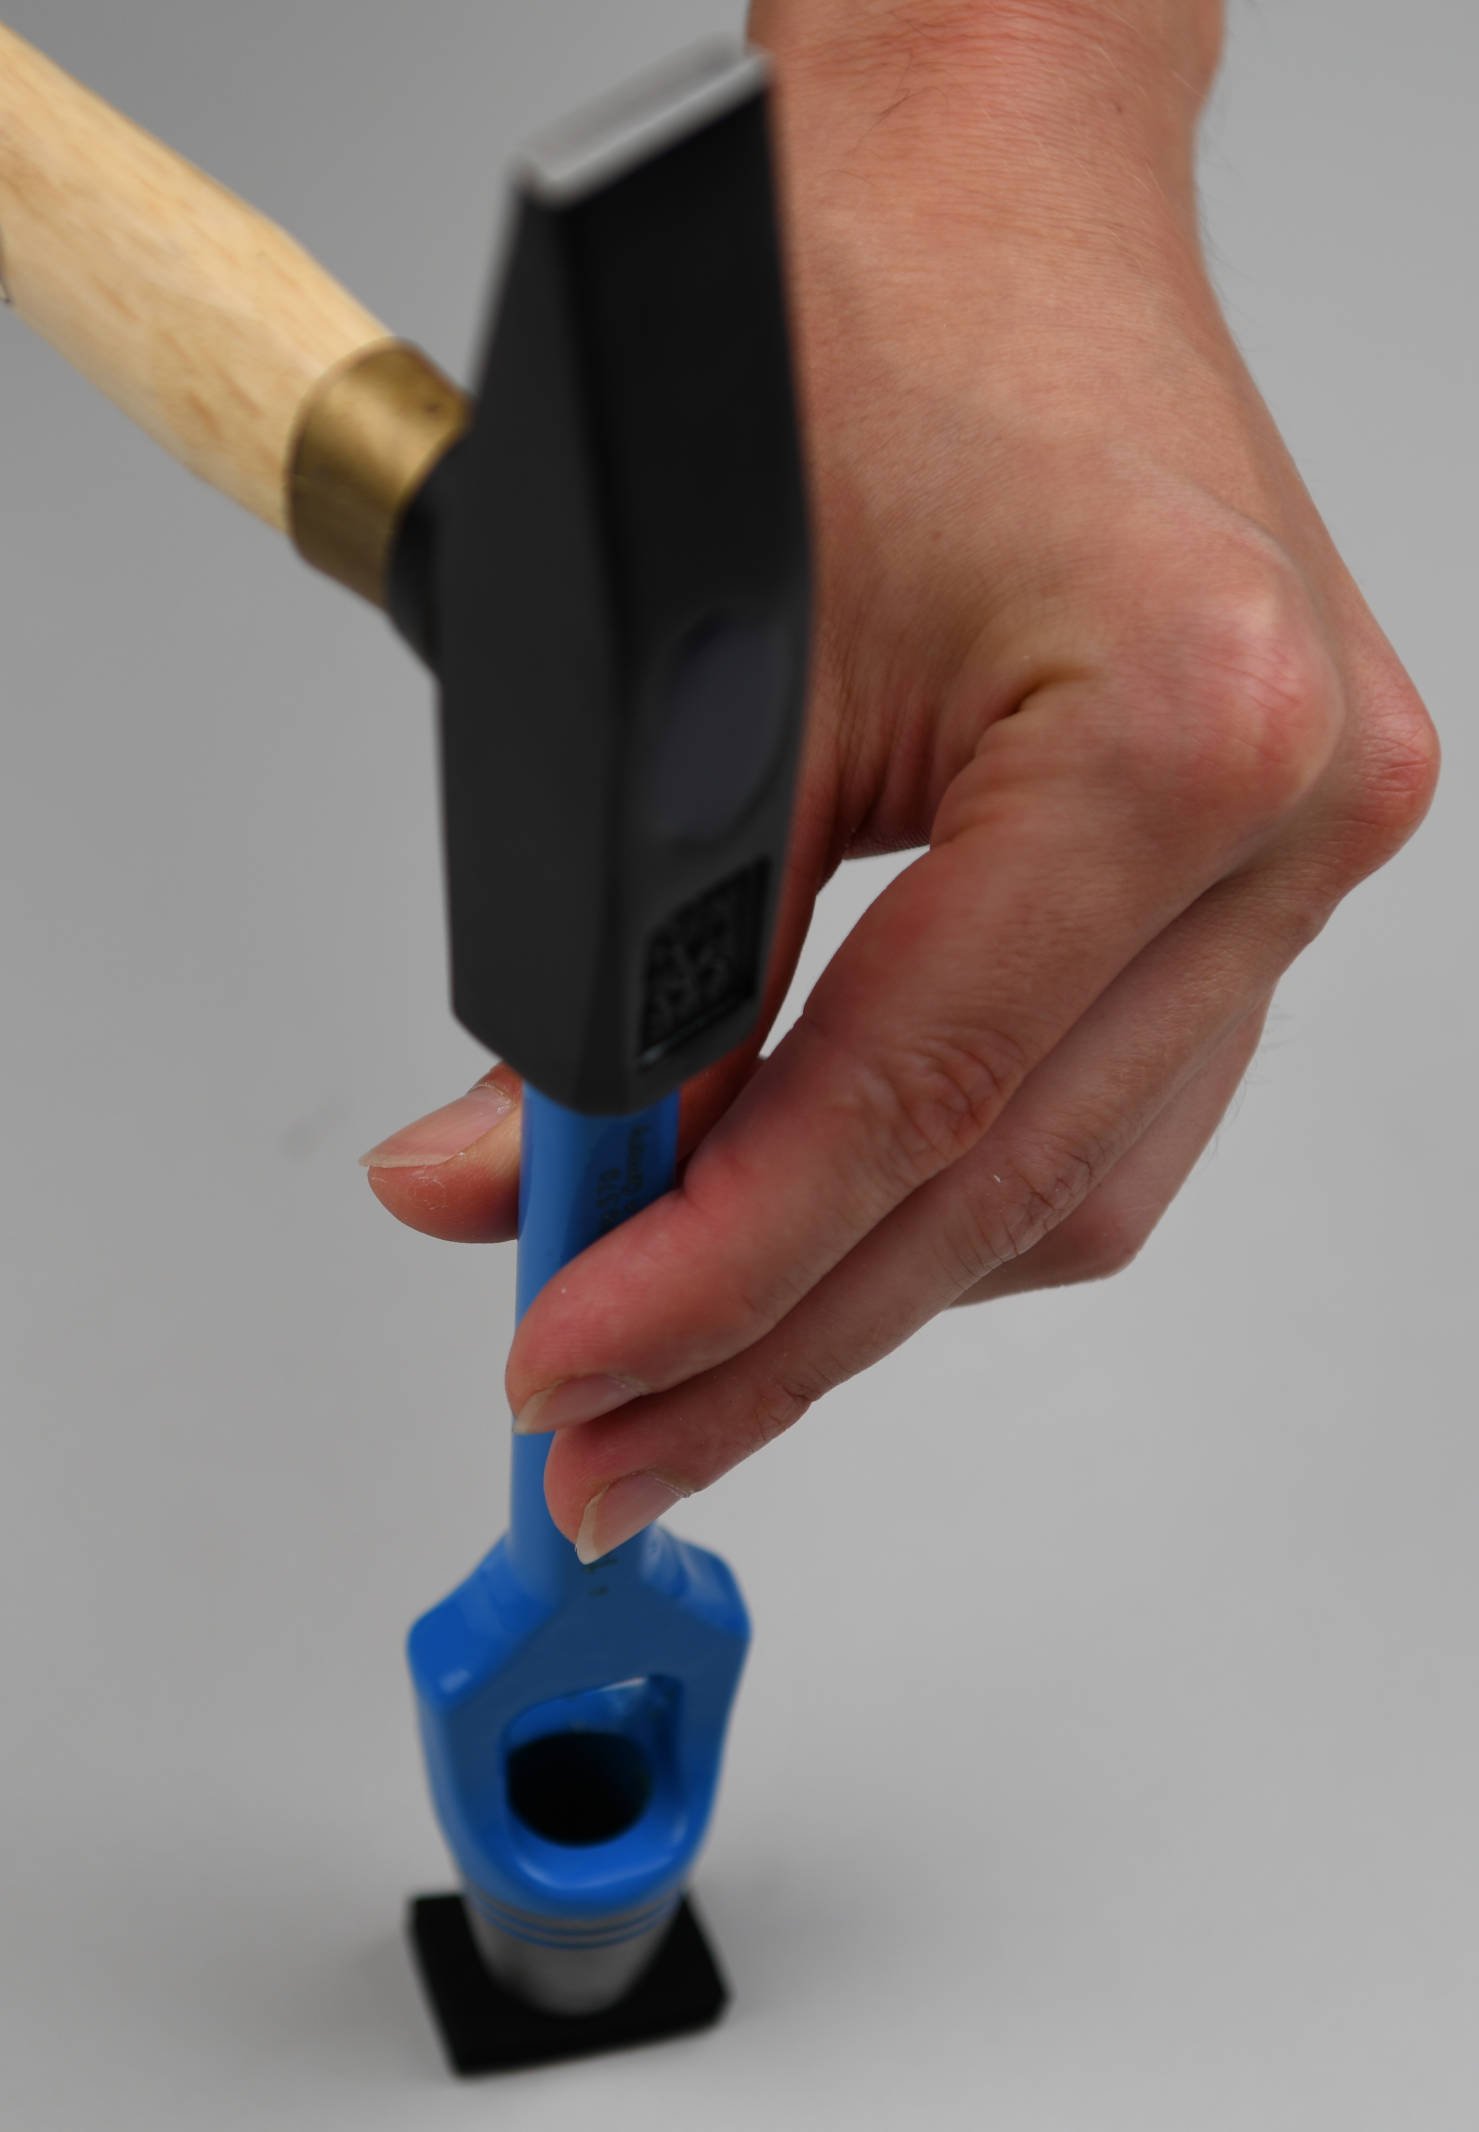
Now that the piece of sealing strip has a 14 mm wide hole in its middle, we can align it with the 14 mm hole we drilled before and attach it to the inside of the enclosure lid.
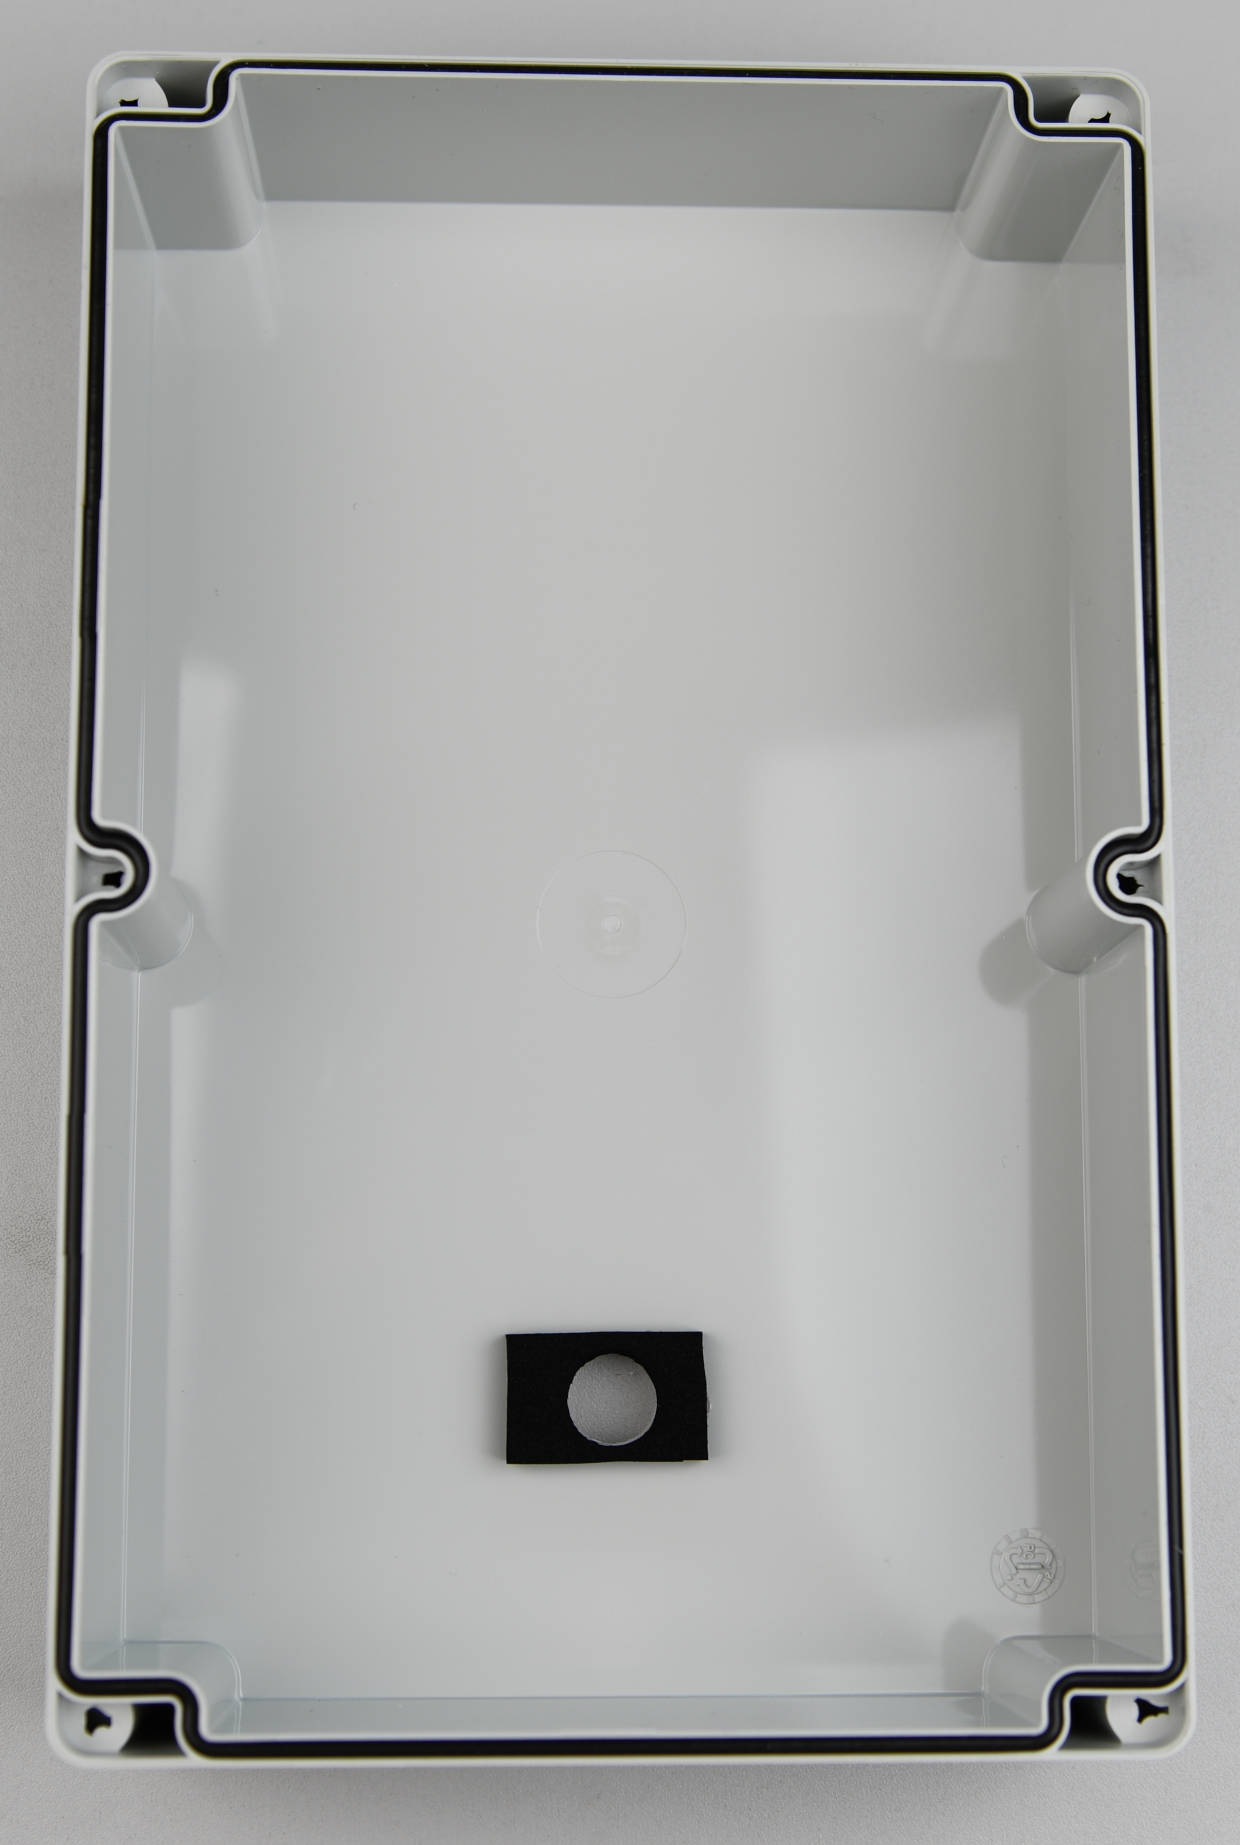
And that's it! Everything is now prepared for the next steps where we will integrate the hardware into the enclosure.